|
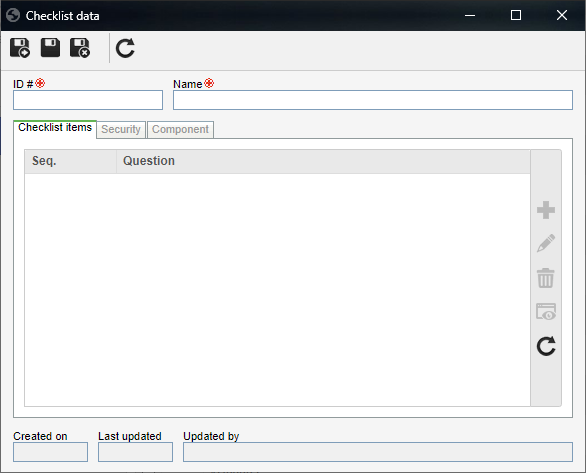
To add a new checklist, click on the  button on the main toolbar. To edit the data of a checklist, select it in the list of records and click on the button on the main toolbar. To edit the data of a checklist, select it in the list of records and click on the  button. button.
On the screen that will be opened, enter an ID # and a name for the checklist. After that, save the record. Thus, the following tabs will be enabled to be filled out:

Use this tab to assemble the checklist question structure. On the side toolbar, the following buttons are available:

|
Click on this button to add a question to the checklist. See further details in the "Adding a question" topic below.
|

|
Click on this button to edit the question selected in the structure.
|

|
Click on this button to delete the question selected in the structure from the checklist.
|
Adding a question
|
To add a question to the checklist, click on the  button on the side toolbar. On the data screen that will be opened, fill out the following fields: button on the side toolbar. On the data screen that will be opened, fill out the following fields:
Question data
|
Question
|
Enter the question that will be added to the checklist.
|
Upper level item
|
Fill out this field for the question to be hierarchically added below another question. In this case, select the desired question. If a question is selected in the checklist structure, this field will be filled out by the system, but it will be possible to edit it.
|
Default answer
|
Fill out this field to define that the question is displayed with a selected answer when answering. In this case, expand the list and select the desired answer.
|
Mandatory to have [Comments] field filled out when
|
Expand the list and check the options that correspond to the answers that, when selected, will make completing the Comments field of the checklist mandatory. Keep the answers to which it will not be required to complete the Comments field unchecked.
For example, If the "No" and "N/A" options are checked, when selecting these options as answers to the question of the checklist, the "Comments" field will have to be filled in compulsory.
|
Sequence
|
Enter the number that corresponds to the order of the question in the checklist structure.
|
Description
|
Enter important information about the question.
|
After that, save the record. Repeat the procedure to add all desired questions.
|
|
On this tab, it is possible to define the security list for the checklist. Enable the desired option:
Private
|
Public
|
Only the users defined in this tab will be able to edit or view the checklist. To do that, use the following columns:
▪Edit: Define which users, teams, departments and/or positions will have permission to edit the checklist. ▪View: Define which users, teams, departments and/or positions will have permission to view the checklist. |
All system users will be able to view the checklist, but only the users defined in the respective column will be able to edit it.
Therefore, the View column will be disabled (since the checklist can be viewed by any user).
In the Edit column, define which users, teams, departments and/or positions will have permission to edit the checklist data.
|
To add a user, team, department, or position to the security list, simply type the desired name in the available field and select the corresponding option in the list that will be displayed or press "Enter" on the keyboard.
To delete a user, team, department, or position from the security list, click on the  button next to the desired record. button next to the desired record.
|
Th user that created the checklist and the system admin will always have permission to access the record, even if they are not added in this tab.
|
|
This tab displays the SE Suite components that use the checklist. When you wish to use the same checklist in several components, the association of checklists from other components may be done through the association of an existing record, available next to the add button in checklist creation, or through the SE Administration component.
|
After setting the necessary configurations, save the record.
|


