|
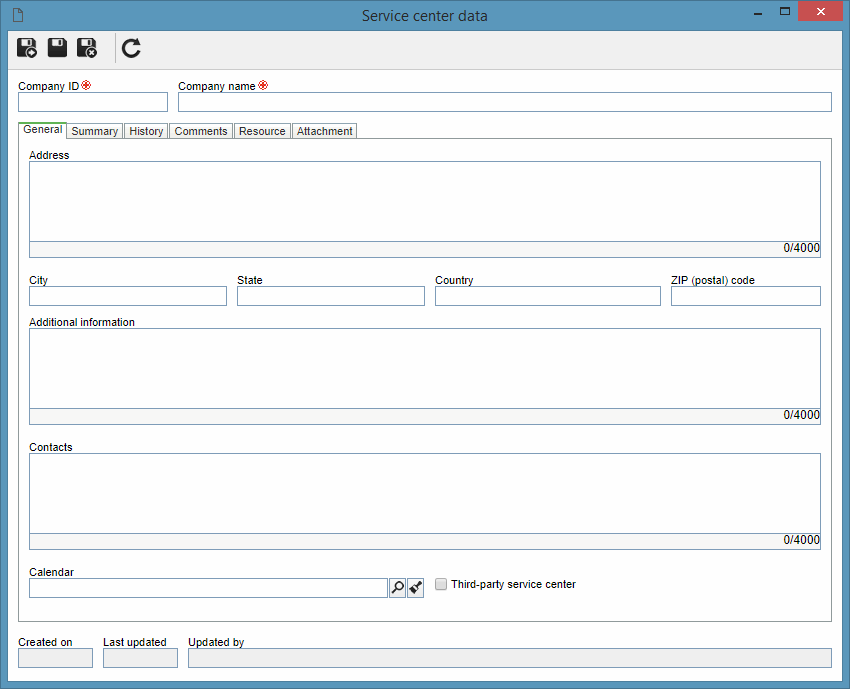
To add a new service center, click on the  button on the main toolbar. To edit the data of a center, select it in the list of records and click on the button on the main toolbar. To edit the data of a center, select it in the list of records and click on the  button. button.
On the screen that will be opened, enter the company ID and the company name of the service center. Fill out the desired fields in the following tabs:

Note: The Resource tab will only be available for completion after saving the record for the first time.
Field
|
|
Address
|
Fill out this field to record the service center address.
|
City
|
Fill out this field to record the city in which the service center is located.
|
State
|
Fill out this field to record the state in which the service center is located.
|
Country
|
Fill out this field to record the country in which the service center is located.
|
ZIP (postal) code
|
Fill out this field to record the service center postal code.
|
Additional information
|
Use this field to record important information about the service center.
|
Contacts
|
Use this field to record the people in contact with the service center.
|
Calendar
|
Fill out this field to preset the calendar that will be used to control the service center calibrations and/or maintenances.
Refer to the SE Administration component specific documentation for more information about adding and configuring calendars.
|
Option
|
Checked
|
Unchecked
|
Third-party service center
|
Indicates that the service center does not belong to the organization.
|
Indicates that the service center belongs to the organization.
|
|
Use this tab to summarize the service center.
|
Use this tab to enter the history of the service center.
|
Use this field to record general comments about the service center.
|
Use this tab to manage the technicians of the service center. The buttons displayed in the side toolbar will vary if the service center is:

|
Click on this button to add a new technician to the service center. On the screen that will be displayed, locate and select the desired resource. For internal service centers, SE Suite users will be available for selection, which when they are recorded, the system will automatically define them as resources. Once done, save your selection.
|

|
Click on this button to view the data of the resource (technician) selected in the list of records.
|

|
Click on this button to enable or disable the resource for the service center. Note that when you disable a resource, it will only be inactive for the service center where it was disabled. To disable a resource in all service centers, it is necessary to disable its record through the resource record menu.
|

|
Click on this button to make the resource selected in the list of records responsible for the service center in question. To remove responsibility for the service center, simply select the resource defined as responsible and click on this button.
|

|
Click on this button to delete the resource selected in the list of records from the service center.
|
|

|
Click on the arrow located next to this button and select the desired option:
▪New: Allows creating a new resource and associating it as a technician for the service center. The created resource will be of the "Generic" type. See more details on the screen that will be opened in the Creating a resource section. ▪Associate: Allows associating an already created asset as a technician of the service center. On the screen that will be displayed, locate and select the desired resource. Third-party service centers will list "generic" resources. Once done, save your selection. |

|
Allows editing the data of the resource selected in the list of records. See more details on the screen that will be opened in the Editing a resource section.
|

|
Allows enabling or disabling the service center resource. Note that when you disable a resource, it will only be inactive for the service center where it was disabled. To disable a resource in all service centers, it is necessary to disable its record through the resource record menu.
|

|
Allows making the resource selected in the list of records responsible for the service center in question. To remove responsibility for the service center, simply select the resource defined as responsible and click on this button.
|

|
Allows deleting the resource selected in the list of records from the service center.
|
|
|
In this tab, it will be possible to add, delete, download and view the attachments related to the service center. For further details on how to add attachments to the record, see the Adding attachments section.
|
After performing the desired configurations, save the record.
|


