Task:
|
Expired process
|
Who is notified:
|
Users who have permission to edit or revise enabled in the permission profile of the process type.
|
When:
|
When the default time set in the validity configuration, associated with the type of the pending process expires.
|
Purpose:
|
Allow the responsible parties to revise or revalidate the pending process.
|
How to execute this task:
1.
|
Select the desired process from the list of pending records.
|
2.
|
On the toolbar, click on the  button and select the desired option: button and select the desired option:
▪Add new revalidation: Select this option to create a revalidation of the process. The steps of this operation will be described in the following steps. ▪Add new revision: Select this option to create a revision of the process. Remember that this option will only be enabled if the type of the process has the ISO9000 or Workflow revision control configured. Refer to the Creating a process revision section to obtain further details on how to revise the process.
Specific buttons:

|
Click on this button to view the flowchart of the data of the process in question.
|

|
Click on this button to delete the selected pending process. Remember that, to perform this operation, it is necessary to have the Delete permission enabled in the permission profile of the type.
|

|
Click on this button to disable the selected process.
|
|
3.
|
After selecting the Add new revalidation option, fill out the following fields on the screen that will be displayed:
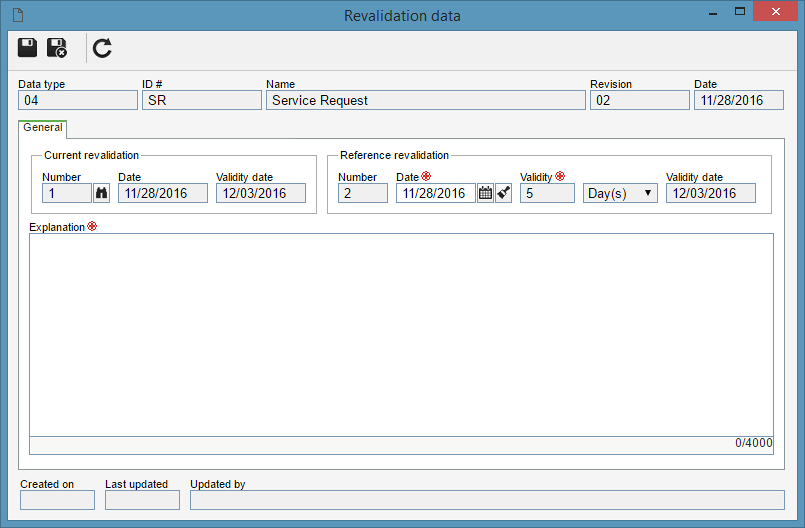
Reference revalidation: Enter the date regarding the revalidation being created. The "Date" field will be filled out by the system with the current date. If the "Enable revalidation date to be changed" option is not checked in the validity configuration associated with the process type, it will not be possible to change the date during the execution of this task. Otherwise, it will be possible to edit the date, allowing a retroactive revalidation.
Explanation: Enter an explanation for the revalidation of the process in question.
|
4.
|
Save the record. If the approval step is not parameterized in the validity configuration, the revalidation will be closed. Otherwise, do not close the data screen, because the Approval tab will be displayed.
|
5.
|
In the Approval tab, it is not possible to define the parties responsible for approving the revalidation in question. To do that, fill out the following fields:
Responsibility route: Select, among those saved in the system, the responsibility route for the navigation in question. If needed, use the buttons located next to the field to create a new responsibility route or clear the value filled in the field, respectively.
Wait for all members approval: Check this option for the revalidation approval to be released only after all route members approve their tasks.
Approval type: Define whether the approval will be:
▪Incremental: The revalidation may be approved/rejected by any member of the responsibility route. ▪Circular: The revalidation must go through all the members of the responsibility route and only the last member in the sequence may approve/reject it.
It is important to point out that the fields on this screen will only be available for editing if, in the Approval tab of the validity configuration, it is NOT set that the route type will be 'Fixed & unique'. If the 'Fixed & unique' route type is set, its fields will be automatically filled out by the system and may not be edited.
|
|
6.
|
If in the validity configuration, the Variable approval route is set in the toolbar, the following buttons will be enabled on the Approval tab, located next to the list of records:

|
Click on this button to add a new member to the responsibility route. Refer to the Configuring a responsibility route section to obtain a detailed description on how to add a new member. It is important to point out that, if the member is being added to a route associated with the revalidation, this addition will only be valid for the process revalidation. It will not be replicated to the route record created through the Configuration  Responsibility route menu. Responsibility route menu.
|

|
Click on this button to edit the data of a member. Select the desired record before clicking on the button.
|
|
Click on this button to delete a member from the responsibility route. Select the desired record before clicking on the button.
|
|
7.
|
After filling out all the necessary fields, click on the  button. At this point, the system will ask about sending the revalidation to approval. Confirm so that the revalidation can be sent to approval by the responsible parties. button. At this point, the system will ask about sending the revalidation to approval. Confirm so that the revalidation can be sent to approval by the responsible parties.
|
|