|
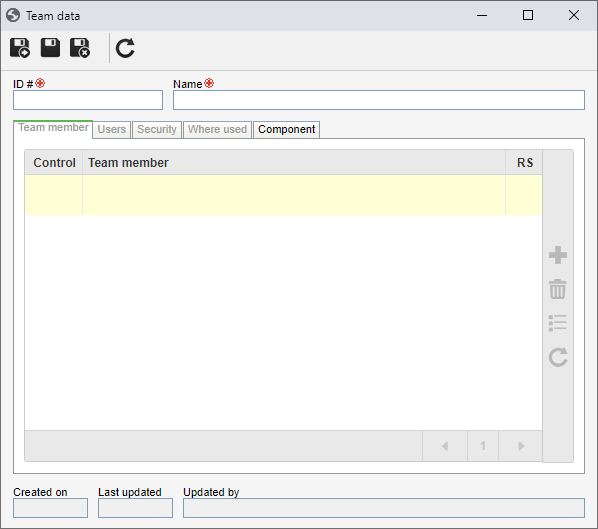
To add a new team, click on the  button on the main screen toolbar. To edit the data of a team, select it in the list of records and click on the button on the main screen toolbar. To edit the data of a team, select it in the list of records and click on the  button. button.
On the screen that will be opened, enter an ID # and a name for the team.

Save the record. At this point, the following tabs will be available to be configured:
Use this tab to define who will be part of the team. To add a member to the team, click on the  button on the side toolbar. On the screen that will be opened, perform the following steps: button on the side toolbar. On the screen that will be opened, perform the following steps:
1.In the Control field, select the desired option: ▪Organizational unit: Users in a particular organizational unit or department will be part of the team. ▪Position: Users who perform a certain position in the organization will be part of the team. ▪Department/Position: Users of a defined department of the organization who hold a specific position will be part of the team. ▪User: A specific user will be part of the team.
2.According to the selected access type, the Search filters will be enabled to be filled out. Use them to make it easier to search for users in the security list.
3.If the selected control is Organizational unit, the hierarchy of business units and the departments belonging to them (if any) will be displayed. Check the business units and/or desired departments. By checking the "Consider sublevels" option at the bottom of the screen, the system will also consider the organizational units that are down in the hierarchy of the selected organizational unit. Notice that by checking this option, if new organizational subunits are subsequently added (whether they are business units or departments), they will be automatically incorporated into the team. Next, to the hierarchy, the system also makes available buttons that allow you to check all the sub-levels of a particular organizational unit or uncheck all sub-levels. Notice that by using the "Check all sub-levels" button, if new organizational sub-levels are added later, they will not be incorporated into the team.
4.After entering the fields above, click on the  toolbar button on the selection screen. Based on the control selected and the values entered in the search fields, the result will be displayed in the list of records on the lower part of the screen. Select the ones that will compose the team. Hold the SHIFT or CTRL keys down or check next to each item to select more than one record at a time. toolbar button on the selection screen. Based on the control selected and the values entered in the search fields, the result will be displayed in the list of records on the lower part of the screen. Select the ones that will compose the team. Hold the SHIFT or CTRL keys down or check next to each item to select more than one record at a time.
5.After setting the necessary configurations, save the selection. Repeat the steps above to add all desired members to the team.
Use the  button on the side toolbar to disassociate the organizational unit, position, department+position and/or user selected in the list of records of the team. button on the side toolbar to disassociate the organizational unit, position, department+position and/or user selected in the list of records of the team.
|
|
This tab lists the users of the organizational unit, position and department+position and the specific users that are members of this team.
|
On this tab, it is possible to define the security list for the team. Enable the desired option:
Private
|
Public
|
If this option is enabled, only the users defined in this tab will be able to edit or view the team. To do that, use the following columns:
▪Edit: Define which users, teams, departments and/or positions will have permission to edit the team. ▪View: Define which users, teams, departments and/or positions will have permission to view the team. |
If this option is enabled, all system users will be able to view the team, but only the users defined in the respective column will be able to edit it.
Therefore, the View column will be disabled (since the team can be viewed by any user).
In the Edit column, define which users, teams, departments and/or positions will have permission to edit the team data.
|
To add a user, team, department, or position to the security list, simply type the desired name in the available field and select the corresponding option in the list that will be displayed or press "Enter" on the keyboard.
To delete a user, team, department, or position from the security list, click on the  button next to the desired record. button next to the desired record.
|
The user who created the team and the system admin will always have permission to access the record, even if they are not added in this tab.
|
|
This tab displays the records with which the team is associated. To do that, the system displays the components and the record number of each component that is associated with the team in question. When clicking on a component, all the record types that use it, are listed. When clicking on a record type, the system displays a listing with the records data that contain the team.
|
In this tab, the SE Suite components that use the team are displayed. When you wish to use the same team in several components, the association of teams from other components may be done through the association of an existing record, available next to the add button in team creation, or through the SE Administration component.
|
After performing all desired configurations, save the record.
|


