|
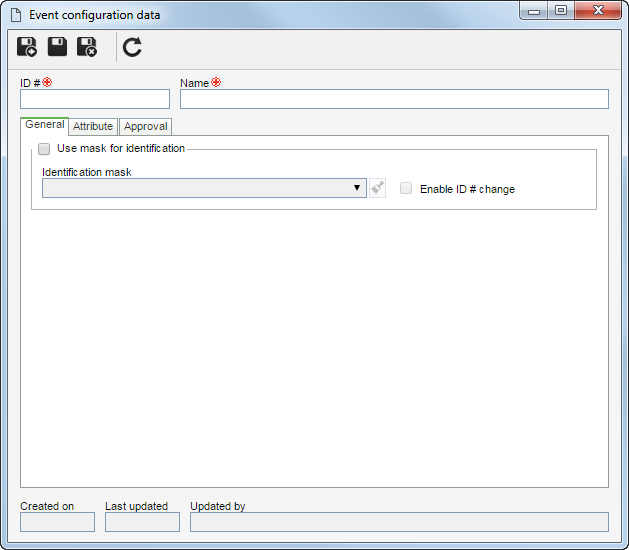
To configure a new event, click on the  button on the main screen toolbar. To edit the data of an event, select it in the list of records and click on the button on the main screen toolbar. To edit the data of an event, select it in the list of records and click on the  button. button.
On the screen that will be opened, enter an ID # and a name for the event:

After saving the record for the first time, the following tabs will be available:
Field
|
Use mask for identification
|
Check this option to use the automatic identification feature when performing an event in a storeroom with this configuration associated. Fill in the following fields:
Identification mask: Select the desired identification mask. Note that only identification masks configured with an Event object will be available for selection.
Enable ID # change: Check this option to allow editing the identifier generated when performing an event. If this option is not checked, the generated identifier may not be edited.
|
|
Use this tab to associate the attributes that complement the information of this event configuration.

|
Click on this button to add a new attribute and associate it with the record. See how to perform this operation in the Configuring an attribute section.
|

|
Click on this button to associate an attribute that was previously created in the system with the record. Refer to the Adding attributes section for further details on how to perform this operation.
|

|
Click on this button to save the association of attributes with the record.
|

|
Click on this button to disassociate the attribute selected in the list of records from the record.
|
If the attribute configurations are edited (e.g.: an attribute checked as required becomes non-required or vice versa), they will be replicated to the revenues of this type when their data is edited.
|
|
In the Approval tab, it is possible to configure which storeroom events will have approval and who will be responsible for them. The fields below are valid for the "Input event", "Output event", "Balance adjustment", and "Processing" sections.
Field
|
Approval step?
|
Check this field to determine the event types that must go through approval. Then select the route type that will be used:
▪Variable: Allows the responsibility route to be selected/edited during the event, furthermore, allowing the editing of its members. ▪Fixed: Allows the route to be selected/edited during the event, however, it will not be possible to edit its members. ▪Fixed & unique: A default approval route will be established for ALL events of this type (input, output, balance adjustment, or processing) that are performed in the storeroom that has this configuration, that is, the route selected in the respective field may not be changed (nor its members) during the event. |
Responsibility route
|
Select the responsibility route for the approval. Use the buttons placed on the side of the field if necessary, to create a new responsibility route, edit the data of the selected route or clear the filled out value, respectively. The filling in of this field is mandatory if the route type is "Fixed & unique". If another route type option is selected and this field is filled in, during the event, the system will use the entered responsibility route, however, it will be possible to edit it. Note that only the approval responsibility routes will be available for selection.
|
|
After filling in all the necessary fields, save the record.
|


