|
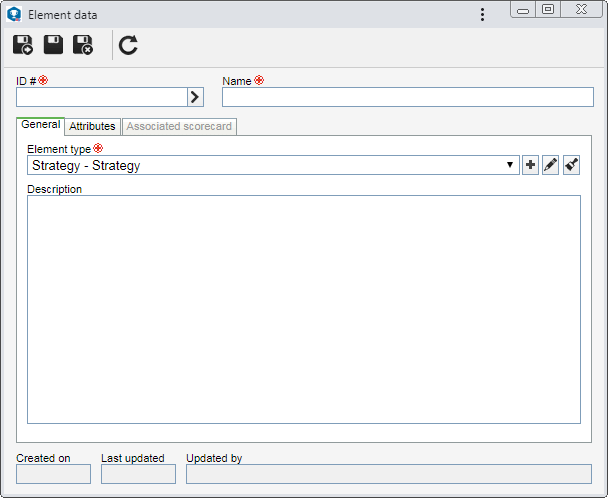
To add a new element, click on the  button on the main screen toolbar. On the screen that will be displayed, select the type that will classify the element and save the selection. button on the main screen toolbar. On the screen that will be displayed, select the type that will classify the element and save the selection.
To edit the data of an element, select it in the list of records and click on the  button. button.
The following fields and tabs are available in the element data screen:

Field
|
ID #
|
Enter a number or code to identify the element or use the arrow next to this field to generate an automatic ID #. If the use of an identification mask was configured in the type, at the moment of generating the automatic ID #, the respective mask will be shown.
The ID # generated through the mask can only be edited if the "Enable ID # change" option is checked on the data screen of the element type.
|
Name
|
Enter a name for the element.
|
Field
|
Element type
|
Displays the type selected during the addition of the element, although it is possible to edit it. In that case, select the type that will classify the element in question. Use the other buttons to add a new type to sort the element and clear the field.
|
Description
|
Fill out this field to specify the element being created.
|
|
This tab will only be displayed if at least one attribute is associated in the Attribute tab on the element type data screen. In that case, enter the values of the displayed attributes. Attributes that are required must necessarily be filled out. The way to enter an attribute varies according to the configurations established when creating it.
|
This tab will only be enabled when the element is associated with a scorecard. In it, it will be listed the scorecards that have the element in question associated with its structure. Click on the name of the listed scorecard to view its data. The elements that have association can be identified by the "A" (Associated?) column, in the main screen list of records.
|
After filling out the necessary fields, save the record.
|


