Task:
|
Activity execution
|
Who receives it:
|
User(s) defined as executor(s) of the activity during the modeling of the process (SE Process) that automates the incident.
|
When:
|
Following the process flow, the time comes for the activity to be executed.
|
Purpose:
|
To alert the responsible parties that there are activities to be executed.
|
Users who have access to the "Basic" license can also perform the tasks. However, only the activities of the instances that the executors themselves started are allowed. All other tasks are allowed only by accessing with a "Staff" or "Manager" license.
|
Specific buttons:

|
Click on this button to open the incident activity data in execution mode. If the selected activity is defined for a group (functional role, area or department/position), then the system will ask if you wish to associate the activity with your user. If the question is confirmed, the activity will be associated with you and the activity data will be displayed in execution mode; otherwise, the activity will continue to be associated with the group and the activity data will be displayed in the search mode.
|

|
Click on this button to view the incident data.
|

|
Click on this button to view the flowchart of the incident instance.
|

|
Click on this button to associate the execution of an activity with the authenticated user, that is, the activity stops being the responsibility of a group (functional role, department/role, department or department/position) and starts being under the exclusive responsibility of the user who took it. This button will only be enabled if the activity executor is not a User.
|

|
Click on this button to disassociate the execution of an activity from the authenticated user, that is, it stops being under exclusive responsibility and starts being the responsibility of a group (functional role, department/role, department or department/position), allowing any user who belongs to it to execute it. This button will only be enabled if the executor of the activity is a User.
|
How to execute this task:
1.
|
In the pending records list, select the incident activity that will be executed. If necessary, use the Search filters panel to locate the desired records. After that, click on the button on the toolbar.
The system allows executing several tasks at the same time, but it is necessary for the tasks to belong to the same activity, process and revision. It will not be possible to execute the tasks in batches if there are incomplete attributes or form fields.
After selecting the tasks, click on the button. A screen will be displayed in which it will be possible to add Comments and Attachments to all selected activities. Then, click on the button that corresponds to the action that will be executed in the instances. Both the comments and the attachments will be added to all selected instances.
|
|
2.
|
If the responsible party for the activity is a group (department, position, team, or functional role), the system will question whether the user wants to take responsibility for the execution of the activity. By clicking OK, the activity will be associated with the authenticated user. Click on Cancel to display the activity data screen, but its execution cannot be associated.
Use the RT column in the list of records to identify the type responsible for the execution of each activity (functional role, department/role, department, department/position, user or system). Hover the mouse over each icon to identify what they represent.
|
|
3.
|
At this point, the activity data screen will be displayed:
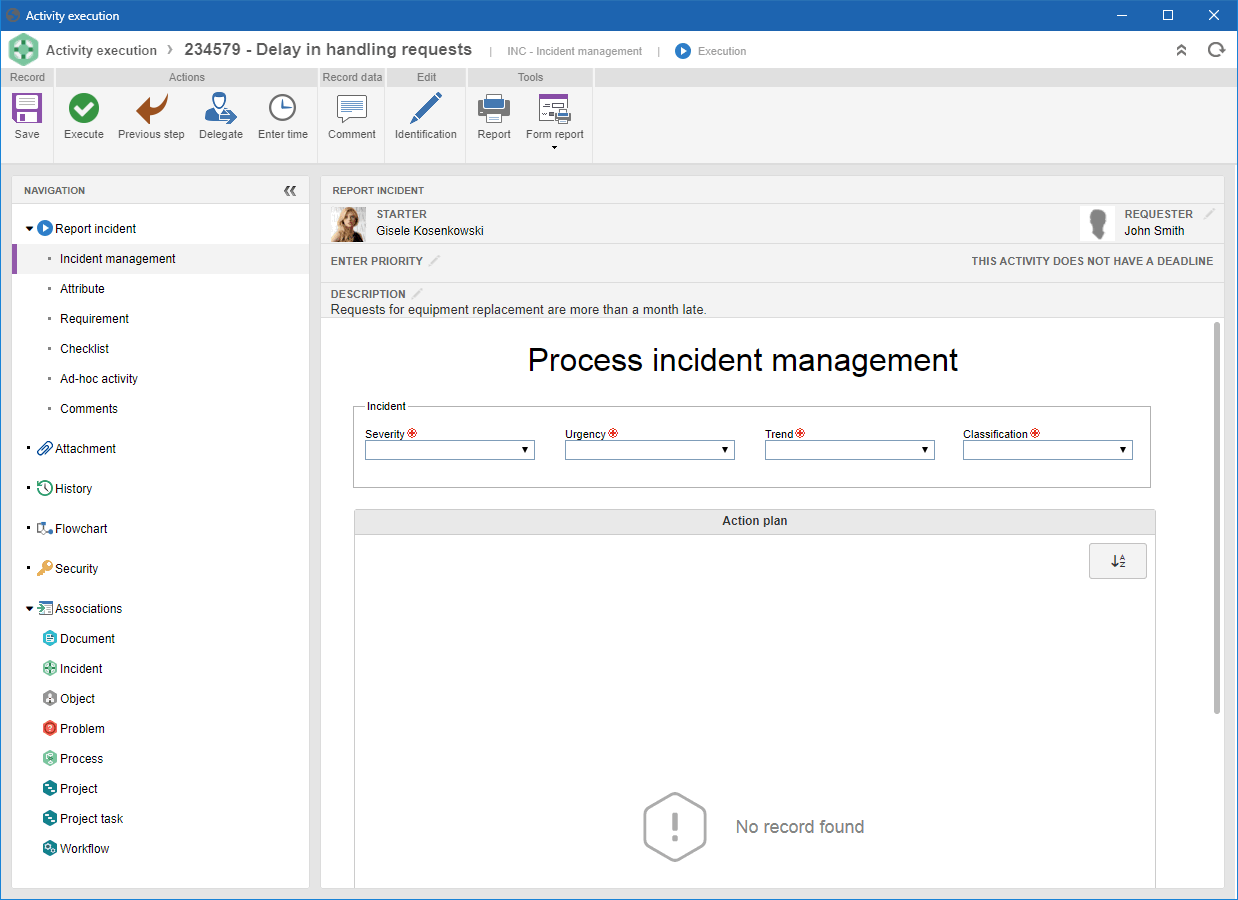
The image above is for illustrative purposes only and aims to exemplify the fields and buttons that may be displayed on the activity data screen. It is important to point out that the available fields and buttons will vary according to the configurations set during the creation and modeling of the process (SE Process).
|
|
4.
|
In the Navigation panel, it is possible to enter significant data for the execution of the activity. See more details in the Entering the incident data section.
It is important to note that this panel will not be displayed if in the activity data (Configuration  Form) the "Show form only in activity execution" option has been checked during the process modeling. Form) the "Show form only in activity execution" option has been checked during the process modeling.
|
|
5.
|
Click on the Save button to only save the data entered in the activity data screen without executing it, that is, the activity will remain in the pending records list and will not proceed in the process flow.
|
6.
|
The Enter time button will be displayed if SE Suite has, along with SE Incident, an active license for the SE Time Control component. By clicking on this button, the timesheet screen will be displayed. Refer to the specific SE Time Control for more details on timesheets.
|
7.
|
Click on the Comment button to add a comment to the instance history. After clicking on this button, a screen will be displayed in which the comment must be entered, allowing a user to be notified by mentioning them through @user. If the process is configured with the "Enter requester" option, the "Set comment as restricted" option will only be displayed when the "Allow entering requester" option is configured in the process data (Configurations  Instance). This allows the comment to be viewed by users who have permission to view the instance and who are not set as requesters. Instance). This allows the comment to be viewed by users who have permission to view the instance and who are not set as requesters.
The entered comment will be displayed in the History section of the Navigation panel.
|
8.
|
The Identification section will only be displayed if in the activity data (Configuration Instance), during the process modeling, the "Enable ID # change" option and/or the "Enable title change" option has been checked. This section allows changing the identification data of the incident to which the activity belongs. By clicking on the button of this option, the system will display a screen where it is possible to fill in the following information:
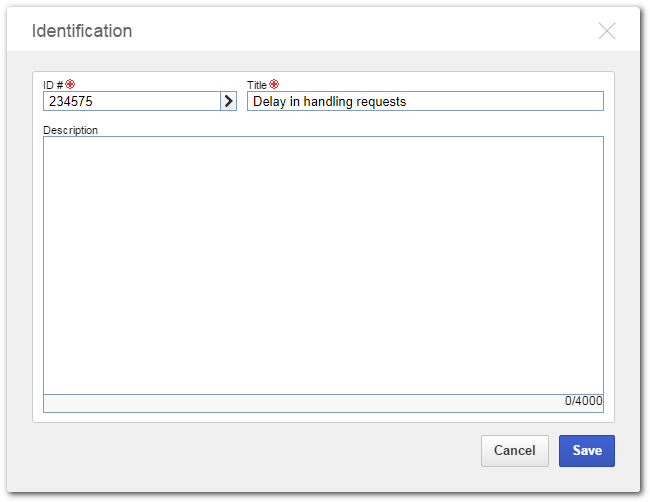
ID #: This field will be filled with the ID # generated when creating the incident. This field can only be changed if the "Enable ID # change" option is checked in the activity data (Configuration Instance). The ID # can be entered by the user or will be formed according to the pre-established settings in the process data screen.
Title: This field will be filled with the title entered when creating the incident. This field can only be changed if the "Enable title change" option is checked in the activity data (Configuration Instance). This title can be entered by the user or it will be a default title, according to the configurations made in the process data screen.
Description: Enter relevant information about the incident to which the activity being performed belongs to. It is important to note that if:
▪In the process data (Configuration Instance), the "Enable description information" option is not checked, this field will not be displayed. ▪In the process data (Configuration Instance) the "Enable description information" option is checked, however, if in the activity data (Configuration Instance) it is not checked, this field will be displayed, but will not be enabled for editing.
|
9.
|
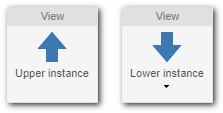
The Upper instance or Lower instance section will only be displayed if the incident is a subprocess or contains a subprocess that has already been started in its flowchart.
|
▪Upper instance: Allows viewing the instance data of the upper level process of the incident whose activities are being executed. ▪Lower instance: Allows viewing the data of the instances of the lower level processes (sub-processes) of the incident whose activities are being executed. |
|
10.
|
The History section will be displayed on the button bar instead of the Navigation panel (within the activity data) if in the activity data (Configurations Form), during the process modeling, the "Show form only in activity execution" option has been checked. Through this section, it is possible to view the main events that occurred during the execution of the incident until the current date. By checking the "Show all history" option, all events that have occurred until the current date will be displayed in detail.
To add a comment, click on the Comment button, located on the upper right corner of the History section. On the screen that will display, enter the desired comment and if necessary, check the "Set comment as restricted" option so that the comment is not visible to the requester. The comment will be displayed in the timeline. It is possible to edit the comment or delete it from the timeline by using the Edit and Delete buttons in the comment event.
Notice that:
▪If the activity has multiple executors, a comment can only be edited/deleted by the user who added it and only during the execution of the activity. ▪If the activity does NOT have multiple executors, a comment can be edited/deleted during the execution of the activity, regardless of who added it. |
|
11.
|
The Flowchart section will be displayed on the button bar instead of the Navigation panel (within the activity data) if in the activity data (Configurations Form), during the process modeling, the "Show form only in activity execution" option has been checked. Through this section, it is possible to view the flowchart of the instantiated process, making it possible to follow in which point of the flow is occurring the execution of the activity.
Hover the mouse over the flowchart elements (activities, sub process, decision etc.) to view their data (status, start date, executor etc.). Refer to the specific documentation of the SE Process component for further details on process flowcharts.
|
|
12.
|
The Message event section will be displayed if in the activity data (Configuration Instance), during the process modeling, the "Enable message event change" option has been checked and there is a message event configured in the respective field. In the section, it is possible to change the process event message data associated with the activity that is being executed. When you click on this option, the following screen will be displayed:

View the specific documentation of the SE Process component, in the "Process flowchart Editing item data Events" section, for a detailed description of the fields displayed in the event data screen.
|
|
13.
|
In the Tools section, the following options are available:
▪Report: Allows configuring and generating reports of incident data to which the activity that is being executed belongs. It is possible to define whether the report will display the attributes and/or its history. ▪Form report: This button will only be displayed if the activity has an associated form (SE Form). It displays the form so that it can be printed.
|
14.
|
In the Actions section, after filling all required fields, click on the button that corresponds to the action to be taken to execute the activity. At this point, the next activity in the flow will be released to the corresponding executor. See more details about the actions that may be performed in the activities in the Actions section.
|
15.
|
If the authenticated user is also the executor of the next activity, the system will ask if you wish to execute it. If so, the activity data screen will be displayed for completion.
|
Use the other buttons on the toolbar to: view the data and the process flowchart and issue the available reports for the menu.
|
If the process that automates the incident has asynchronous system activities in its flow, its execution may be tracked by the process/instance manager through the Management  Incident menu. Incident menu.
|
|