Resources control details |
|
|
When accessing the "Management
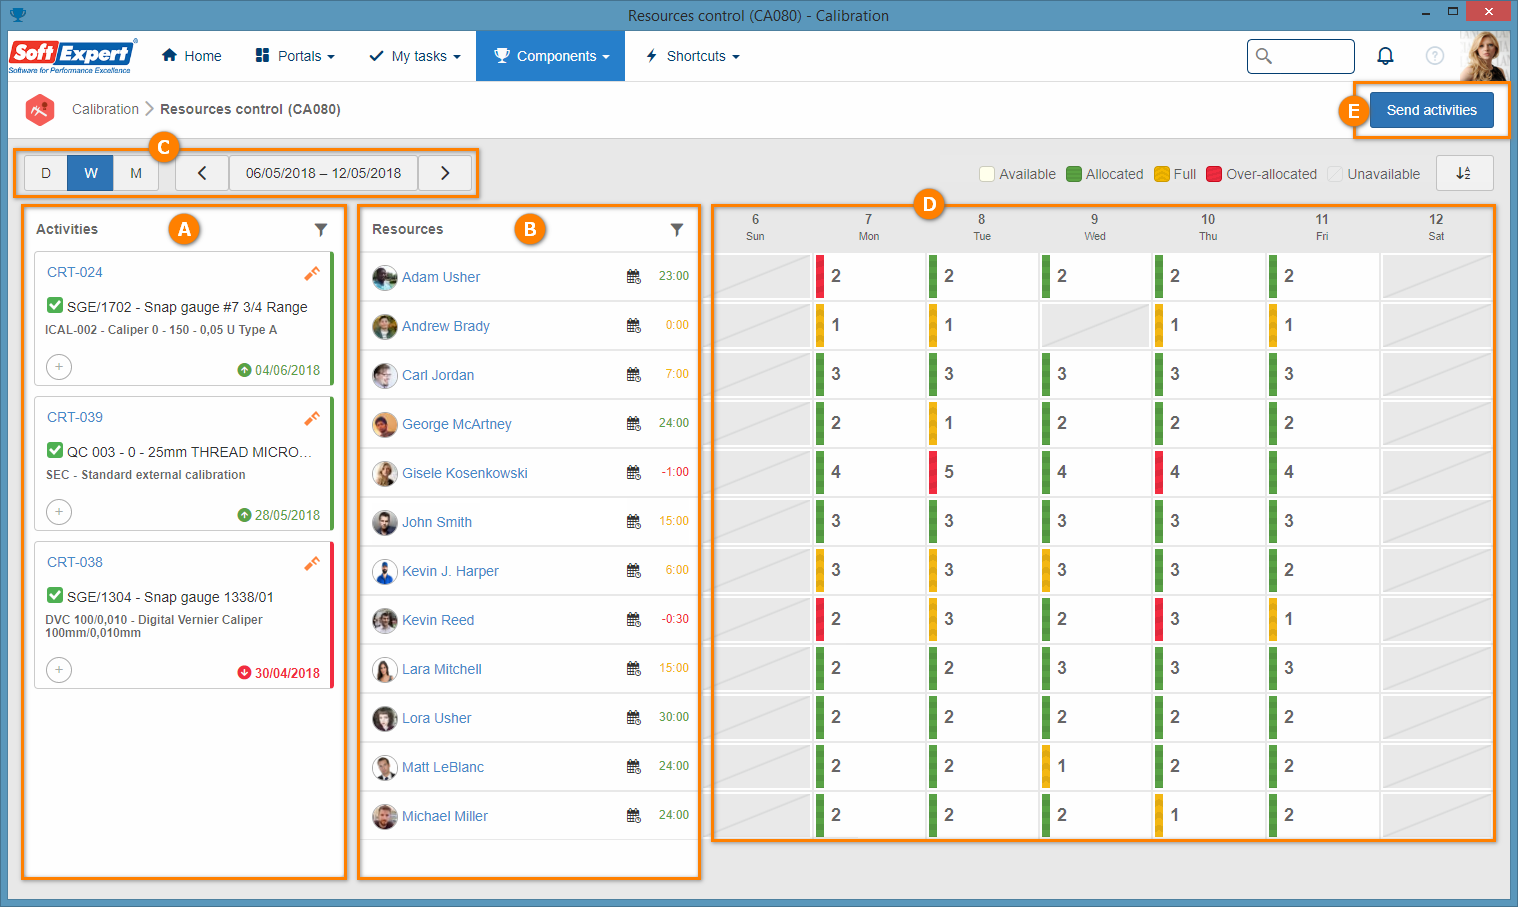
(A) The Activity panel (backlog) will list all activities whose status is "Planning". Activities that have been submitted for execution and/or approval will no longer be part of this list. Use the
(B) The Resource panel (list of technicians) will list the (technical) resources recorded in the system. Displays only (technical) resources that have at least one association with a service center. The availability of the technician is related to the schedule associated with that user. Remember that, if the "Do not display resources from other business units" option is checked in the General parameters, the resource panel will not display the resources belonging to business units other than the unit of which the logged user is part. If necessary, use the
(C) The Period filters automatically update the resource allocation vision (D). The possible visions are by Day, Week and Month, with the week field being the default. The system will always display according to the current week.
(D) The system will display, in the Workload, the scheduled time for the technician (B), according to the period being displayed (C). For activities that actual time was entered, the system will replace the planned value with the actual value. Therefore, there may be differences in availability when one access the workload at different times of the day or period, since updating will be constant. To associate an activity with a resource, simply drag the desired activity to the area that corresponds to the desired day. Each rectangle in this panel shows the number of activities allocated per day for the (technical) resource. The colors and filling design indicate the allocation status: Available, Allocated, Full, Over-allocated and Unavailable.
(E) Clicking on the Send activities button will display a screen where the user can select which activities (A) will be sent to the next step. On the selection screen, the system will display the same activities as the backlog, that is, if you have used filters to list the activities of the backlog, then the same filter will be applied to the list of activities that can be sent for execution and/the approval. In the modal shown, the distinction will be between the activities with allocation and the activities without allocation. |