|
To add a new business unit, click on the arrow next to the  button and select the Business unit option. To edit the data of a business unit, select it in the main screen hierarchy and click on the button and select the Business unit option. To edit the data of a business unit, select it in the main screen hierarchy and click on the  button. button.
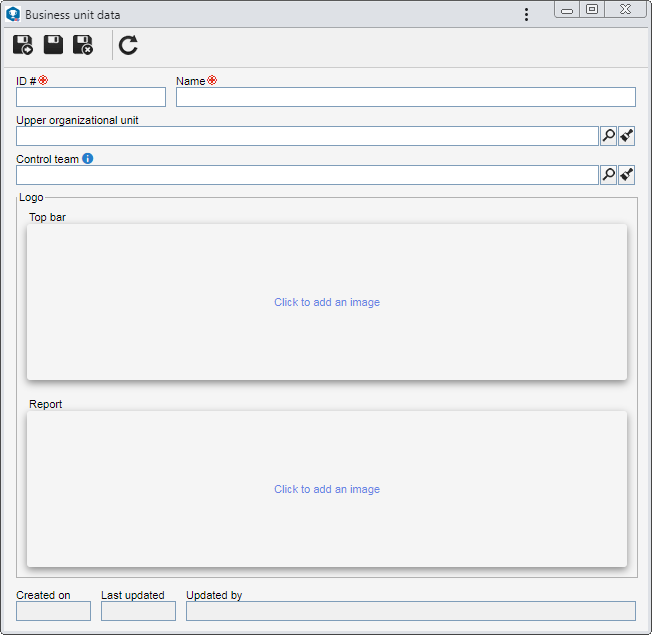
On the data screen that will open up, the following fields will be available:
Fields
|
|
ID #
|
Enter a number or code to identify the business unit.
|
Name
|
Enter the name of the business unit.
|
Upper organizational unit
|
Fill out this field for the business unit to be hierarchically added below another unit. In this case, select the desired business unit. It will not be possible to define departments as upper level items, only business units. If a business unit is selected in the main screen hierarchy, this field will be filled out by the system, but it will be possible to edit it.
|
Control team
|
Fill out this field to define that the members of a certain team may view the records regarding users that belong to the business unit in the SE Administration, SE Competence and SE Training components, as long as they have access to the respective menus. The team set in this field complements the team set in the general parameters (if any).
If this field is not filled out and a control team is not defined in the general parameters either, the configurations performed in the "Allow logged user to view records from" field of the general parameters will be valid.
|
Logo
|
|
Top bar
|
In this area, it is possible to define the image that will be displayed in the SE Suite menu panel, representing the business unit. To do that, click on the board below this field and, on the screen that will be opened, locate and select the desired image.
To successfully upload the file, its extension should be .jpg, .jpe, .jpeg, .gif, .bmp or .png, and its dimensions should not exceed 203px wide and 45px high. After that, it will be possible to preview the selected image. If the image is not displayed as desired, use the respective button to delete it.
|
Report
|
In this area, it is possible to define the image that will be displayed in the reports generated in SE Suite, representing the business unit. To do that, click on the board below this field and, on the screen that will be opened, locate and select the desired image.
To successfully upload the file, its extension should be .jpg, .jpeg or .gif. After that, it will be possible to preview the selected image. If the image is not displayed as desired, use the respective button to delete it.
The logo defined in this field will be applied to the SE Suite reports, when generated by users belonging to the business unit in question, overwriting the logo configuration performed in the SE Configuration  System (CM006) component. If a report logo is not defined in this field, when the users of this business unit generate the reports, the logo parameterized in the aforementioned screen will be displayed. System (CM006) component. If a report logo is not defined in this field, when the users of this business unit generate the reports, the logo parameterized in the aforementioned screen will be displayed.
|
Save the record after filling out the fields. If logos were defined, they will be displayed in the system, according to the following examples:
 Top bar
 Report
|