|
See how to create a new path:
1.On the main screen toolbar, click on the arrow located next to the  button and select the Path option. button and select the Path option.
2.In the window that will be displayed, select the course type that classifies the paths being created and save your selection.
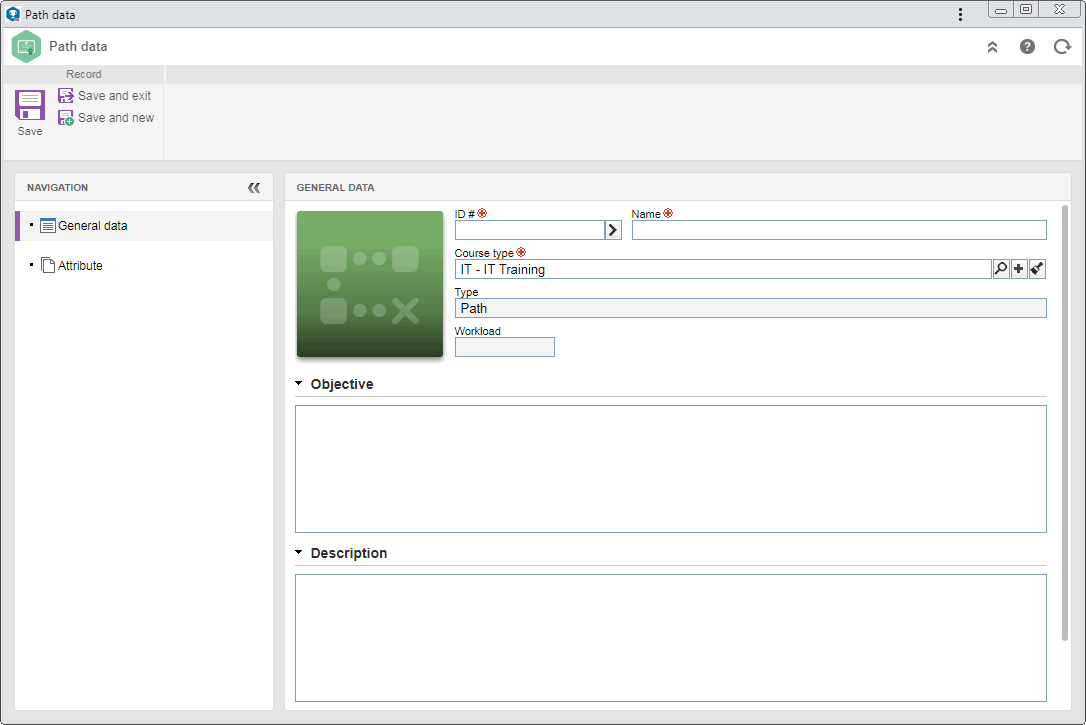
3.At this point, the path data screen will be displayed:
4.In the General data section, the following fields are available:
Field
|
Image
|
Displays the default SE Suite image for paths. To change it, click on it and, on the screen that will be displayed, select one of the available images or use the "Upload file" button to add a custom image. The file with the custom image for the path must have one of the following extensions: .jpg, .jpeg, .png or .gif.
|
ID #
|
Enter a number or code to identify the path, or, use the arrow next to this field to generate an automatic ID #.
If identification mask use has been configured in the type that classifies the path, when the ID # is generated, the corresponding mask will be displayed. The ID # generated through the mask can only be edited if the "Enable ID # change" option is checked on the data screen of the path type.
|
Name
|
Enter a name for the path being created.
|
Course type
|
Displays the previously selected course type, and it is possible to edit it. In this case, select the type that should classify the path. Use the other buttons next to the field to add a new type to classify the course and clear the field.
|
Type
|
Displays the type of the record being created. In that case, "Path".
|
Workload
|
Displays the result of the sum of the workloads of the courses associated with the path being created.
|
Objective
|
Enter the objective expected to be reached with the path.
|
Description
|
Enter important information about the path.
|
5.The General data  Attributes section will only be displayed in the navigation panel if at least one attribute is associated in the Attribute tab of the path type data screen. In that case, enter the values of the displayed attributes. Those that are required must have their values filled in. Blocked attributes will be filled in by the system with the default value defined when they are associated with the path type. The way to enter an attribute varies according to the configurations set when creating it. Attributes section will only be displayed in the navigation panel if at least one attribute is associated in the Attribute tab of the path type data screen. In that case, enter the values of the displayed attributes. Those that are required must have their values filled in. Blocked attributes will be filled in by the system with the default value defined when they are associated with the path type. The way to enter an attribute varies according to the configurations set when creating it.
6.After that, save the record, but do not close the data screen. At this point, the other sections will be enabled to be filled out. Refer to the Editing a path section for a detailed description on the other fields of the path data screen.
|