Creating/Editing an analysis |
|
|
It is possible to create and edit analyses in SE Analytics through the File
To edit an analysis, select it from the list of records in the second quadrant and click on the
To record an analysis, access the "File
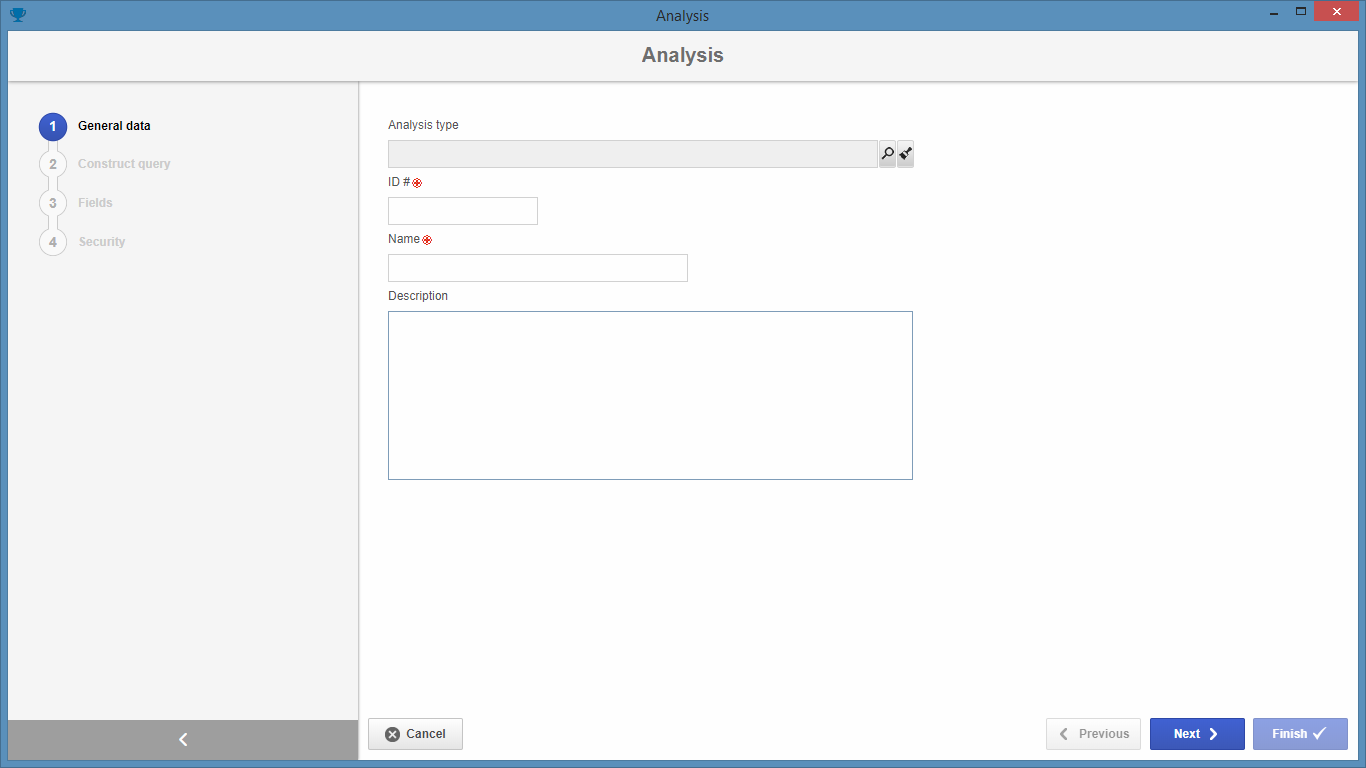
General dataIn the "General data" step, enter the ID # and name of the analysis. If you wish to classify the analysis in a hierarchy, select the type, in the "Analysis type" field, that classifies this analysis. In the "Description" field, provide more details about the analysis.
After filling in the fields, click on the "Next" button to go to the next step.
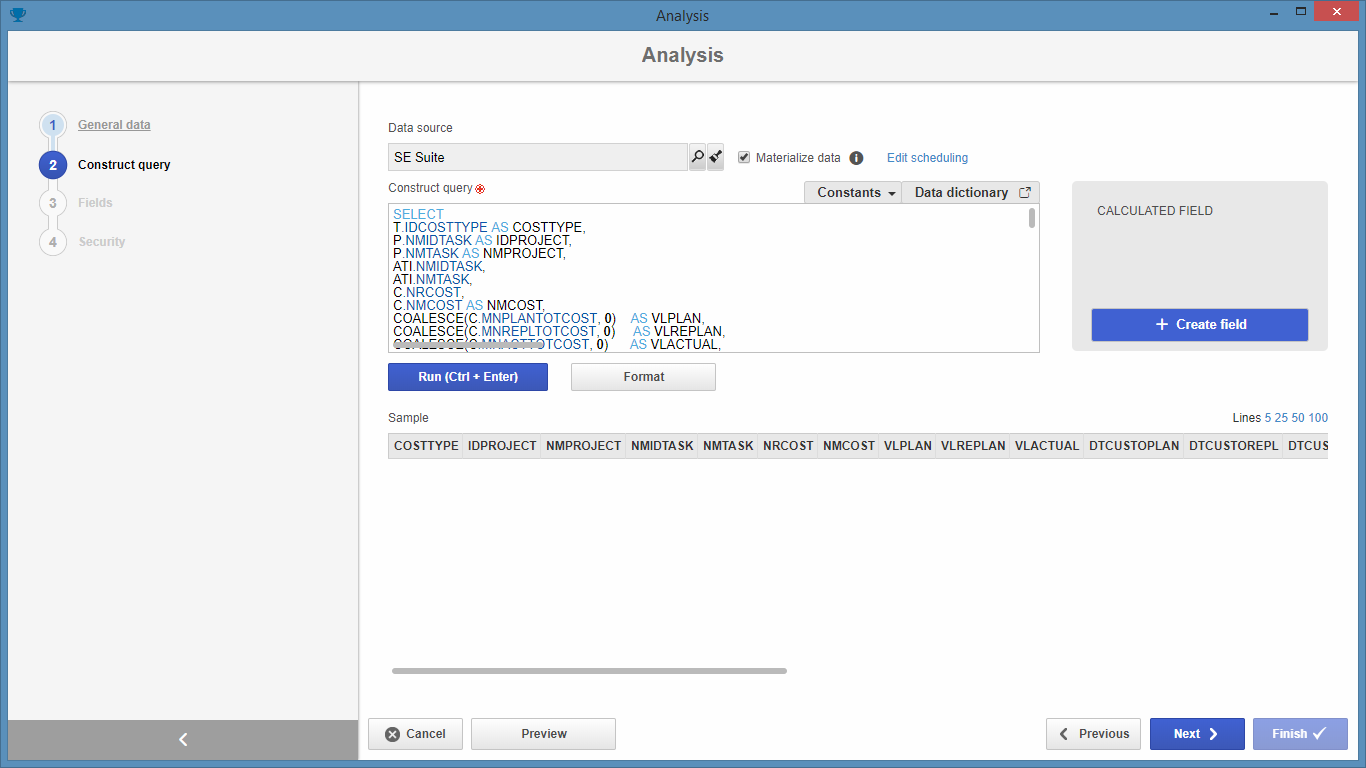
Construct queryThe "Construct query" step consists of entering the SQL command that will define the data to be used by the analysis, among other configurations. Fill in the following fields:
Data source: Select the data source that contains the data to be used by the analysis. The data source establishes the connection with the database and must be previously configured in SE Administration. Remember that the "SE Suite" data source is the system default and displayed without need for prior configuration. This data source establishes the connection to the SE Suite database. Materialize data: Check this option if you wish the data to be materialized, that is, the SQL command of the analysis will be executed from time to time, and the result will be stored in a temporary table. When this option is checked, the "Edit scheduling" option, which allows defining the materialization synchronization interval of the analysis, will be displayed. Construct query: Enter the SQL command that will be used in the analysis. Next, click on the Execute button or press CTRL + ENTER to execute the SQL command defined in the field. If an error occurs, the screen will display it. It is also possible to configure one or more calculated fields to be displayed in the query execution result. The Calculated field feature allows displaying additional information in the query result, such as the subtraction between the values of two columns, for example. Refer to the Configuring a calculated field section for more information on how to use this resource in the analysis.
After filling in the fields, click on the Next button to go to the next step.
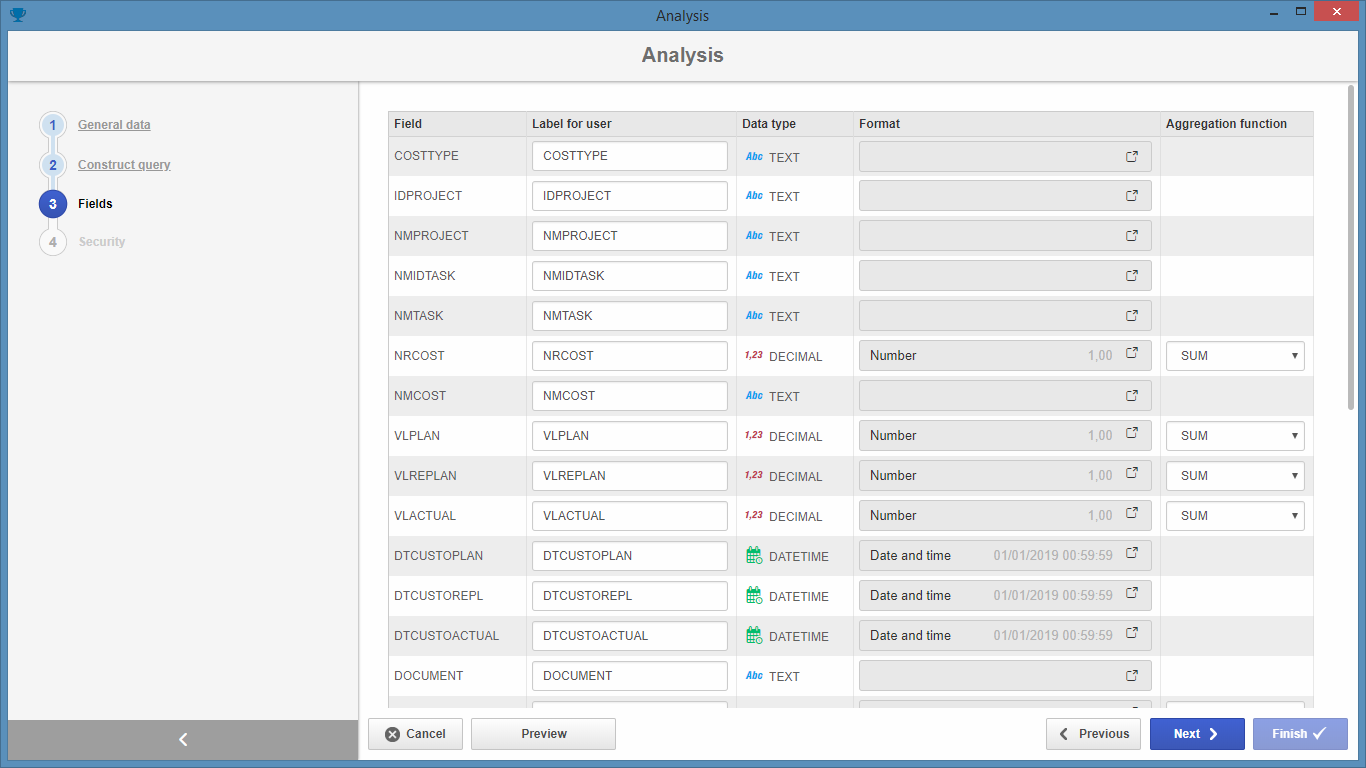
FieldsIn the Fields step, configure the fields that will be displayed in the analysis:
Field: This column displays the names of each field. Label for user: Enter the labels of each column in this field. Data type: This column displays the data type of each field. Format: Use this field to edit the data type when the format of a field needs to be edited. Using this field, the user can edit the format of some data type, such as date (dd/mm/yyyy, mm/dd/yyyy, etc.), currency ($, €, £, etc.), among others. Aggregation function: This column will be available only for numeric type data. An aggregation function processes a set of values from a single column of a table and returns a single value as a result. The following functions are available: ▪Sum: This function calculates the sum of the values of a single column and returns this result. ▪Maximum: This function analyzes a set of values and returns the biggest among them. ▪Minimum: This function analyzes a set of values and returns the smallest among them. ▪Average: This function calculates the arithmetic average of the values of a column and returns this result. ▪Count: This function returns the number of lines in a column, that is, the number of values in the field.
After filling in the fields, click on the Next button to go to the next step.
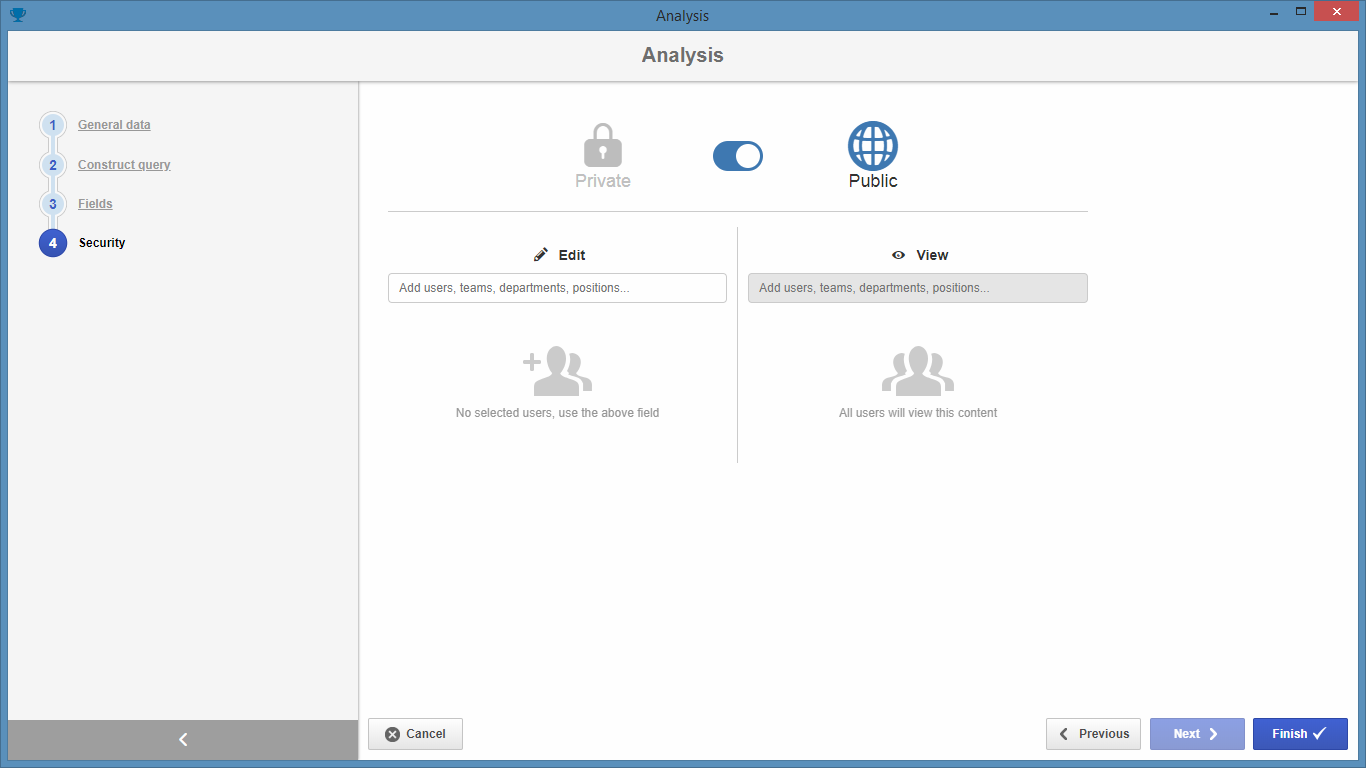
SecurityTo define the analysis security, on the screen that will be displayed, enable the desired option: ▪Private: Only the responsible parties(1) defined on this screen will be able to edit or view the analysis. To do that, in the Edit and View columns, define who will be able to perform these operations(2). ▪Public: All system users will be able to view the analysis, but only the responsible parties defined in the Edit column will be able to perform this operation(2) (3). Once done, click on Apply.
After filling out all necessary fields, click on the Finish button to end the analysis configuration.
|