Creating a calibration activity (programming) |
|
|
See, in this section, how to program calibrations in the system:
On the list of records in the second quadrant, find and select the desired calibration plan. Click on the
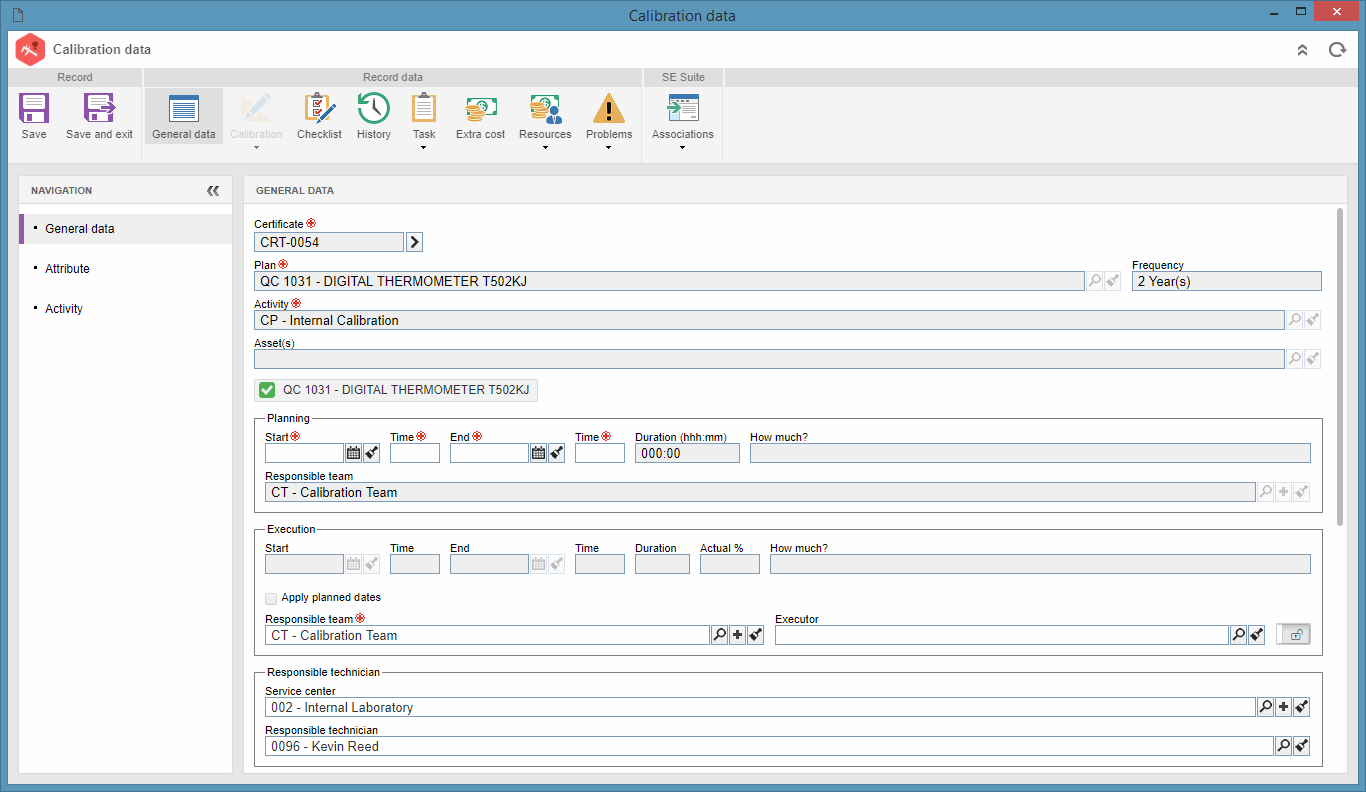
At this point, the following data screen will be displayed:
General dataCertificate: Enter an ID # for the calibration activity. Remember that, if the plan standard activity was configured to use a mask, when generating the automatic identifier, the respective mask will be displayed. This field may be disabled if the respective configuration is also set in the calibration plan standard activity. Planning: Use this field to enter the planning data for the calibration activity: ▪Start: Enter the start date and time of the calibration programming. This field is filled in with the current date and time; however, it is possible to edit them. ▪End: Enter the end date and time of the calibration programming. The Duration field will be calculated automatically by the system. Execution: The execution fields can only be filled when the activity is in the "Execution" step. However, it will be possible to change the Responsible team for the calibration execution. To define a specific executor, enable this option by clicking on the button next to the Executor field and then select the user who will execute the calibration.
After you have completed all required fields, the calibration activity data can be saved for the first time. To do that, click on the Save button to save the data.
|