Navigation:  File > Capture configuration > Creating a capture configuration >

Security

Previous  Top  Next

To configure a security list for the capture configuration, first, select one of the following options:

Public: Any user with access to SE Capture may also access the capture configuration.

Restricted: Only certain SE Capture users will be allowed access to the capture configuration. Thus, the buttons on the side toolbar will be enabled. Click on the button and, on the selection screen that will be opened, perform the following steps:


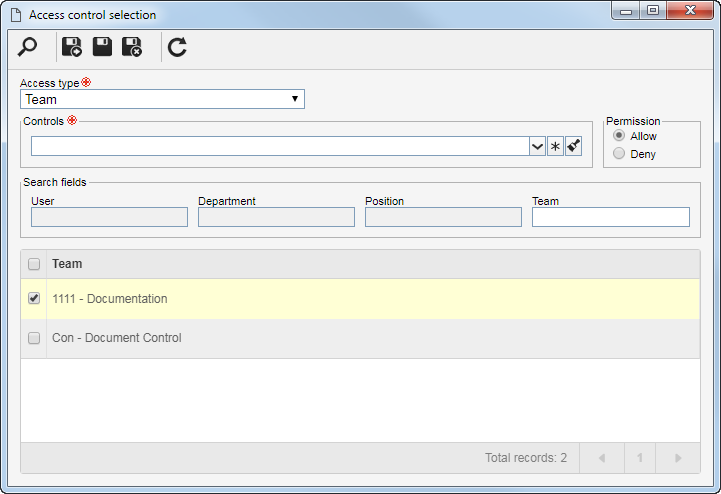
1.Select one of the following options to set the access type that will make up the security list:

Access type

Team

It will be composed of the members of a team previously created in the SE Document component.

Organizational unit

It will consist of users of a particular business unit/department of the organization.

Department/Position

It will be composed of users from a specific department of the company, who have a specific position.

Position

It will be composed of users who hold a specific position in the company.

User

It will be composed of a specific user.

All

It will be composed of all users who have access to SE Capture.


2.According to the selected access type, the Search fields will be enabled for filling. Use them to make it easier to search for desired records.


3.If the selected access type is Organizational unit, the hierarchy of business units and the departments belonging to them (if any) will be displayed.

Check the business units and/or desired departments. By checking the "Consider sublevels" option at the bottom of the screen, the system will also consider the organizational units that are down in the hierarchy of the selected organizational unit. Note that by checking this option, if new organizational subunits (whether they are business units or departments) are subsequently added, they will be automatically added to the security list.

Next to the hierarchy, the system also makes available buttons that allow you to check all the sub-levels of a particular organizational unit or uncheck all sub-levels. Notice that by using the "Check all sub-levels" button, if new organizational sub-levels are added later, they will not be incorporated into the security list.


4.After that, click on the button on the toolbar of the selection screen. Depending on the access type selected and the values entered in the filters, the result will be displayed in the list of records, located at the bottom of the screen. Select the ones that will compose the security list. Hold the SHIFT or CTRL keys down or check next to each item, to select more than a record at a time.


5.In the Controls field, expand the list and check the desired actions. Then, define if they will be allowed or denied for the access type:

Control

Allowed

Denied

Security data

The user will be able to edit the configurations performed in the "Security" section of the capture configuration.

The user may edit the other data of the capture configuration, but the "Security" section will remain blocked.

List

The category will be displayed for the user on the system screens that have capture configuration hierarchy.

The category will not be displayed for the user on the system screens that have capture configuration hierarchy.

View

The user may view the capture configuration data screen in "read-only" mode.

The user will not be able to view the capture configuration data.

The controls that are not checked for a certain access type will be considered "denied".

Use the other buttons next to the field to mark all the available controls and clear the markups.


6.Once done, save your selection. Use the other side toolbar buttons to edit and delete the record selected in the security list.