Data collection configuration |
|
Access the Management
On the main screen toolbar, click on the arrow next to the
The following screen will be displayed:
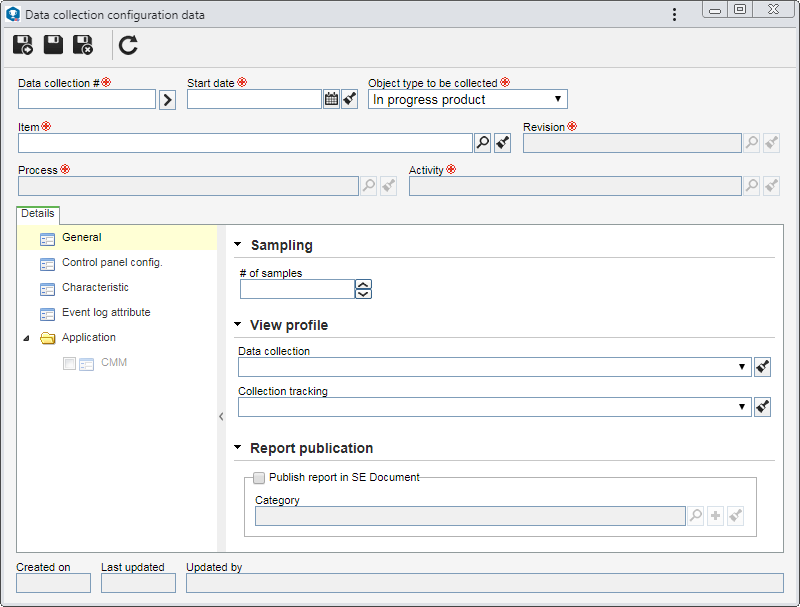
Fill in the following fields on the data collection configuration screen:
Data collection #: Enter the data collection number. Each data collection must have a unique number in the system. For that, click on the button next to this field to generate an automatic number. Start date: Enter the start date of the data collection. Type of object to be collected: ▪Item: Select the item whose characteristics will be analyzed. ▪Revision: Select the number of the revision of the item whose characteristics will be analyzed. The system will fill this field in automatically with the last revision of the item. ▪Process: Enter the process that will be controlled. If the SE Process integration field is checked through the General parameters screen, it will be possible to associate a process from the SE Process component. Remember that only the processes that were associated with the item in question through the SE PDM component will be available for selection. ▪Activity: Enter a process activity that will be controlled. Remember that the system will display the activities associated with the process selected previously. In addition to that, the activity must have characteristics associated with it, which must have an enabled application for SE SPC. After saving the record, these characteristics will be displayed in the Characteristics section in the Details tab.
Details
Control panel config.ParameterizationAllow user to omit a characteristic for a sample: Select this option to allow the user to omit a characteristic in the control panel sample. Advanced task period: Select the number of days in advance for the tasks to be displayed in the list of pending records before the execution deadline. General data: Select one of the following options: ▪Keep general data according to the characteristic configuration: Select this option so that the general data is kept according to the options selected for each characteristic. ▪Keep general data according to prior sample: Select this option so that the general data is kept according to the options selected in the previous sample. ▪Keep the general data according to the last read characteristic: Select this option so that the general data is kept according to the options selected in the last characteristic. Attribute: Select one of the following options: ▪Keep the attributes according to the characteristic configuration: Select this option so that the attributes are kept according to the options selected for each characteristic. ▪Keep the attributes according to the previous sample: Select this option so that the attributes are kept according to the options selected in the previous sample. ▪Keep the attributes according to the last read characteristic: Select this option so that the attributes are kept according to the options selected in the last characteristic.
Chart viewDetermine the configurations to be applied to the charts: Number of lines: Enter the number of lines that will be displayed in the collection execution screen. Up to 3 lines can be informed. Number of columns: Enter the number of columns that will be displayed in the collection execution screen. Up to 3 columns can be informed. The table displayed below the fields will be adjusted according to the configurations set for the number of lines and columns. In each cell of the table, it is possible to select a chart/control chart that will be displayed on the data collection screen.
CharacteristicIn this section, the system will display the characteristics associated with the object, item, process, or activity selected previously (step 3). Use the buttons in this section to edit the characteristics. See more details about how to edit the data of the characteristics in the Editing the characteristic data section.
Event log attributeIn this section, the system will display the attributes defined in the general parameters. Use this section to configure the attributes that will be displayed during the data collection execution.
CMM Use the Application CMM file configuration: ▪Template: Select the CMM file to be the template for the collection. ▪Import files by: Configure whether you wish to import the file information per sample (first reading of each sample) or per reading (all readings of each sample). Use the Associations section to perform the association between the data collected in the CMM reading and the template type. To do that, click on the
Save the record. |
|||||||||||||||||