|
See in this section the first steps to access SE Suite:
Login
The login screen will display when the user has access to SE Suite URL. Enter the user and password to access SE Suite and click on the Login button. If the system is configured for single sign-on, click on the Single sign-on button.
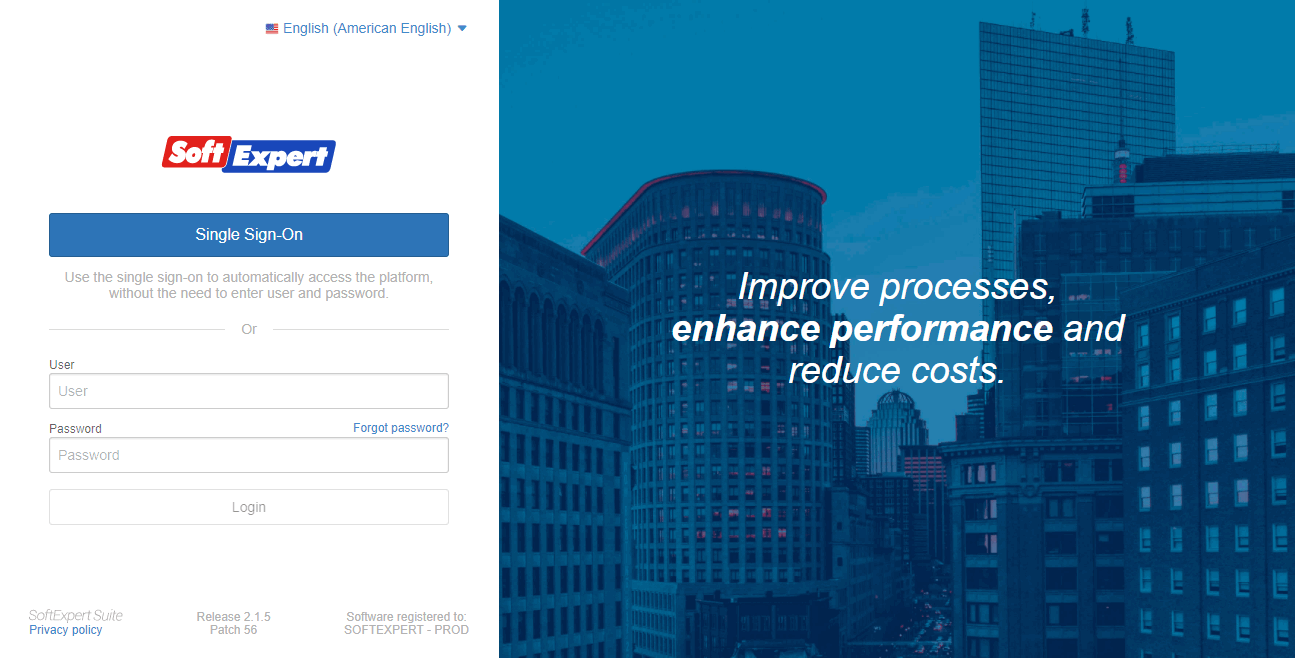
Forgot password?: Click on this link to retrieve your password. On the field that will be available, enter the user to access SE Suite.
Note: It is necessary to enter the username instead of the e-mail as it is possible to have two internal users with the same e-mail address. This is not applicable to external users.
▪To log into SE Suite, the administrator must have made the authentication configurations in the SE Configuration component, besides creating users in the SE Administration component. Therefore, ask your organization's system administrator for your access data for SE Suite. ▪If your user has more than one license, it will be possible to select the desired license in the License key field on the user data screen. |
▪On the upper part of this screen, there is a menu that displays the language in which the login screen is being displayed. Click on the arrow for the other language options to be displayed. If the language is changed, after logging in, the system will display a message in the selected language. Confirm the message if you wish to change the language of the system. The language can also be edited in the user data screen. ▪The login screen will display default SoftExpert images, but they can be edited to match the visual identity of each company. These changes must be performed by the system administrator or a user with access to the system configuration menu (CM006). The images must be uploaded in the "Login screen background image" field, which allows images with dimensions of 1350px by 1080px at most, in .jpg or .png formats, with up to 1MB in size. |
Main screen
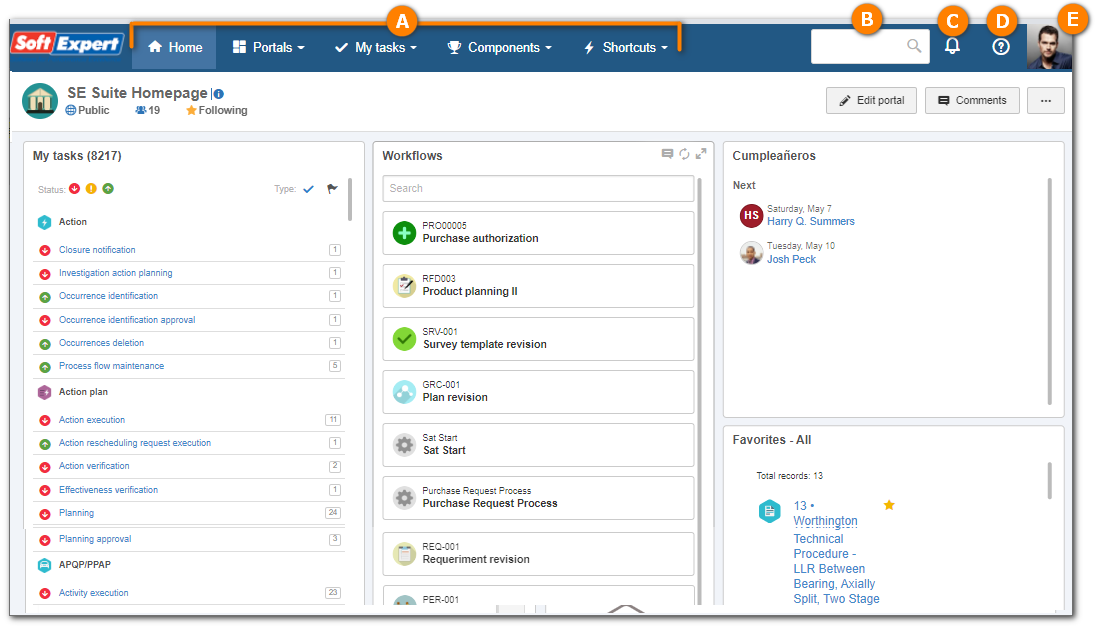
Once logged in, the home screen of SE Suite is displayed:
A
|
Menu panel: In this panel are located the system menus.
|
B
|
Full text search: This field allows you to perform the search for a certain token in several components.
|
C
|
Notification center: This menu notifies the user when there is any update with which they are involved.
|
D
|
Help center: This menu centers all resources focused on supporting customers and updating the system.
|
E
|
User panel: This panel is expanded by clicking on the user's photo and allows you to view the information about the logged user.
|
|