At this point, the system will open the screen to allocate monitored events. The ID # and Name fields will be filled in by the system with the respective information of the resource selected before. Fill in the following fields:
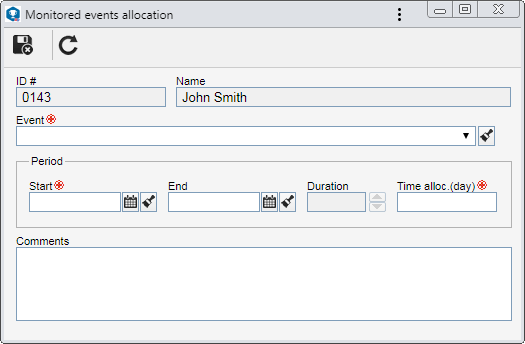
Event: Select the monitored event (SE Time Control) you wish to allocate to the resource.
Period: Select the start and end date of the monitored event, as well as the hours per day it occurs.
Comments: Enter important information about the monitored event.
|