|
Location: Execution  Target/Measurement Target/Measurement
Prerequisites:
▪Scorecard with indicators
Overview:
Through this menu, the logged user will be able to manually enter values for targets and measurements in the indicators of different scorecards in whose security they have the "Target" and "Measurement" controls enabled.
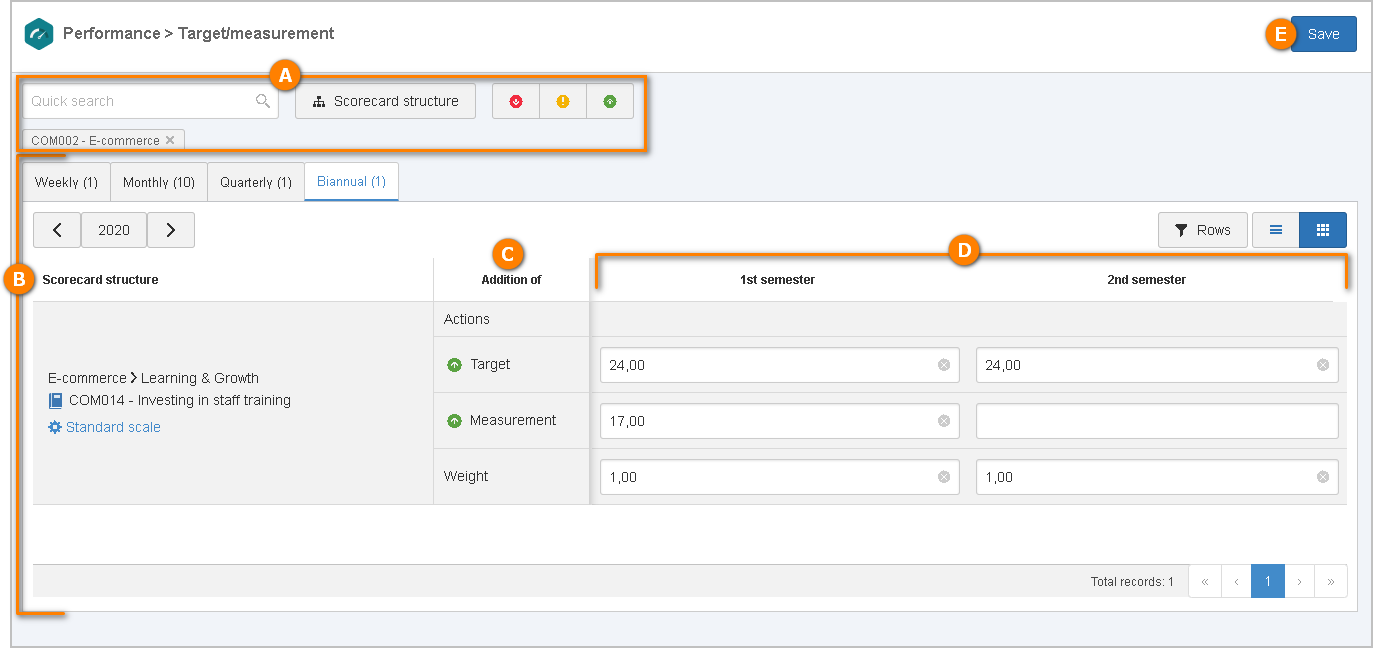
The vision is divided according to the following image. The alphabetical letters identify each available item:
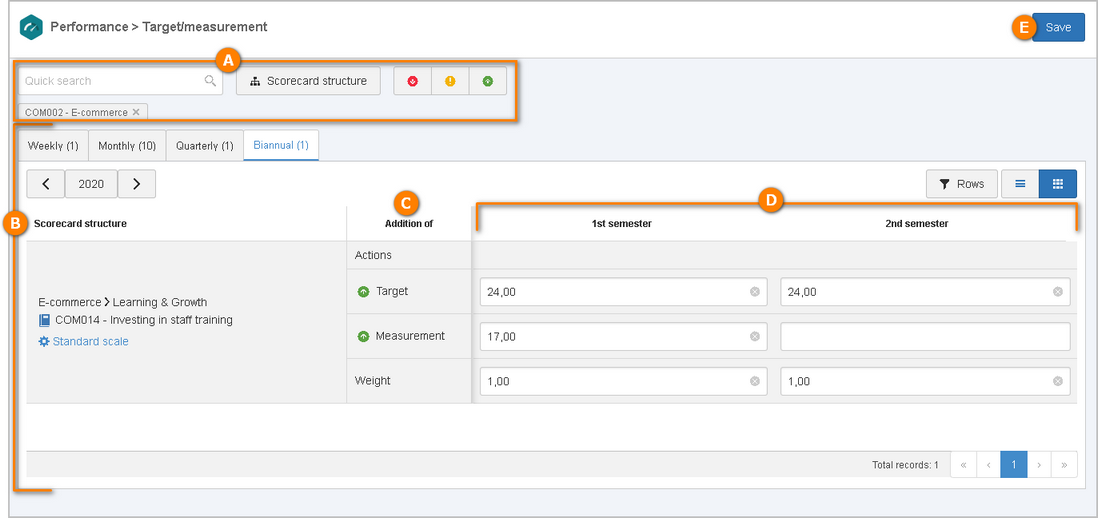
A
|
On the upper part, the filters that allow locating the desired scorecard/indicator more easily are available. These filters can be used isolated or combined, to restrict the search result even further:
▪Quick search: Enter the ID # or the name of the scorecard with the indicators whose values you wish to enter. ▪Scorecard structure: Click on this option to locate an indicator associated with the structure of a specific scorecard. On the screen that will be opened, locate and select the desired scorecard in the hierarchy and then select the node in the structure whose indicators you wish to display (scorecard, upper element or indicator). The selected node will be displayed right below this field. ▪Target/Measurement deadline status: Click on the option that corresponds to the status of the indicators whose values you wish to enter: past due, close to due date or on time. |
B
|
The indicators will be separated into tabs according to their frequency. On the upper part of each tab, there are options that allow:
▪Browsing through the periods before and after those that are displayed; ▪Filtering the fields related to the indicators that will be displayed; ▪Switching the display between one or multiple periods. Then, the indicators in which the user has "Target" and "Measurement" permissions are listed. Above the name of the indicator, the scorecard to which it belongs and the element above it in the structure (if any) are displayed.
Indicators with "Based on event" frequency will not be displayed in this menu.
If, in the indicator data, the Default scale option has not been enabled, the respective option will be displayed under its name. After entering and saving the target data for the indicator, click on this option to define the range of values that will compose the range items in each indicator period. On the screen that will be opened, perform the necessary adjustments and save the changes. Note that the name and the number of range items will be displayed according to the configurations and the start of the validity of the revision of the range related to the indicator.
At the bottom part of this tab, it is possible to browse through the pages of the indicator listing.
|
C
|
In the Addition of column, the options whose values may be added will be displayed: target (as long as the indicator has one), measurement, weight (as long as it is not fixed), and additional fields (if any, as long as their value is not obtained through a formula).
Indicator targets and measurements obtained through formulas will be highlighted in this column.
|
D
|
The columns of the periods will be displayed according to the presentation configured in the upper part of the tab.
When hovering the mouse over the period of an indicator, the following options will be displayed in the upper part:
▪N/A: Click on this option if, for any reason, there are no values in this period. In this case, the period will not be considered in the calculation of the scorecard. ▪ : Click on this option to add an attachment related to the period. For further details on how to add attachments to the record, see the Adding attachments section. : Click on this option to add an attachment related to the period. For further details on how to add attachments to the record, see the Adding attachments section. ▪ : Click on this option to enter a comment related to the period. On the screen that will be opened, enter a title and a comment regarding the period. : Click on this option to enter a comment related to the period. On the screen that will be opened, enter a title and a comment regarding the period. To enter a value, click on the field and type the desired value according to the measurement unit set for it.
To extend the value of the target or the measurement of an indicator to other periods, simply enter the value in the respective field, click on the gray arrow in the upper part of the field and drag on the same line for the desired periods.
Note that it will not be possible to enter target and measurement values for indicators that go through approval. This operation must be performed through the Execution Scorecard execution menu.
|
E
|
After filling out all desired fields, save the record.
|
|