|
See below how to export and import forms:
Form export
To export a form, first select the desired form on the main screen. On the toolbar, click on the More  Export button. Export button.
The system will generate a file with .seform extension. The data related to the form will be exported to the file: table type, form type, table, attributes, relationships, formulas, and the design of the form containing the relationships of the items with the fields of the tables. With that mechanism, besides reusing them in a production and test environment, the user can create templates to help managers parameterize the system.
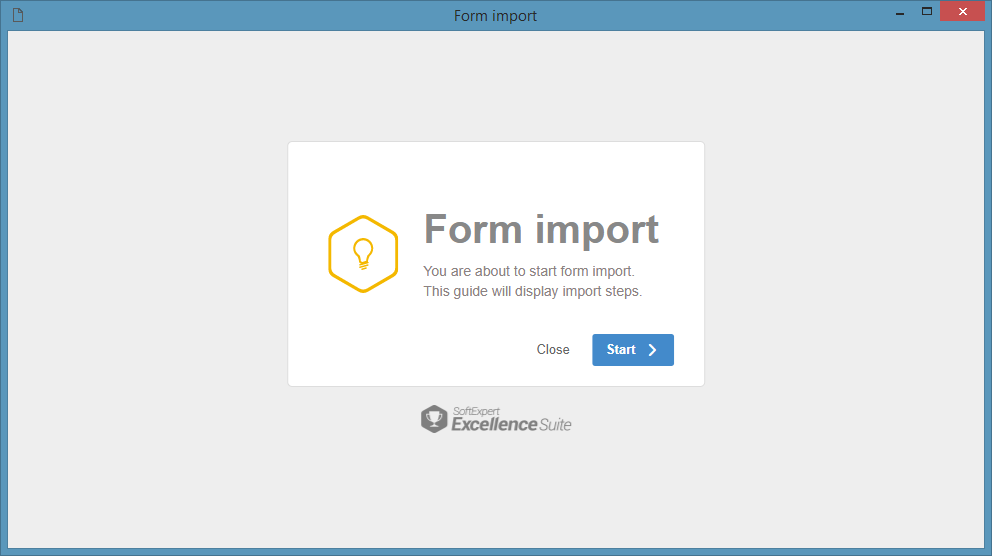
Form import
To import a form, click on the More Import button on the toolbar. At this point, the system will display the Wizard with the step-by-step to import a form: In each import step, the system will verify whether the data already exist. If they exist, the fields will be automatically filled in by the system; in that case it is mandatory to select the data, being possible to replace them by the data already saved in the system. If they do not exist, the fields may be left empty. Thus, the data will be imported or, then, an existing datum may be selected. However, there may be a mix of information in the case of attributes and relationships in the existing tables. Click on the Start button:
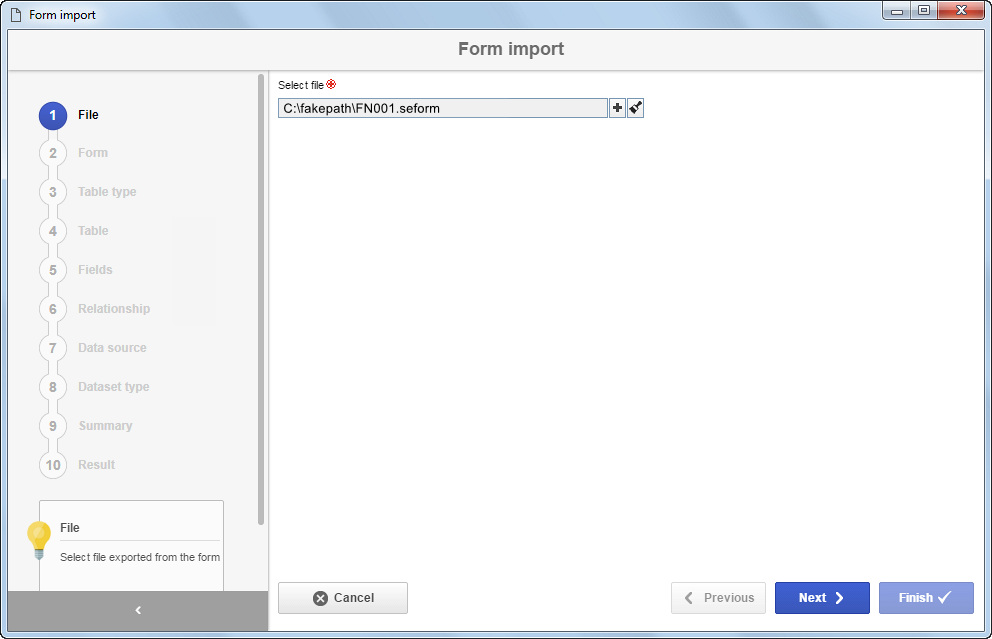
In this step, select the form file that will be imported. After selecting the file, click on the Next button to continue with the import.
|
Select one of the following options:
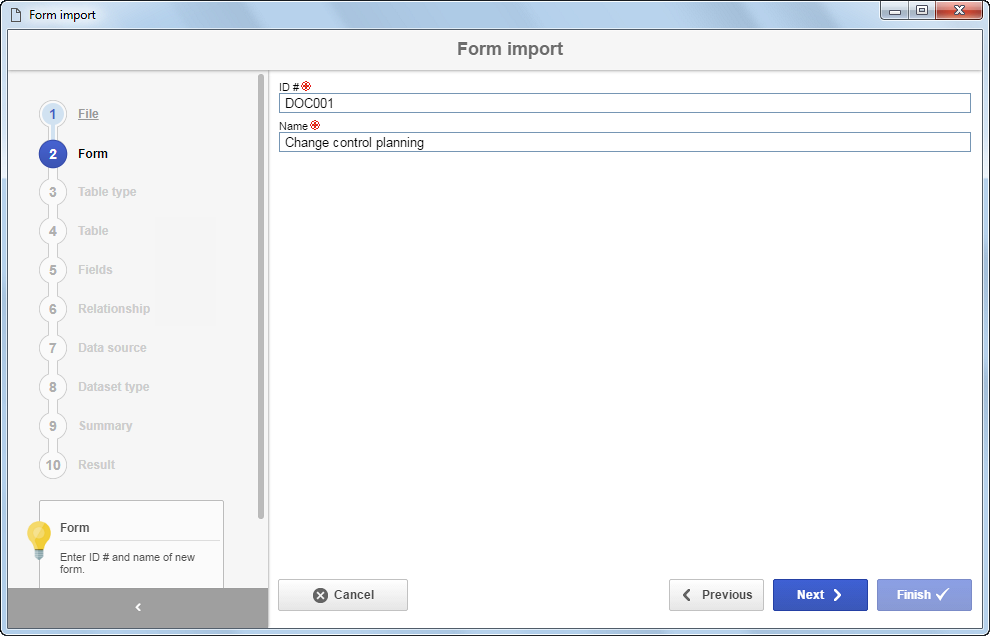
▪Create new form: Enter the "ID #" and the "Name" for the form being imported. After filling out the required fields, click on the Next button to continue with the import.
▪Use existing form: Select the desired created form to be used in the import. The import cannot be performed in a form with previously created items. The system will clear the form before starting the import. After filling out the required fields, click on the Next button to continue with the import. A message will be displayed in the import wizard for the user to confirm the deletion of the items.
Import new datasets only: Check this field to import only new datasets. Existing datasets must be kept and used in the form. For existing datasets that will be reused in the form, the system checks for inconsistencies such as missing fields, and displays a message in the import result indicating which fields were inconsistent, avoiding the creation of duplicated datasets.
|
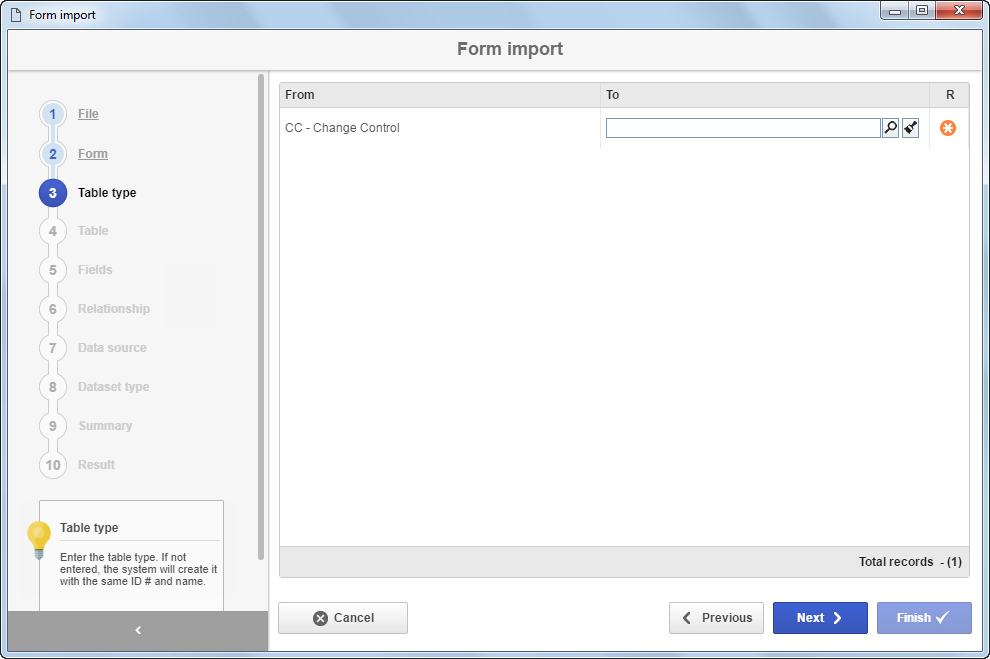
In this step, select the type that classifies the table that will be used by the form being imported. The system will verify whether the table type already exists. If it exists, the type will be automatically selected; however, it will be possible to select another table type. If it does not exist, the field will be empty for creating/importing the table type; in that case, if a type is selected, then the table type will not be imported. Click on the Next button to continue with the import.
|
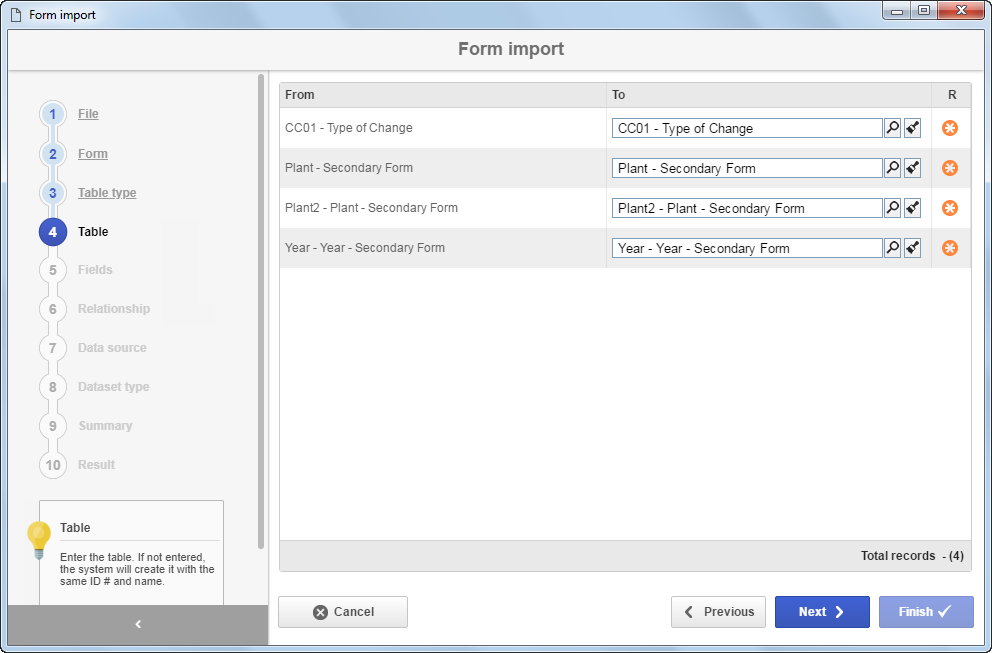
In this step, select the table that will be used by the form being imported. The system will verify whether the table already exists. If it exists, it will be automatically selected; however, it will be possible to select another table. If it does not exist, the field will be empty for creating/importing the table; in that case, if a table is selected, then the table will not be imported. Click on the Next button to continue with the import.
|
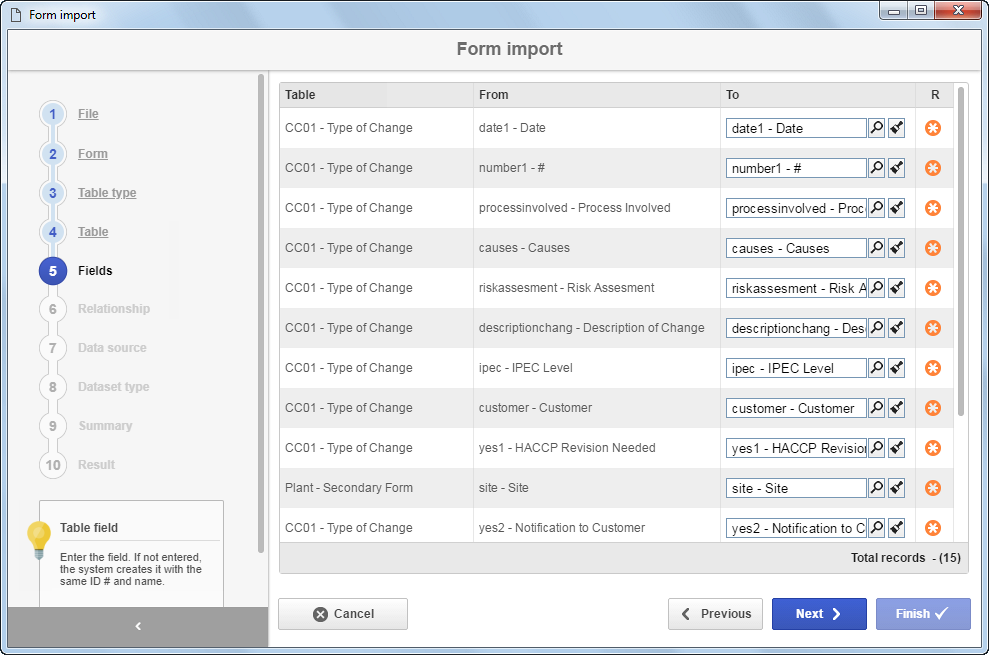
In this step, the system will display the attributes of the form being imported. If a table was selected in the previous step, then the system will verify whether the attributes exist in the table. If they exist, the attributes will be automatically selected; otherwise the field will be empty to add the attributes in the table. If no table was selected in the previous step, then the table will be imported along with the attributes. Click on the Next button to continue with the import.
|
In this step, the system will display the relationships of the form being imported. If a table was selected in the previous step, then the system will verify whether the relationships exist in the table. If they exist, the relationships will be automatically selected; otherwise the field will be empty to add the relationships in the table. If no table was selected in the previous step, then the table will be imported along with the relationships. Click on the Next button to continue with the import.

|
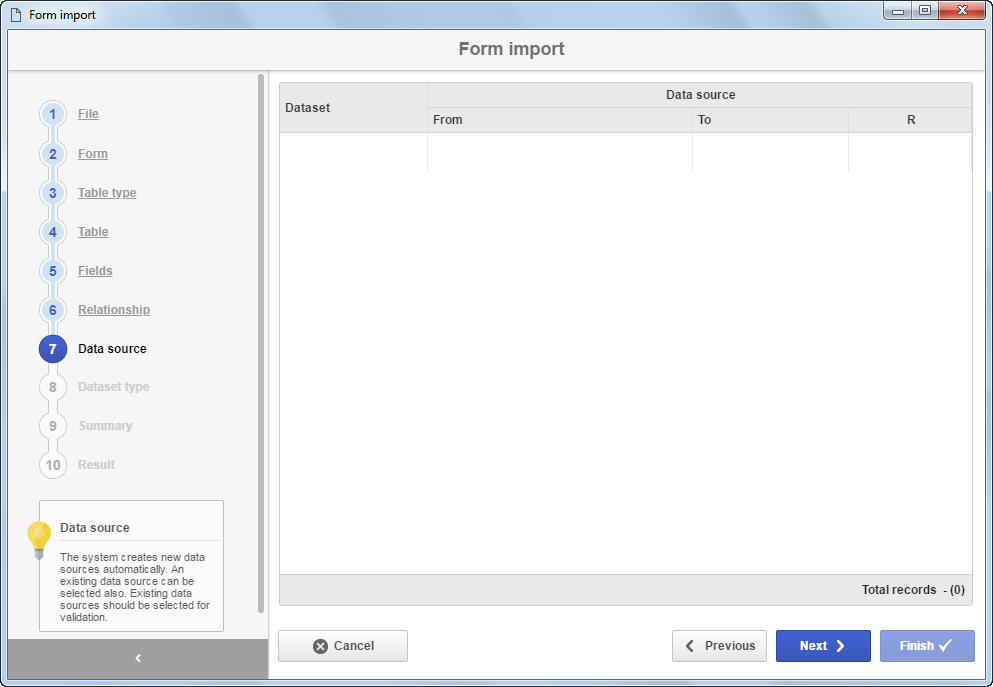
In this step, the system will display the data sources of the form being imported. The system will verify whether the data sources exist. If existent, they will be automatically selected; however, it will be possible to select other data sources. If they do not exist, the fields will be empty for creating/importing the data sources; in that case, if a data source is selected, then the data source will not be imported. Click on the Next button to continue with the import.
|
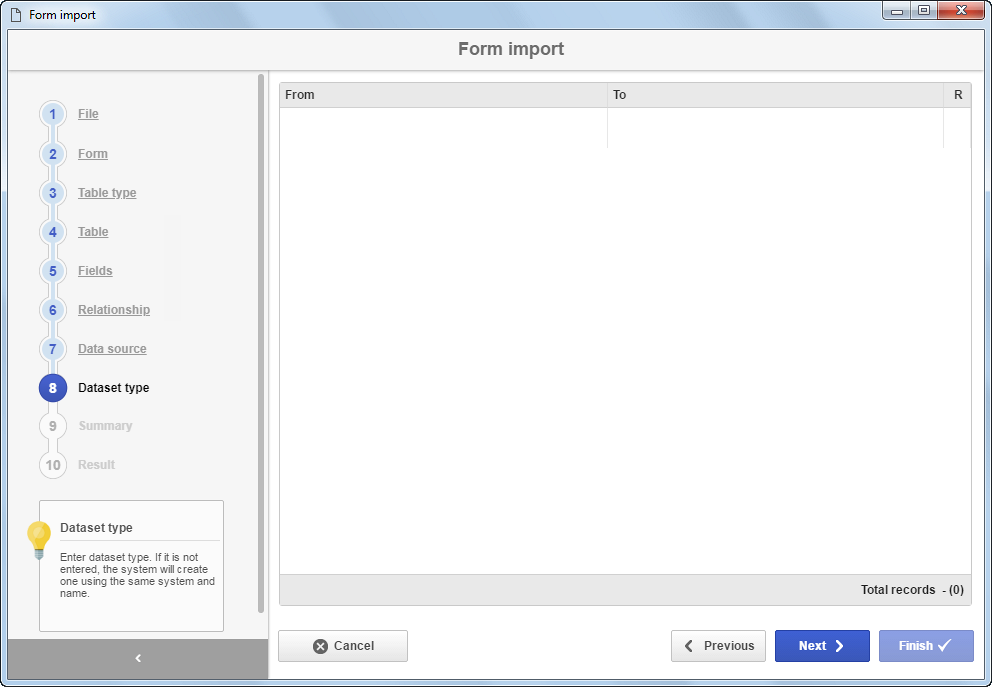
In this step, the system will display the dataset types of the data sources of the form being imported. The system will verify whether the dataset type already exists. If it exists, the type will be automatically selected; however, it will be possible to select another set type. If it does not exist, the field will be empty for creating/importing the dataset type; in that case, if a type is selected, then the dataset type will not be imported. Click on the Next button to continue with the import.
|
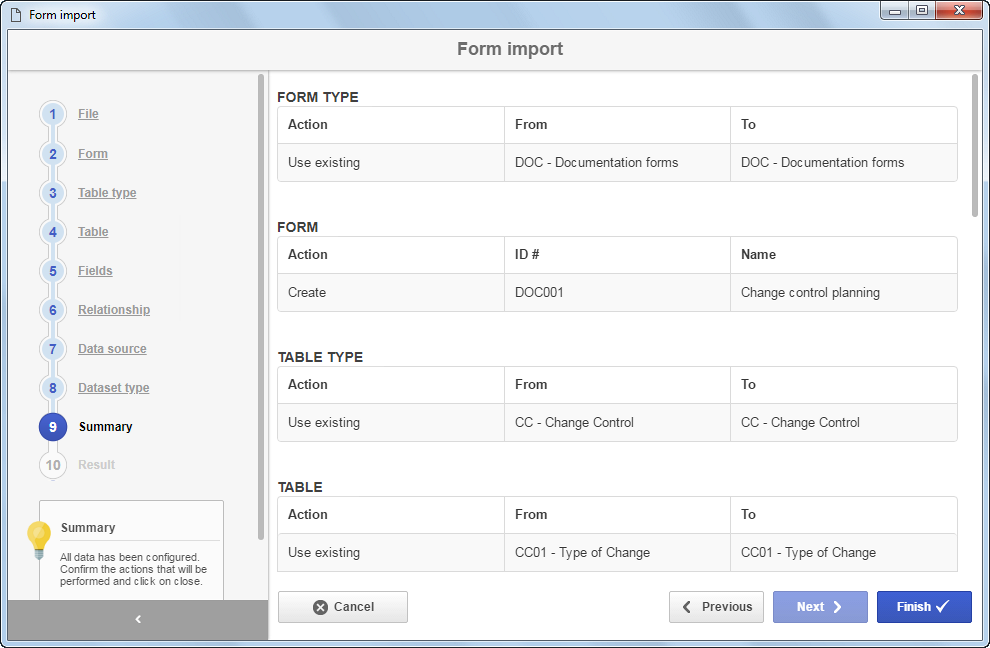
In this step, the system will display a summary of all the information that will be imported. If you need to change some information, click on the Previous button until you reach step in which the data that will be edited, then, click on the Next button until you return to this step again.
|
This step will display the message that says whether the import has been successfully performed. Click on "View form" to view the imported form or on "Close" to close the import screen.

|
|