|
SLA is the acronym for Service Level Agreement. It consists in an agreement between two parties: the entity willing to render the service and the customer, who will benefit from it. The SLA's should be controlled using specific methods and metrics that can guarantee the public interested in acquiring a particular service, recognize the quality of results obtained by a particular company or entity that executes them.
The SLA may be applied to the entire market section that deals with services; however, by convention, this agreement is related to companies that work in the department of Information Technology - IT. The main SLA points may be summarized as follows:
▪Definition of the results to be obtained; ▪Execution time of the activity to be developed; ▪Definition of those responsible for the activities and the involvement they will have; ▪Definition of the tools that will be used; ▪Detailing of the amount of work to be delivered;
This configuration is based on the statuses of the process activities. Because of that, the process flowchart must be modeled and the activities must have a status assigned to them. See below how to configure the variable duration for the Service Level Agreement (SLA)
1.
|
After checking the Variable duration (SLA) field, click Configure rules. At this point, the following data screen will be displayed:
|
2.
|
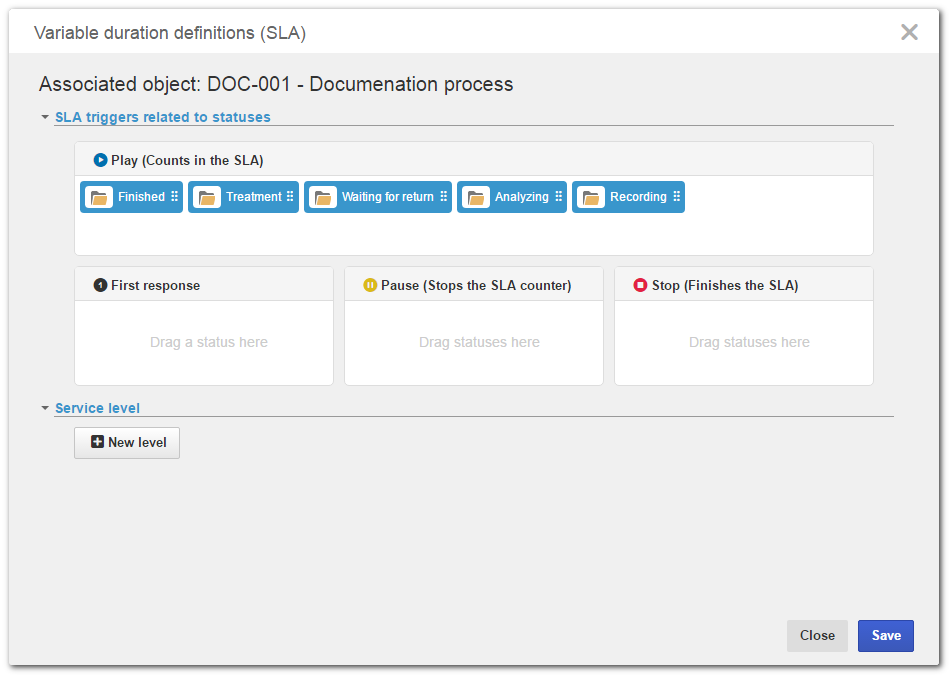
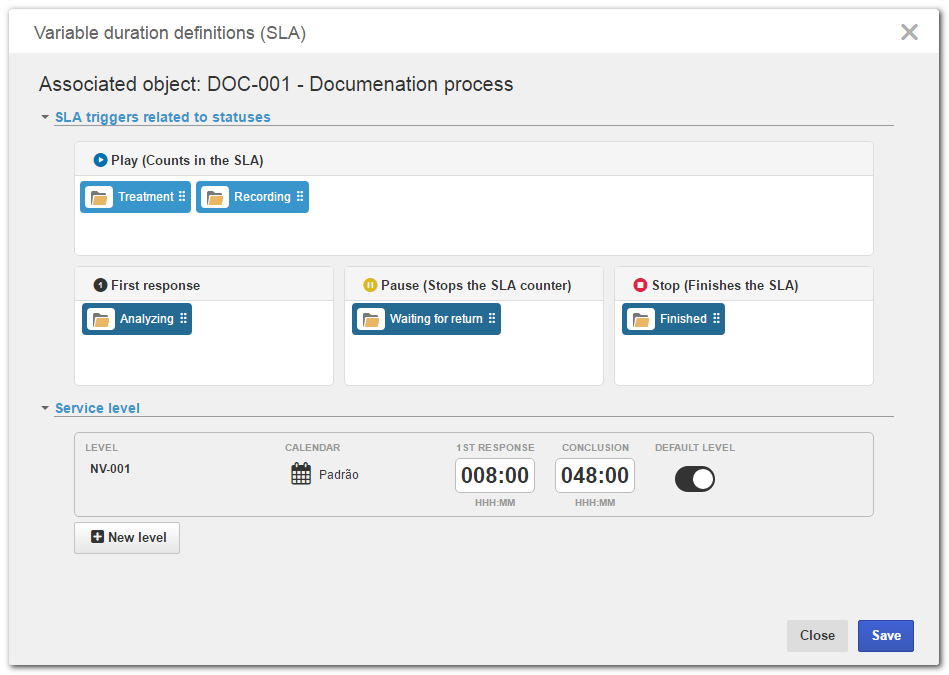
In SLA triggers related to statuses, the system will display the Play (Counts in the SLA), First response, Pause (Stops the SLA counter) and Stop (Finishes the SLA) triggers, in which the statuses associated with the process activities must be assigned. At this point, all the process statuses are in the Play item. Drag the statuses to the First response, Pause, and Stop triggers as needed:
Play: The duration of the activities, whose statuses are configured in this step, will be considered for the SLA.
|
First response: Only one status may be assigned to this trigger. In this trigger, drag the status associated with a screening activity or that corresponds to taking on the service. In this step, the time of the first response, which is the time between the creation of the record and the first response received by the customer, will be calculated.
|
Pause: One or more statuses may be associated. In this trigger, drag all the statuses associated with the activities whose duration will not be considered for the SLA. In this step, time will not be accounted, because the activities of these statuses are waiting for a return from the customer or are pending due to some other reasons.
|
Stop: One or more statuses may be associated. In this trigger, drag the statuses associated with the activities that will finish the SLA. Depending on the process mapping, the service may have already finished; however, the process flow will continue. In this step, it will be possible to associate, for example, the statuses of activities related to the satisfaction survey of the service that has just been performed, in addition to statuses associated with end points.
|
Comments:
▪The SLA starts when enabling an activity whose status is defined in the Play or First response step. The First response starts counting in the SLA when enabling the activity with the status of the First response step. ▪If there are no statuses associated with the Play or First response steps, the SLA starts counting right after the process starts. ▪Remember that, when executing an activity with the First response status, the respective step is finished; however, if the instance status once again becomes First response, the respective step will be updated, that is, it will again be considered in the SLA duration. ▪If there is no status defined in the first activity of the process, the SLA will be started in the Pause step. ▪When adding a status in the process, it will be automatically added to the Play step. ▪When deleting a status from the process, and it is no longer associated with any step of the process, it will be automatically deleted from the SLA. ▪When changing the configuration of the SLA triggers in a process with no revision control, the changes will be immediately applied to the in-progress instances. ▪The process imports and exports will not contain the SLA configurations. ▪The SLA configurations will be applied in the process copies. ▪The SLA configurations are kept in process revisions. |
|
3.
|
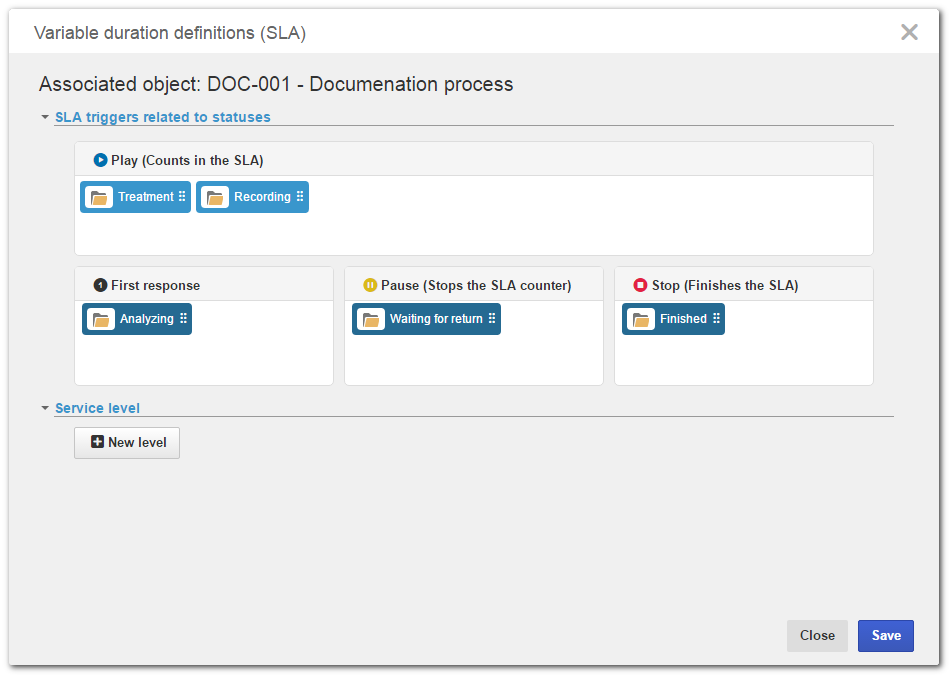
See an example of the distribution of statuses in each SLA step:
|
4.
|
In Service level, define the rules for the service levels. For that, click on New level. At this point, the system will display the rule configuration wizard.
|
5.
|
In the Rule step, click on the New rule button to define a condition to be applied to the service level in question. These rules are related to three variable types, which are: Process attributes, Form entity attributes, and Priority. For example, if the rule is configured with a Priority equal to "Normal", the service level in question will be applied if, during the execution of the process (in SE Workflow, SE Incident, or SE Problem), the "Normal" Priority is set. If needed, add other rules as conditions for the service level in question. After defining all the necessary rules, click on the Next button.
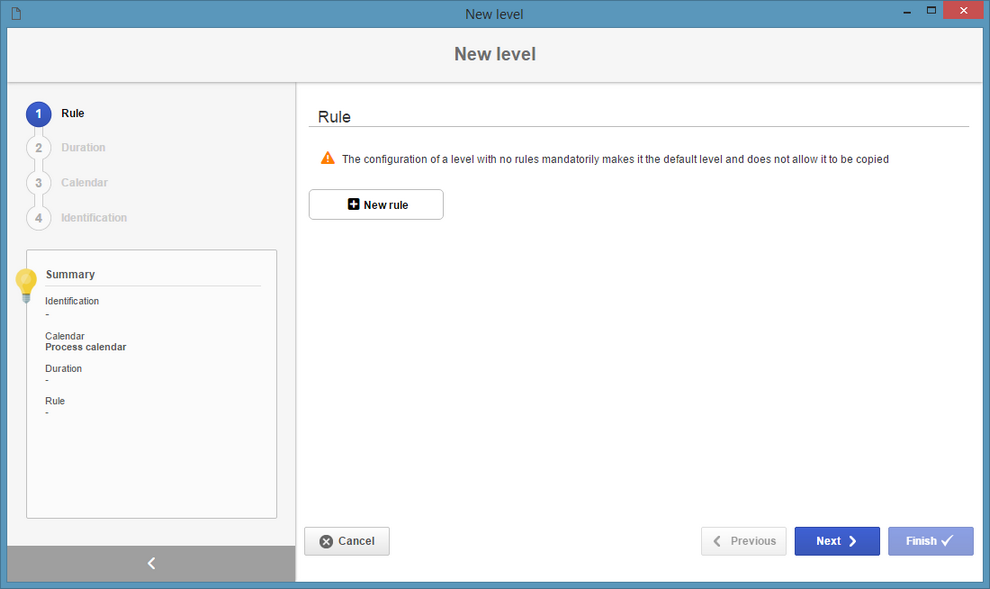
It is possible to set a level without rules; however, this level will necessarily be the default level. If new levels are added, at least one rule must be configured. In other words, only the default level may exist with no configured rules.
|
|
6.
|
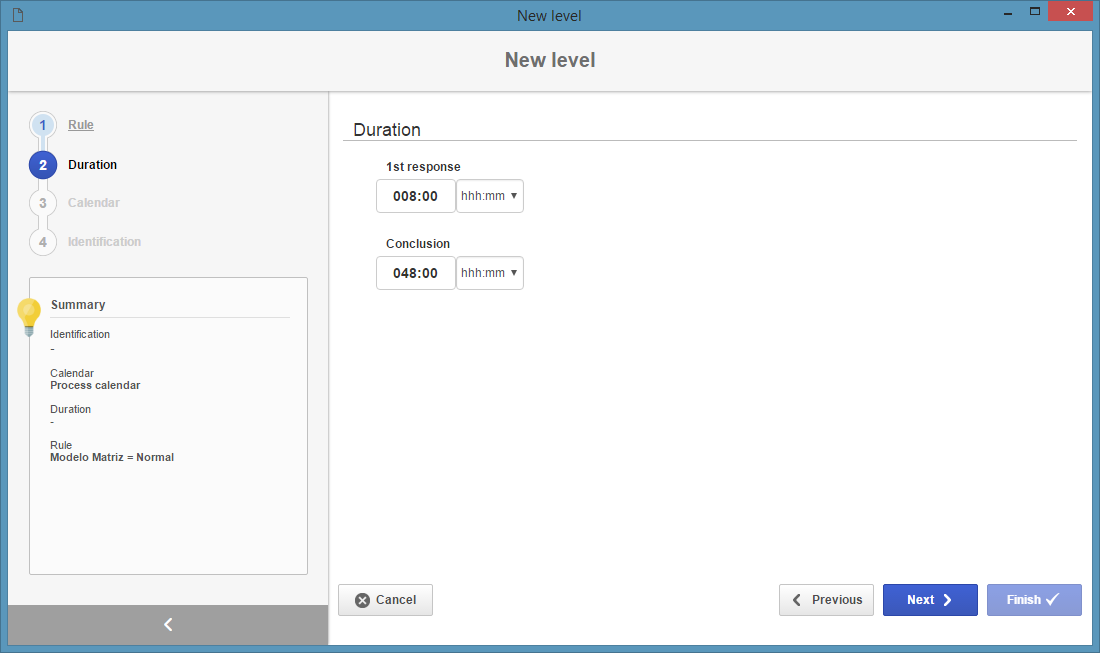
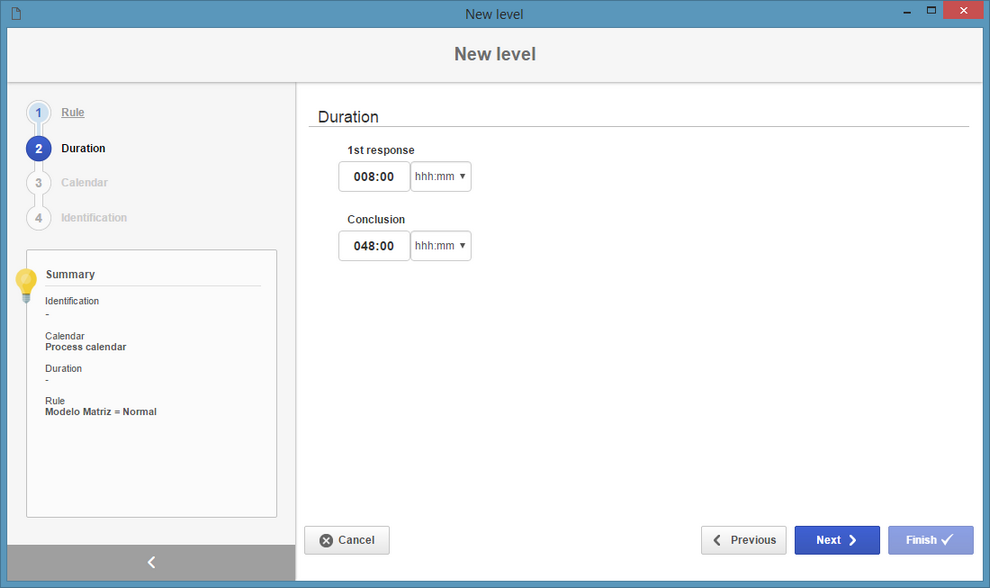
Use the Duration step to define the duration for the service level in question. To do that, fill out the following fields:
▪1st response: This field will be displayed if a status was configured as a trigger for the First response step. The duration can be given in hours/minutes or days. ▪Conclusion: Enter the total duration for the service level in question. The duration can be given in hours/minutes or days.
|
7.
|
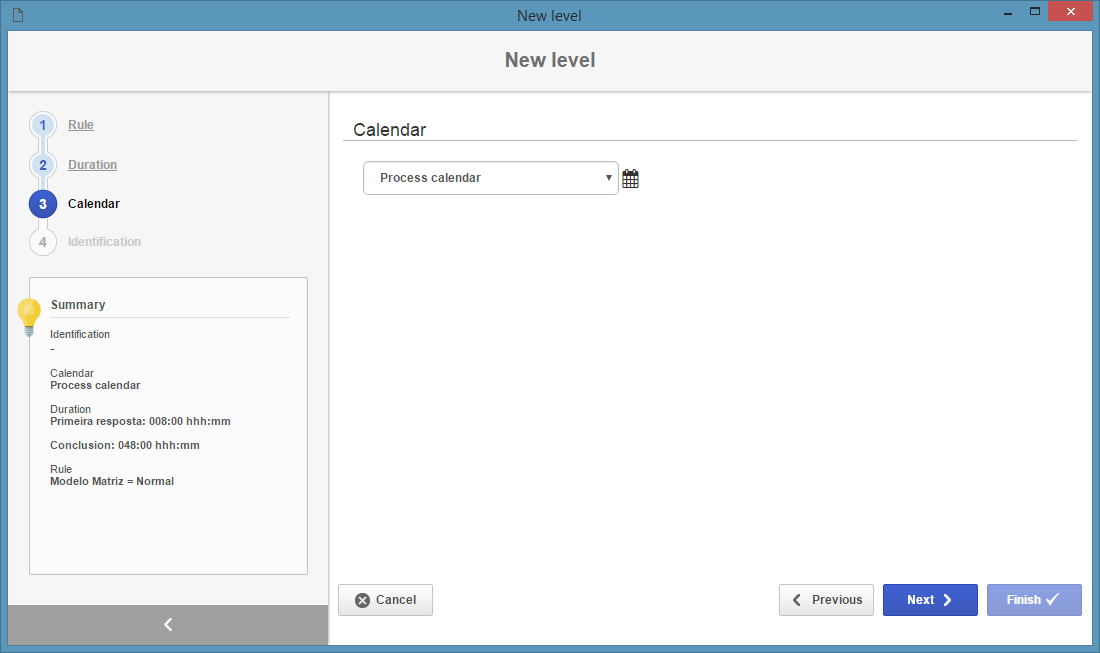
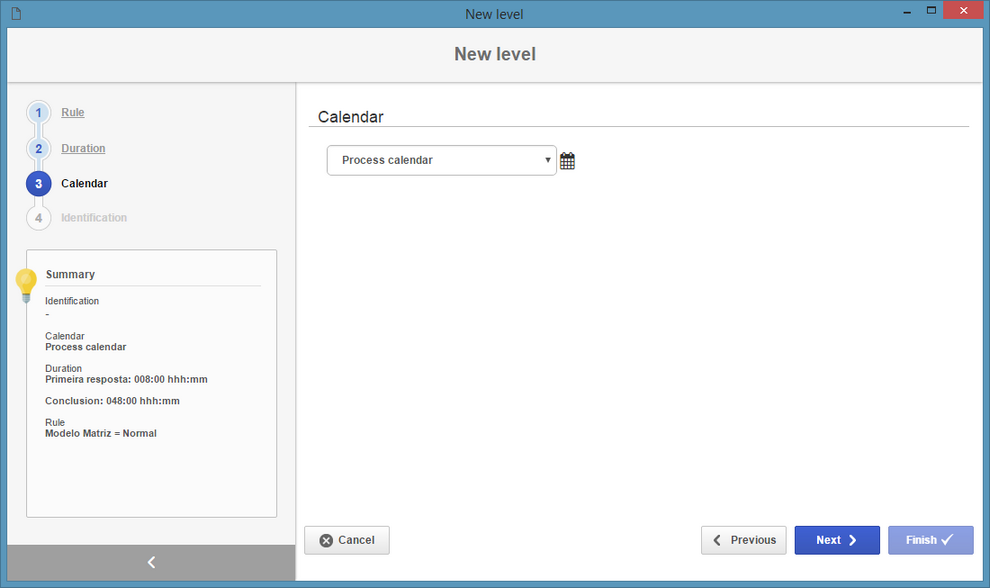
In the Calendar step, select the calendar to be used for this service level.
|
8.
|
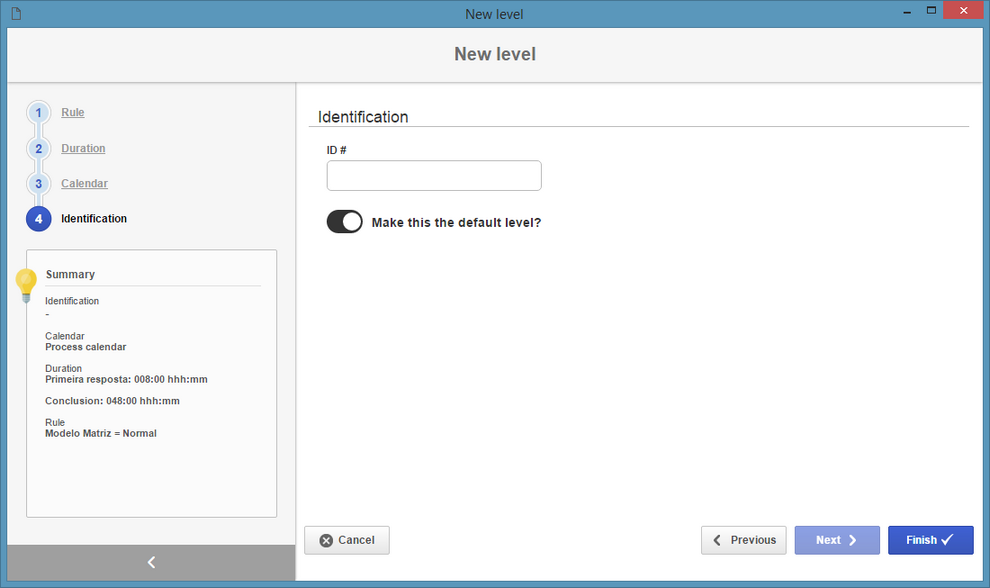
In the Identification step, enter an ID # for the service level in question. Check the Make this the default level field, in case there are other configured levels.
|
9.
|
After configuring the level, click on the Finish button. If needed, add new levels by repeating the procedure described above.
|
10.
|
When returning to the Variable duration definitions (SLA) screen, in the Service level section, the system will display a summary of each level, allowing some basic changes, such as the 1st response and conclusion durations.
|
11.
|
Click Save and close the screen.
|
|