Planning the data collection |
|
|
See how to plan the data collection:
1.On the main screen toolbar, click on the
2.At this point, the system will display the Collection planning screen:
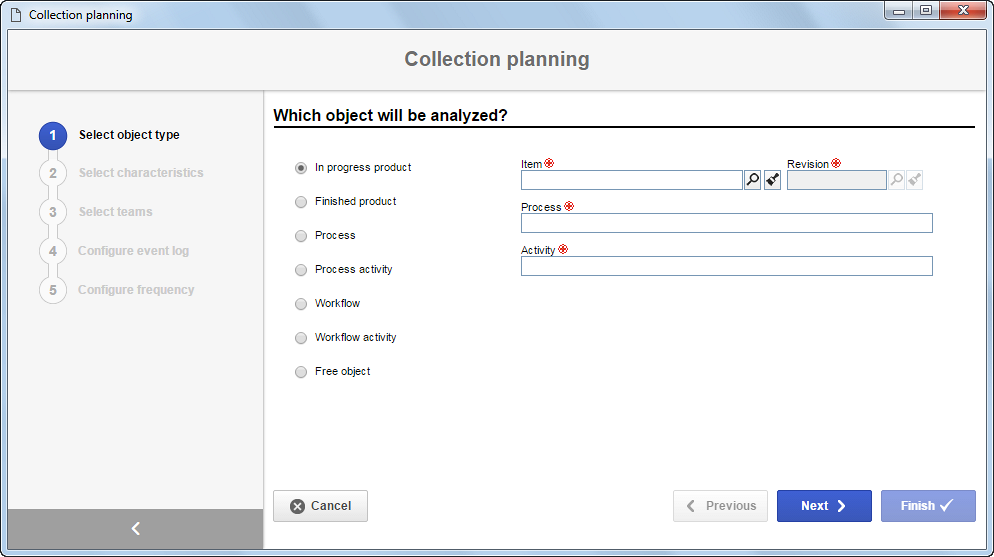
3.During the first planning step, select one of the options to define the type of the object that will be collected: In progress product: This option will be available if SE PDM and SE Process are part of the acquired solution. When selecting this option, enter the item, the item revision and the process involved in the data collection to be planned. Finished product: This option will be available if SE PDM is part of the acquired solution. When selecting this option, enter the item involved in the data collection to be planned Process: This option will be available if SE Process is part of the acquired solution. When selecting this option, enter the process involved in the data collection to be planned. Process activity: This option will be available if SE Process is part of the acquired solution. When selecting this option, enter the process and the activity involved in the data collection to be planned. Workflow: This option will be available if SE Workflow is part of the acquired solution. When selecting this option, enter the process involved in the data collection to be planned. Workflow activity: This option will be available if SE Workflow is part of the acquired solution. When selecting this option, enter the process and the activity involved in the data collection to be planned. Free object: When selecting this option, enter the object involved in the data collection to be planned. If the object is already created in the system, select the Use existing object option and select the object that will be used. If the object has not been created yet, select the Create new object option and enter the required data in this section to create the new object.
4.After entering the data of the object that will be analyzed, click on the Next button. The following step will be displayed:
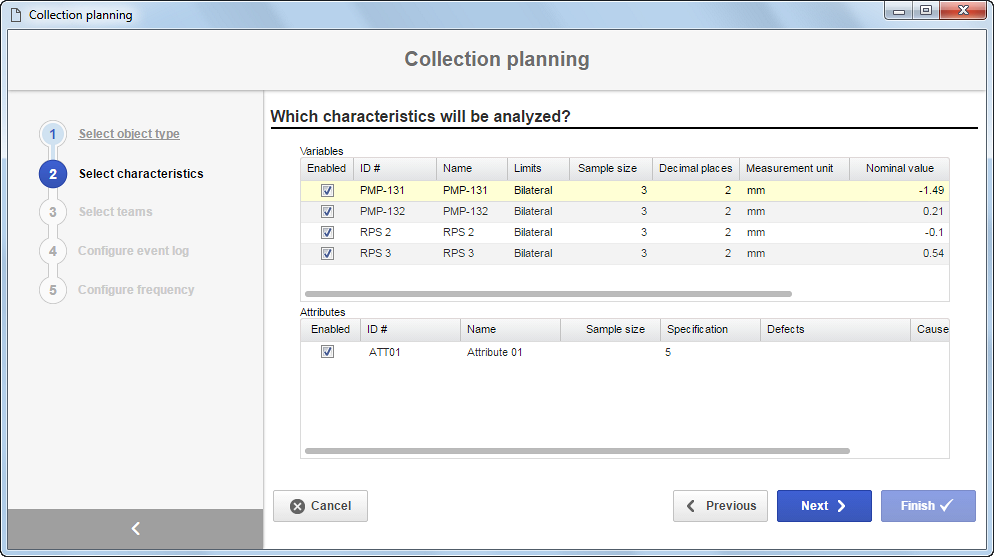
5.In the characteristic selection step, the system will display the object characteristics. Use the Enabled column, present in the Variables and Attributes section to only select the characteristics that must be analyzed. By default, all characteristics will be selected, so, to uncheck a characteristic, unselect the checkbox field of the corresponding characteristic. An unchecked checkbox means that the analysis of the characteristic in question will be cancelled for the collection in question.
6.After selecting the characteristic that will be analyzed, click on the Next button. The following step will be displayed:
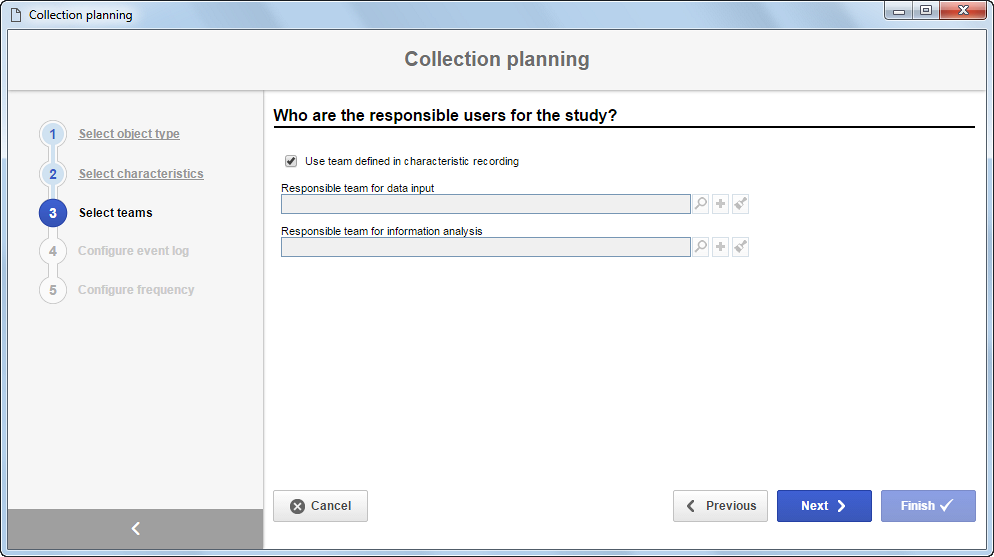
7.In the team selection step, define the parties responsible for the study. If the Use team defined in characteristic recording field is selected, it indicates that the system will use the teams defined when creating the characteristics. Otherwise, enter the teams responsible for the data input and for the information analysis.
8.After selecting the parties responsible for the study, click on the Next button. The following step will be displayed:
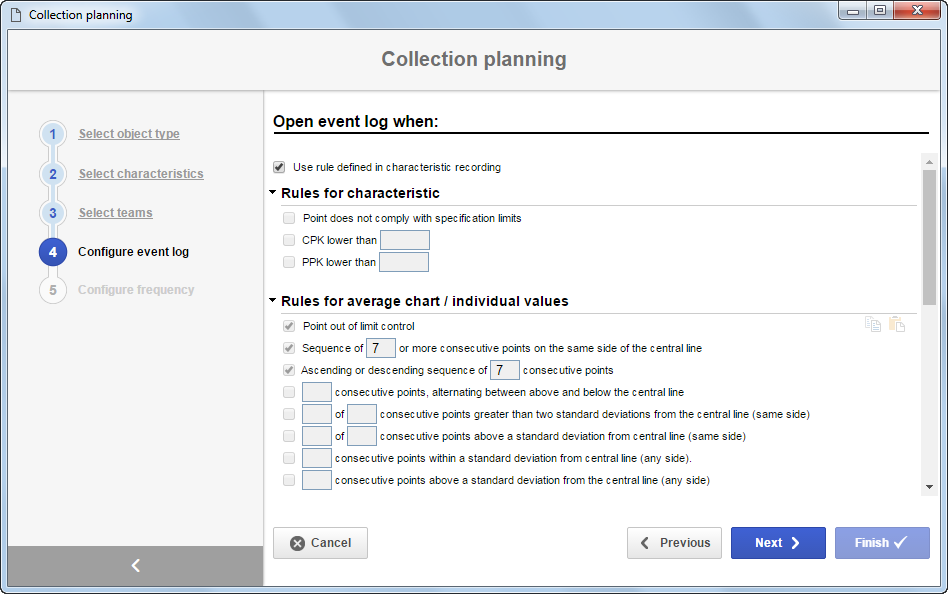
9.In the event log configuration step, define the rules to open the event log. Check the Use rule defined in characteristic field to use the rules configured for the characteristic. Otherwise, configure the rules in the sections of this step.
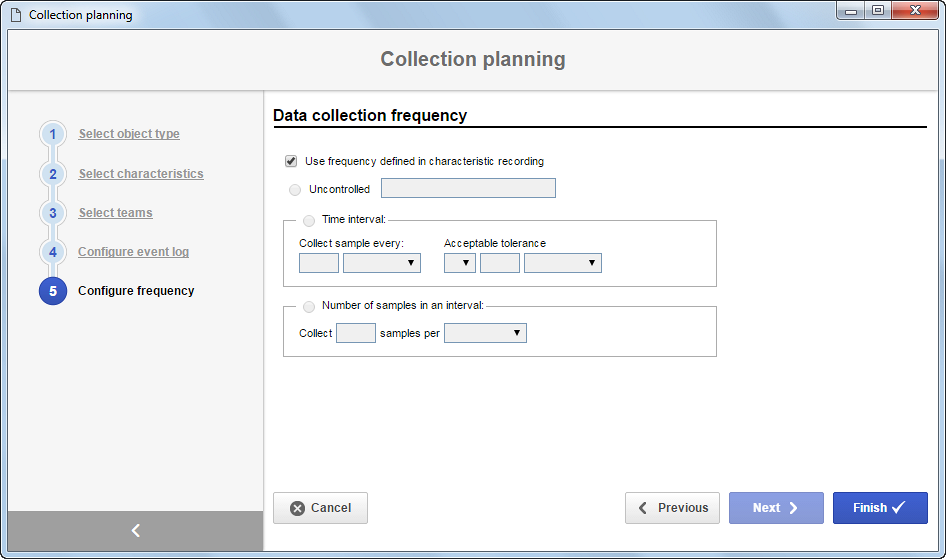
10. After configuring the rules for the event log, click on the Next button. The following step will be displayed:
11. In the data collection frequency configuration step, define how the data collection frequency control of the planning in question must be performed. Check the "Use rule defined in characteristic recording" field to use the frequency configured for the characteristic. Otherwise, select one of the following frequency options: Uncontrolled: Select this option for the data collection not to have a controlled frequency. Time interval: Select this option for the system to collect a sample in a given time interval. For example: Collect sample every 10 hours. Number of samples in an interval: Select this option for a determined number of samples to be collected in an interval. For example: Collect 5 samples per day.
12. After configuring the collection frequency, click on the Finish button. The data collection configuration screen will be displayed. Refer to the Data collection configuration section for details on how to perform the configuration of this screen. |