Configuring a standard activity type |
|
|
To add a new standard activity type, click on the
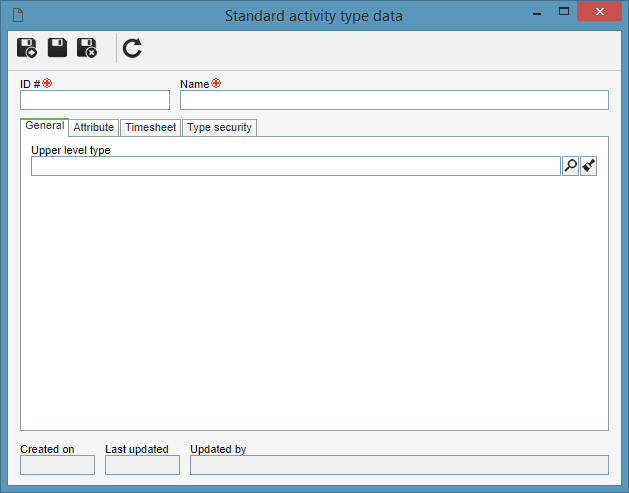
On the screen that will be opened, enter an ID # and a name for the standard activity type. The following tabs are available:
Note: To successfully add a standard activity type, it is necessary to fill out the desired fields in the General tab. After saving the data for the first time, the other tabs will be available to be filled out. GeneralUpper level type: Fill out this field for the type to be hierarchically added below another standard activity type. In this case, select the desired standard activity type. If a type is selected in the main screen hierarchy, this field will be filled out by the system, but it will be possible to edit it.
AttributeUse this tab to define attributes to complement the information of the standard activities of this type. On the side toolbar, the following buttons are available:
TimesheetThis tab will only be displayed if the "Integration with SE Time Control" option was checked in the general parameters. Use it to define attributes to complement the information of the timesheet in the standard activities of this type. On the side toolbar, the following buttons are also available:
Type securityIn this tab, it is possible to configure a security list for the standard activity type. To do that, select one of the following options: Public: Select this option so that any user of SE Asset has access to this type. Restricted: Select this option for only specific users of SE Asset to have access to the type. At this point, the sidebar buttons will be enabled. Use them to add, edit and delete accesses from the security list.
To add a new access to the security of the type, click on the 1.Select one of the following options to set the access type that will make up the security list: Team: It will be composed of the members of a team already registered in SE Asset. Organizational unit: It will be composed of users of a particular organizational unit or department of the organization. Department/Position: It will be composed of users from a specific department of the organization who have a specific position. Position: It will be composed of users who hold specific position in the organization. User: It will be composed of a specific user. All: It will be composed of all users who have access to SE Asset.
2.According to selected access type, Filters will be enabled to be filled out. Use them to make it easier to search for desired records.
3.If the selected access type is Organizational unit, the hierarchy of business units and the departments belonging to them (if any) will be displayed. Check the business units and/or desired departments. By checking the "Consider sublevels" option at the bottom of the screen, the system will also consider the organizational units that are down in the hierarchy of the selected organizational unit. Note that by checking this option, if new organizational subunits (whether they are business units or departments) are subsequently added, they will be automatically added to the security list. Next to the hierarchy, the system also makes available buttons that allow you to check all the sub-levels of a particular organizational unit or uncheck all sub-levels. Note that by using the "Check all sub-levels" button if new organizational sub-levels are subsequently added, they will not be included in the security list.
4.
5.In the Controls field, expand the list and check the desired actions. Then, define if they will be allowed or denied for the access type:
6.Once done, save your selection.
After performing all desired configurations, save the record. |