Scheduling a verification |
|
|
To schedule a location, first, locate and select the desired plan from the list of records in the second quadrant.
Once done, click on the
At this point, the system will display the scheduling wizard screen with the following steps:
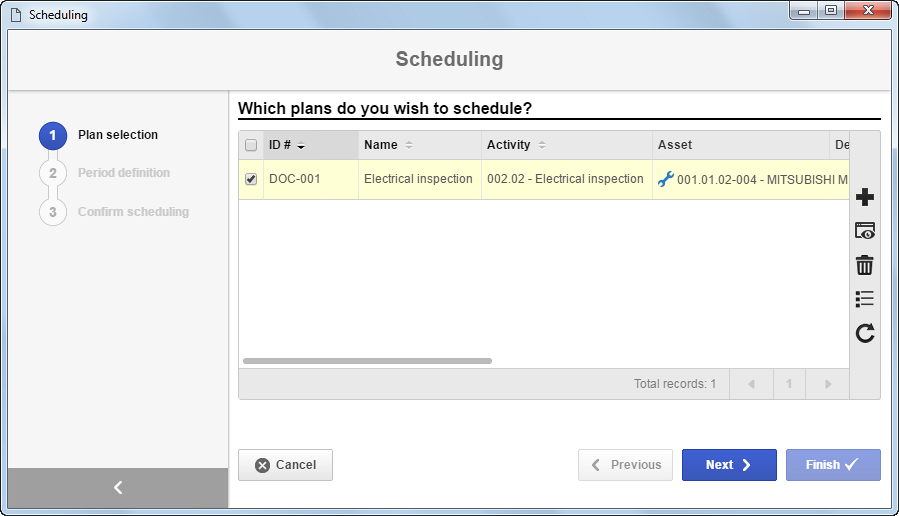
Plan selectionUse the Which plans do you wish to schedule? section to select all the verification plans whose activities must be executed within the period that will be scheduled. The list of records will display the plan that was selected in the list of records of the second quadrant, and it will be possible to delete it and/or associate other plans. For these operations, use the buttons available in the side toolbar.
Use the Next button at the bottom of the wizard to access the next step in which it is located.
Period definitionUse the What's the scheduling period? section to define up to when the verification activities will be scheduled. The number of schedules is obtained from the frequency defined in the standard activity of the verification plan. To define the period of the scheduling, fill in the following fields: Generate activities until: Select the date on which the scheduling period of the verification activities will finish. Activities start date: Select, in this field, whether the start date of each activity will be: ▪Fixed: Each activity will start exactly on the scheduled date, even if a previous activity has been executed after the scheduling date. ▪Variable: The start of each activity will vary according to the execution of the previous activity, respecting the frequency defined in the activity. Create activities in: Enter whether the verification activities will be created in the planning or execution step.
Use the Next button at the bottom of the wizard to access the next step in which it is located.
Confirm schedulingIn this step, all the information about the scheduling of the activities will be available. Check the scheduling information of the verification activities. Click on the Finish button to end the scheduling and exit the wizard.
|