Navigation:  Configuration > Computer > Import profile for computers >

Configuring an import profile for computers

Previous  Top  Next

To add a new import profile, click on the button on the main screen toolbar.


On the screen that will be opened, the following sections will be available:
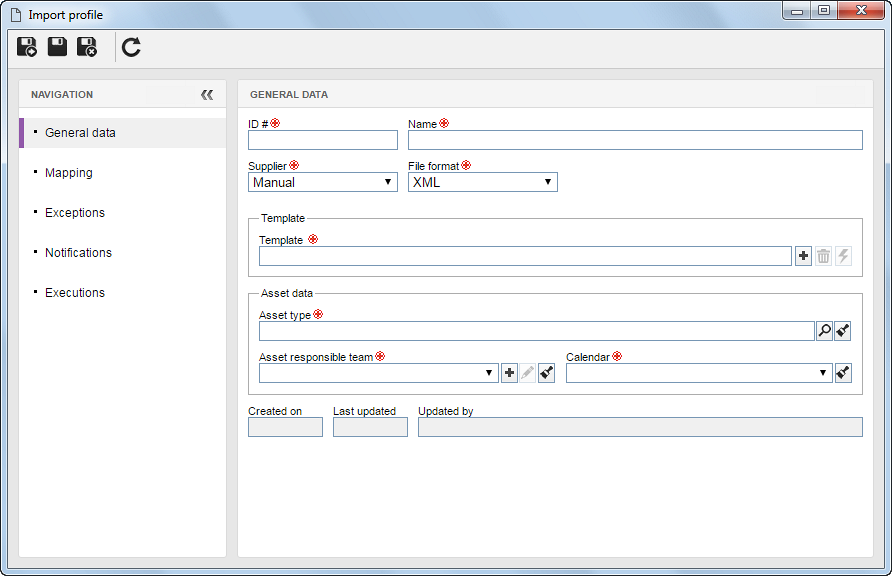


General data

ID #: Enter a number or code to identify the import profile.

Name: Enter a name for the import profile.

Supplier:

Manual: Select this option to use a file created manually. Thus, click on the button next to the Template field to select the file that contains the information about the computers that will be imported. Use the other buttons next to the field to clear it and view the selected template.

OCS Inventory NG: Select this option to use the XML file provided by the OCS Inventory software. The Restore default mapping button will be displayed, which, when clicked, will restore the default mapping for the supplier.

Setrion: Select this option to use the JSON file provided by the Setrion software. The Restore default mapping button will be displayed, which, when clicked, will restore the default mapping for the supplier.

File format:

XML: Indicates that the import will be performed from an .xml file. It will be displayed as checked by the system and it cannot be edited if the selected supplier is "OCS Inventory NG".

JSON: Indicates that the import will be performed from a .json file. It will be displayed as checked by the system and it cannot be edited if the selected supplier is "Setrion".

CSV: Indicates that the import will be performed from a .csv file. The following fields will be enabled:

oSeparator: Define if the separator used in the file will be "comma" or "semicolon".

oMy data contain headers: Check this option to indicate that the first line of the file is the header of the information that will be imported. If this option is not checked, the first line will not be considered a header.

Asset data:

Asset type: Select the asset type that will classify the computers imported by the profile.

Asset responsible team: Select the team that will be responsible for the computers imported by this profile.

Calendar: Select the calendar (SE Administration) that will be applied to the computers imported by the profile.


Mapping

In this section, perform the mapping of which file (XML, JSON, or CSV) information will be imported.

When the supplier of the import file is "OCS Inventory NG" or "Setrion", all the information will be already mapped, because these files have a default structure.

In the case of a "Manual" supplier, it will be necessary to map each field of the template selected in the General data section.


To add or edit the mapping a field, click on the button that will be displayed next to each field when hovering the mouse over them. At this point, the value selection screen will be displayed: Select the desired value and click on the Select button.


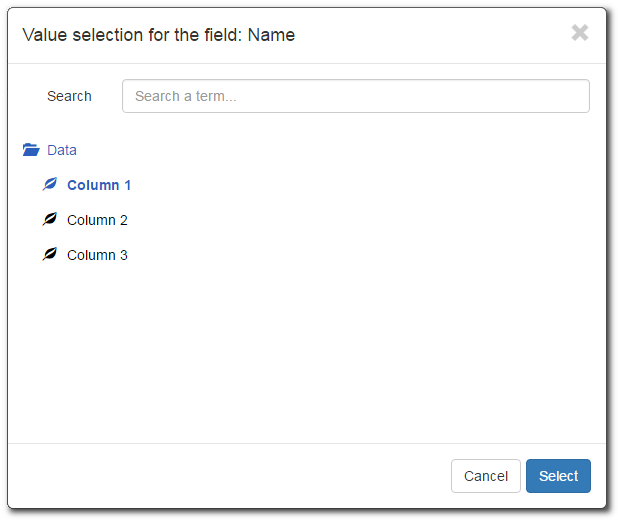
The image below exemplifies the mapping of the fields from a CSV file. In this case, three options are available, because the file has three columns. If the My data contain headers option is checked in the general data, the name of Column 1, Column 2, Column 3, ... Column N fields will be replaced by the header defined in the CSV file.


Exceptions

In this section, define the exceptions that will be required during the import. On the side toolbar, the following buttons are available:

Click on this button to add an exception to the import profile. On the screen that will be opened, select the characteristic and then the desired field. In the Contains field, enter the value that must be ignored. Once done, click on "Save". See an example in the picture below.

Click on this button to edit the exception selected in the list of records.

Click on this button to delete the exception selected in the list of records from the import profile.


This image exemplifies the configuration of an exception to ignore, during the import, computers whose manufacturer contains the word "Dell".

This image exemplifies the configuration of an exception to ignore, during the import, computers whose manufacturer contains the word "Dell".


Notification

Use this section to configure when the notifications related to the imported assets will be issued and who must be notified:

Send notification when

Option

Checked

Unchecked

RAM amount is modified

A notification will be sent when some information related to the RAM memory is changed.

For example, when the amount of memory in some of the computers imported through the profile in question decreases or increases.

A notification related to this situation will not be generated.

The processor is replaced

A notification will be sent when some information related to the processor is changed.

For example, when a processor is replaced by another, with a different speed (clock), number of cores, cache memory, etc.

Total storage capacity is modified

A notification will be sent when some information related to the storage is changed.

For example, when a hard drive is removed/added or when a hard drive is replaced by another one with more or less storage capacity.

A software is installed

A notification will be sent when a software is installed on a computer imported through the profile in question.

A software is uninstalled

A notification will be sent when a software is uninstalled on a computer imported through the profile in question.

Disk space is below

A notification will be sent when the percentage of available disk space on a computer imported through this profile is equal or less than the value entered in the Available disk space (%) field.

Send notification to

Option

Checked

Unchecked

Asset responsible team

The notifications generated by the previously checked situations will be sent to the users who belong to the team responsible for the asset.

The team responsible for the imported computers is defined in the "General data" section; however, after the import, it is possible to edit it.

The team responsible for the asset will not be notified when the previously checked situations occur.

In this case, it is possible to define who must be notified through the "Addressee" field.

Addressee

In this field, it is possible to associate a department, a position, teams, or even specific users to be notified when the previously checked situations occur. To do that, enter the desired name in the field and press Enter on the keyboard or use the button and select the desired record.

As addressees are associated, they will be displayed in the area right below the field. To disassociate an addressee from the profile, hover the mouse over it and click on the Close option. To disassociate all addressees from the profile, click on the button located next to the Addressee field.


Executions

This section displays the history of executions of the import profile. The execution of the import profile for computers may occur manually or automatically; the latter requires the configuration of an execution scheduling.


After performing all desired configurations, save the record.