|
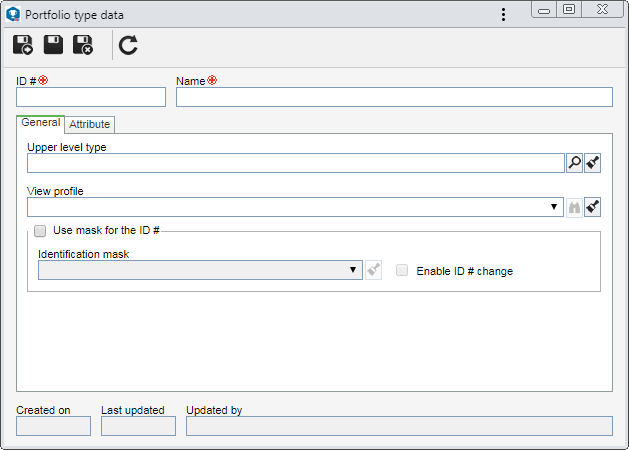
To configure a portfolio type, in the main screen toolbar, click on the  button. button.
On the screen that will be opened, enter an ID # and a name for the portfolio type.

Save the record. Configure the fields in the following tabs:
Field
|
Upper level type
|
Fill out this field for the type to be hierarchically recorded below the selected type. In this case, select the desired portfolio type. If a portfolio type is selected in the main screen hierarchy, this field will be filled out by the system, but it is possible to edit it.
|
View profile
|
Select the view profile that will be applied when viewing the schedule of the portfolios created in this type. Use the other buttons next to the field to view the data of the selected view profile and clear it.
|
Use mask for the ID #
|
Check this option so that, when adding portfolios to this type, the automatic identification resource is used. In the field that will be enabled, select the desired identification mask. Note that only masks whose object is "Portfolio" are available for selection. Check the Enable ID # change option to allow the generated ID # to be edited when adding portfolios to this type. If this option is not checked, the generated ID # may not be edited.
|
|
Use the Attribute tab to define attributes to complement the information of the revenues of this type. On the side toolbar, the following buttons are available:

|
Click on this button to associate an attribute that was previously created in the system with the type. Refer to the Adding attributes section for further details on how to perform this operation.
|

|
Click on this button to save the association of attributes with the revenue type.
|

|
Click on this button to disassociate the attribute selected in the list of records from the type.
|
If the attribute configurations are edited (e.g.: an attribute checked as required becomes non-required or vice versa), they will be replicated to the revenues of this type when their data is edited.
|
|
After filling all the required fields, save the record.
|


