|
To add a new template, click on the  button on the main screen toolbar. To edit the data of a template, select it in the list of records on the main screen and click on the button on the main screen toolbar. To edit the data of a template, select it in the list of records on the main screen and click on the  button. button.
On the screen that will be opened, enter an ID # and a title for the template. The following tabs are also available:
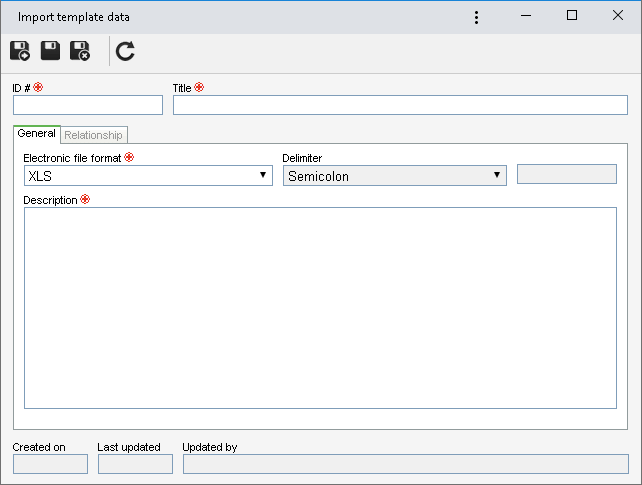
Note: To successfully add a template, it is necessary to fill out the required fields in the General tab. After saving the record for the first time, the Relationship tab will be available to be filled out.
General
Field
|
Electronic file format
|
Select the format of the electronic file that will be used when the data is imported: XLS or CSV.
|
Delimiter
|
This field will only be enabled if the "CSV" option is previously selected. In this case, select the separator that will be used in the files of this type: semicolon, tabulation or customized.
By selecting the Customized option, enter the desired separator in the field that will be enabled.
|
Description
|
Enter relevant information about the template.
|
Relationship
In this tab the template metadata are defined, which will be related to the indexes of the file that will be captured. Their completion will vary according to what the relationship is based on:
Template
1.First, fill out the Template field. To do that, click on the  button and, on the screen that will be opened, browse the files saved in the computer and select the desired template. The extension of this file must be: XLS or CSV, as defined in the General tab. Use the other buttons next to the field to delete or view the selected electronic file. button and, on the screen that will be opened, browse the files saved in the computer and select the desired template. The extension of this file must be: XLS or CSV, as defined in the General tab. Use the other buttons next to the field to delete or view the selected electronic file.
2.After that, click on the  button on the side toolbar. button on the side toolbar.
3.The system will question whether you wish to name the columns by the header of the selected file. Choose the desired option: ▪Cancel: Click on this option if the file does not have a title row. In that case, the system will create a sequential for the names of the fields, which can be edited later to reflect the real sense of them. ▪OK: Click on this option if the selected file has a row of titles. At this point, the file fields will be displayed, as shown in the following example:
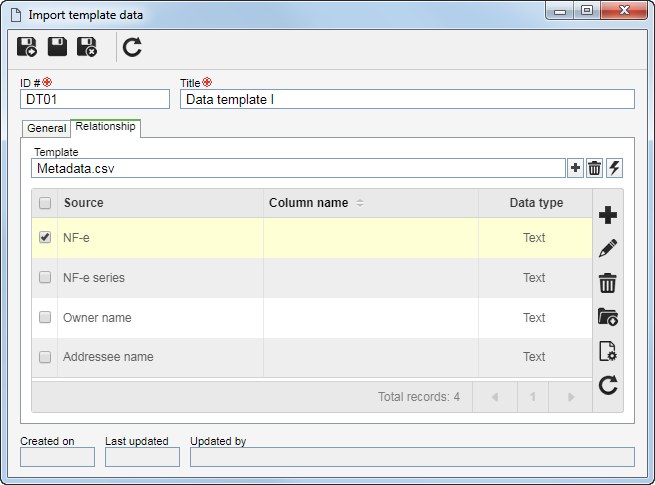
The fields defined in this tab will be presented later in the Relationship section of the capture configuration. So, it is important to give them relevant names. If the fields corresponding to the "Column name" are not filled in, at the time of the relationship in the capture configuration, the corresponding fields will be displayed with the name entered in the "Source" column.
|
Other relationship types
Click on the button to add a new metadata to the relationship. On the screen that will be displayed, fill out the following fields:
Field
|
Source
|
Enter the name of the metadata (index). The fields defined in this tab will be presented later in the Relationship section of the capture configuration. So, it is important to give them relevant names.
|
Column name
|
Fill out this field to define a name for the column. If this field is not filled out, in the capture configuration relationship, the corresponding fields will be displayed with the name entered in the "Source" field.
|
Data type
|
Select the data type supported by the metadata: text, numeric, date or memo.
|
After filling in the required fields, save the record. Repeat the procedure to add all desired metadata to the template.
Specific Buttons:
|
Click on this button to edit the metadata selected in the list of records.
|

|
Click on this button to delete the metadata selected from the list of records.
|

|
Click on this button to verify the relationship of the metadata selected in the list of records.
|
After performing the desired configurations, save the record again.
|