|
Responsibility route consists of a flow of users that will be responsible for certain steps in the SE Suite components, allowing even, to establish deadlines for its execution. Through this menu, it is possible to enter all possible responsibility routes that can be used in the planning approval, critical analysis, and/or closure steps of the surveys.
In the Configuration  Responsibility route menu, use the search panel to easily locate the desired routes through specific information. The result will be displayed in the list of records on the right side of the screen. Responsibility route menu, use the search panel to easily locate the desired routes through specific information. The result will be displayed in the list of records on the right side of the screen.
Use the buttons on the toolbar to add, edit, and delete routes, as well as to generate reports and enable or disable the record of the route selected in the list of records.
To add a new responsibility route, click on the  button on the main toolbar. To edit the data of a route, select it in the list of records and click on the button on the main toolbar. To edit the data of a route, select it in the list of records and click on the  button. button.
On the screen that will be opened, enter an ID # and a name for the responsibility route. The following tabs are also available:
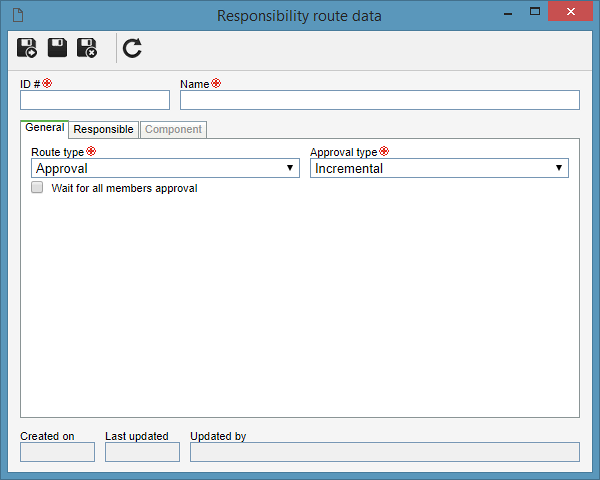
Note: To successfully add a responsibility route, it is necessary to fill out the required fields in the General tab. After saving the data for the first time, the other tabs will be available to be filled out.
General
Field
|
Route type
|
Select one of the following options:
▪Approval: The responsibility route may be used during the approval steps of the records created in the system. ▪Draft: The responsibility route may be used during the draft steps of the records created in the system. |
Approval type
|
This field will only be enabled to be completed if the "Approval" option is selected in the "Route type". Select one of the options to define how the approval will be performed:
▪Circular: The record will go through all the responsible parties in the route, but the approval will be performed by the last sequence. When choosing this approval type, the system will not allow the last sequence to have more than one responsible party. Consequently, if the route contains only one sequence, it may only have 1 responsible party. If the last sequence was configured with a department, position, or team, the member of the department/position/team who executes it first will approve or disapprove it for the other members. Then, make sure the department, position, or team is the most appropriate responsible party to approve the route. ▪Incremental: Just as a responsible party rejects the record, it returns to the step before its current step. |
Wait for all members approval
|
Check this option for the record to proceed to the next step only after all the members of the route release their tasks. If this option is not checked, the record will go to the next route step as soon as a member of the current step releases the task.
|
Responsibility
Use this tab to define the users responsible for the steps that records with this route will undergo. On the side toolbar, the following buttons are available:
|
Click on this button to add responsible parties for the steps defined in the route. See further details in the topics below.
|
|
Click on this button to edit the responsible party selected in the list of records.
|

|
Click on this button to delete the responsible party selected in the list of records.
|
Add an SE Suite user as responsible
To add an SE Suite user as responsible, click on the button on the side toolbar. On the screen that will be displayed, click on SE Suite and perform the following steps:
1.Select one of the following options to define the route responsibility:
Control
|
Area
|
The responsible parties will be the user of a certain department of the organization.
|
Position
|
The responsible parties will be the users who hold a certain position in the organization.
|
Department/Position
|
The responsible parties will be the users of a certain department of the company who hold a specific position.
|
User
|
The responsible party will be a specific user.
|
Team
|
The responsible parties will be the members of a previously created team.
|
2.According to the selected control, the Filters will be enabled to be filled out. Use them to easily search for the desired responsible parties.
3.Also, fill out the following fields:
Field
|
Checklist
|
Select the checklist that the responsible user must answer when approving/drafting the record under their responsibility.
|
Sequence
|
Enter the order of the responsible party for the execution of the draft/approval step assigned to them.
|
Deadline (days)
|
Enter the number of days the responsible party will have to execute the draft/approval step assigned to them.
|
Edit the approval flow?
|
Check this option so that when approving/drafting the record, the responsible party can edit, add or delete members with a higher sequence than them. If this option is not checked, the "Route" tab will not be displayed in draft/approval execution, not allowing the approval flow to be edited.
|
Require digital signature
|
Check this option so that it is mandatory for the documents to be digitally signed to allow releasing the approval task assigned to the responsible party. If this option is not checked, it will be possible to release the approval task without digitally signing the documents.
|
4.After entering the fields above, click on the  toolbar button on the selection screen. Based on the control selected and the values entered in the search fields, the result will be displayed in the list of records, on the lower part of the screen. Select the desired responsible parties. Hold the SHIFT or CTRL keys down or check next to each item to select more than one record at a time. toolbar button on the selection screen. Based on the control selected and the values entered in the search fields, the result will be displayed in the list of records, on the lower part of the screen. Select the desired responsible parties. Hold the SHIFT or CTRL keys down or check next to each item to select more than one record at a time.
5.Once done, save your selection. Repeat the procedure to add all desired responsible parties.
Add a guest as responsible
In the case of the approval route, it is possible to define a responsible party that is not a system user as the approver of the document to which the route is applied. In this case, click on the button on the side toolbar. On the screen that will be displayed, click on Guest and perform the following steps:
1.Enter the name of responsible party and their e-mail address for the document to be sent for approval.
2.In the E-mail template field, select a template created in the system. This template will be sent to the e-mail address of the responsible party with the approval lin. For further information, refer to the E-mail template section.
3.On the Sequence field, enter the order to send the approval assigned with the responsible party.
4.In the Deadline (days) field, enter the number of days the responsible party will have to execute the approval step assigned to them.
5.Use the Message field to add information to the body of the e-mail defined in the e-mail template.
6.Then, save. Repeat the procedure to add all desired responsible parties.
Component
This tab displays the SE Suite components that use the responsibility route. When you wish to use the same responsibility route in several components, the association of routes from other components may be done through the association of an existing record, available next to the add button in responsibility route creation, or through the SE Administration component.
After setting the necessary configurations, save the record.
|