|
This section answers some questions about tasks.
How can I receive task notifications by e-mail?
There are 3 verifications that should be performed to guarantee you will receive task notifications by e-mail:
1.User registration: View your user data, according to the "Modifying user data" section. On the General tab, check whether your E-mail has been registered.
2.SE Configuration  Configuration Notification: In the General section, check the Enable system notifications option. Configuration Notification: In the General section, check the Enable system notifications option.
3.SE Configuration Configuration E-mail server: There should be a default e-mail server configured properly. Access the e-mail server data and click on Send test e-mail to test e-mail sending.
If you are not allowed to make any of these changes, ask your manager or the system administrator.
|
How can I transfer my tasks?
See the necessary steps to transfer tasks:
1.Access My tasks menu and then click on the  button. The system will direct you to SE Administration Configuration Task transfer: User menu. button. The system will direct you to SE Administration Configuration Task transfer: User menu.
To be able to transfer your tasks, you need to have access to the Configuration  Tasks transfer User menu in SE Administration. Tasks transfer User menu in SE Administration.
|
To transfer tasks from a department, team or position, access in SE Administration component, the Configuration  Task transfer Department/Team/Position menu. The steps to transfer the tasks to users will be displayed, but the procedure for the department, team and position is the same; Task transfer Department/Team/Position menu. The steps to transfer the tasks to users will be displayed, but the procedure for the department, team and position is the same;
|
2.In the General search field, placed on the Search filters panel, enter the required fields and the other fields that can help search tasks that will be transferred:
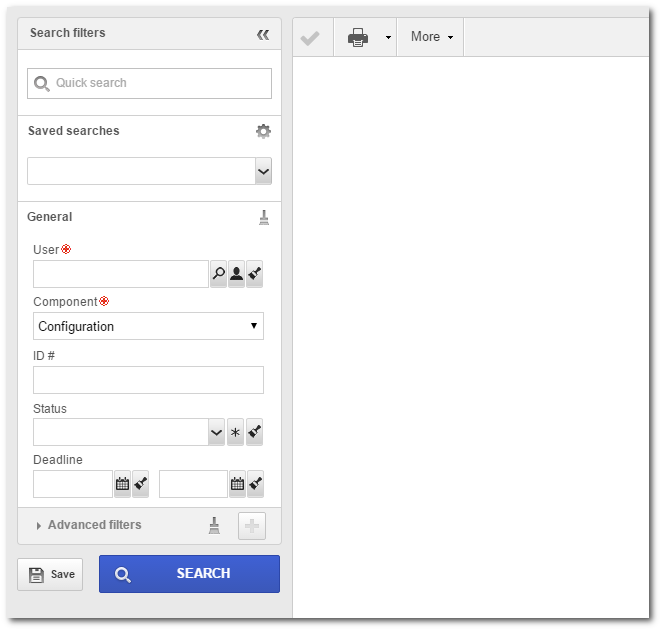
3.Fill out all required fields and then click on SEARCH button. All tasks that correspond to the filled search fields will be displayed.
4.In the To column, enter the new responsible user for each task that will be transferred, according to the transfer type (Department, Team, Position or User).
When accessing the user task transfer menu, the system will display the screen with the search fields to search the tasks. In the User field, the system will display the logged user and other users defined as subordinates in the logged user data.
|
5.Fill out the data above and then click on the  button. At this point, the pending records that were filled out will be transferred to the responsible user that was entered in the fields. button. At this point, the pending records that were filled out will be transferred to the responsible user that was entered in the fields.
If the tasks of a user are being transferred, by clicking on the button, a screen in which one of the following options must be checked will be displayed:
▪Definite transfer: Check this option for the tasks to be definitively transferred to the new responsible user. ▪Transfer tasks until [select a date]: Check this option for tasks to be transferred to the new responsible user until a certain date. By clicking on the link, a screen will be displayed to select the desired date. After this date, the tasks that have not been executed will return to the initial user. |
The task transfer button has not been enabled, how can I transfer my tasks?
▪Causes: The logged user has no permission to access the tasks transfer menu (SE Administration Configuration Task transfer User). ▪What can I do?: The system administrator should create an access group for those users who cannot access SE Administration component, (SE Administration Configuration Access group) that is specific for the task transfer menu. In this access group, the user should check only the task transfer options (team/user/department/position). In the access group data, all users who must have task transfer permission should be associated.
How can I transfer my tasks during my absence?
The system allows your tasks to be automatically transferred to another user for a certain period, for example, on the holidays. See below how to configure this transfer:
1.Access the data of the user who will have their tasks transferred (SE Administration File Organizational unit User). On the user data screen, access the Absence tab:
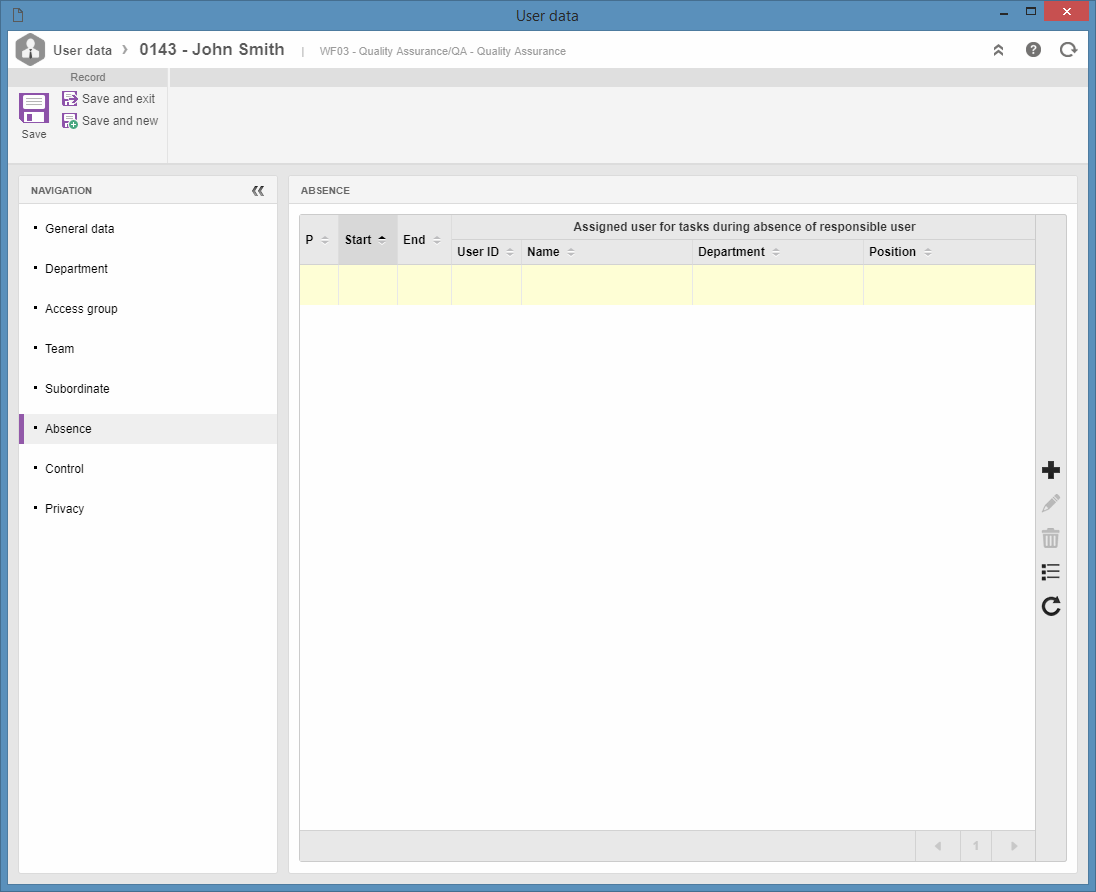
2.On the Absence tab, click on the  button and on the screen that opens, enter the absence period and who will be responsible for the tasks. If necessary, the user can configure exceptions. This means another user can be appointed as the responsible user for the execution of tasks from a determined component. button and on the screen that opens, enter the absence period and who will be responsible for the tasks. If necessary, the user can configure exceptions. This means another user can be appointed as the responsible user for the execution of tasks from a determined component.
3.Save the user data.
|