Navigation:  Management > Revalidation >

Revalidating a process

Previous  Top  Next

See how to perform a revalidation process:


1.

Use the Search filters panel to locate the process that will be revalidated more easily.


2.1_auxnmb

Select it and click on the new button on the toolbar.


Processes that are with a revalidation in progress cannot be revalidated.


3.

On the screen that will open up, the Data type, ID #, Name, Revision and Date fields will be entered with information from the process being revalidated.


revalidacao_dados


4.

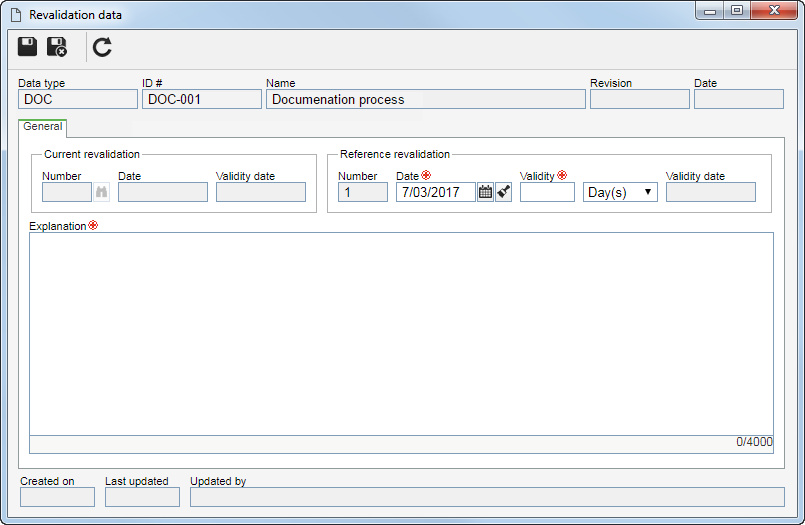
On the General tab, general information is available about the process revalidation. Fill out the following fields:

Current revalidation: The fields in this section are filled out by the system with the following information:

Number: Number of the process current revalidation. Click on the button located next to this field, to view the current revalidation data screen.

Date: Date on which the current revalidation of the process was executed.

Validity date: Date until which the current revalidation will be effective.

Reference revalidation: This section will display information on the revalidation being created. Fill out the fields related to the new validity date of the process:

Number: This field is filled in by the system with a sequential number to identify the revalidation that is being executed.

Date: This field is filled in by the system with the current data. If the "Enable revalidation date to be changed" option is not checked in the validity configuration associated with the process type, it will not be possible to change the date. Otherwise, it will be possible to edit the date, allowing a retroactive revalidation.

Validity: This field is filled in by the system with the Default time defined in validity configuration, which is associated with the process type that is being revalidated. If defined that the default time is Fixed, this field cannot be edited. If it is Variable, it is possible to define the time of the desired validity.

Validity date: After saving the record for the first time, this field is filled in by the system with the date until which the process in question will be valid.

Explanation: Enter an explanation for the revalidation of the process in question.


5.

Save the record. If the approval step is not parameterized in the validity configuration, the revalidation will be closed. Otherwise, do not close the data screen, because the Approval tab will be displayed.


6.

In the Approval tab, it is not possible to define the parties responsible for approving the revalidation in question. To do that, fill out the following fields:

Responsibility route: Select, among those saved in the system, the responsibility route for the navigation in question. If needed, use the buttons located next to the field to create a new responsibility route or clear the value filled in the field, respectively.

Wait for all members approval: Check this option for the revalidation approval to be released only after all route members approve their tasks.

Approval type: Define whether the approval will be:

Incremental: The revalidation may be approved/rejected by any member of the responsibility route.

Circular: The revalidation must go through all the members of the responsibility route and only the last member in the sequence may approve/reject it.


It is important to point out that the fields on this screen will only be available for editing if, in the Approval tab of the validity configuration, it is NOT set that the route type will be 'Fixed & unique'. If the 'Fixed & unique' route type is set, its fields will be automatically filled out by the system and may not be edited.


7.

If in the Validity configuration is set the Variable approval route type, the following buttons will be enabled on the toolbar located next to the list of records:

new

Click on this button to add a new member to the responsibility route. Refer to the Configuring a responsibility route section to obtain a detailed description on how to add a new member. It is important to point out that, if the member is being added to a route associated with the revalidation, this addition will only be valid for the process revalidation. It will not be replicated to the route record created through the Configuration arrowrgray Responsibility route menu.

edit

Click on this button to edit the data of a member. Select the desired record before clicking on the button.

delete

Click on this button to delete a member from the responsibility route. Select the desired record before clicking on the button.


8.1_auxnmb

1_auxnmbAfter filling out all the necessary fields, click on the save_exit button. At this point, the system will ask about sending the revalidation to approval. Confirm so that the revalidation can be sent to approval by the responsible parties. Refer to the Revalidation approval task to obtain further details about this operation.