Navigation:  Configuration > Requirement type > Configuring a requirement type >

Requirement security

Previous  Top  Next

See below how to configure the security list of the requirements created in the type in question:


1.

To do that, first of all, select one of the following options:

Public: Any user of SE Requirement will be allowed access to the requirements of this type.

Restricted: Only certain users of SE Requirement will be allowed access to the requirements of this type. When selecting this option, the side toolbar buttons will be enabled. Click on the button and fill out the following fields on the data screen that opens:


2.

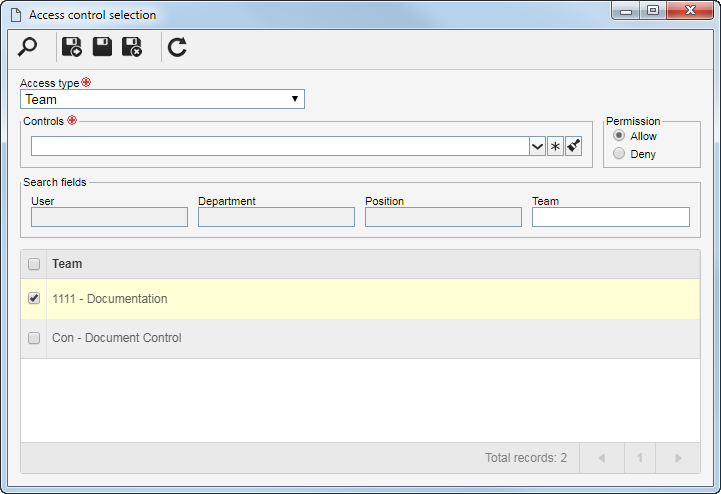
In the Access type field, select one of the following options to set the access type that will compose the security list:

Team: It will be composed of the members of a team previously created in SE Requirement.

Department: It will be composed of users from a selected department.

Department/Position: It will be composed of users from a specific department of the company, who have a specific position.

Position: It will be composed of users who hold specific position in the company.

User: It will be composed of a specific user.

All: It will be composed of all users who have access to the SE Requirement component.


3.

In the Controls field, it is possible to select the actions that may or may not be performed in the requirements of this type. To do so, select the controls that will be granted to access the type selected previously:

Add: Create requirements in this type.

Edit: Change the requirements data of this type.

Delete: Delete the requirements of this type.

List: View the requirements of this type in the records lists.

View: View the requirements data of this type.


4.

Select in the Permission field, if the controls checked previously will be granted or denied for access type.


5.

According to selected access type, Search fields will be enabled to be filled out. Use them to facilitate the search of users who will form the security list.


6.

Then, click on the button on the toolbar of the selection screen. Depending on the access type selected and the values entered in the filters, the result will be displayed in the list of records, located at the bottom of the screen. Select the ones that will compose the security list and save the record. Hold the SHIFT or CTRL keys down or check next to each item, to select more than a record at a time.