|
Location: Management  Control panel Control panel
Prerequisites:
▪Reporting an incident
Overview:
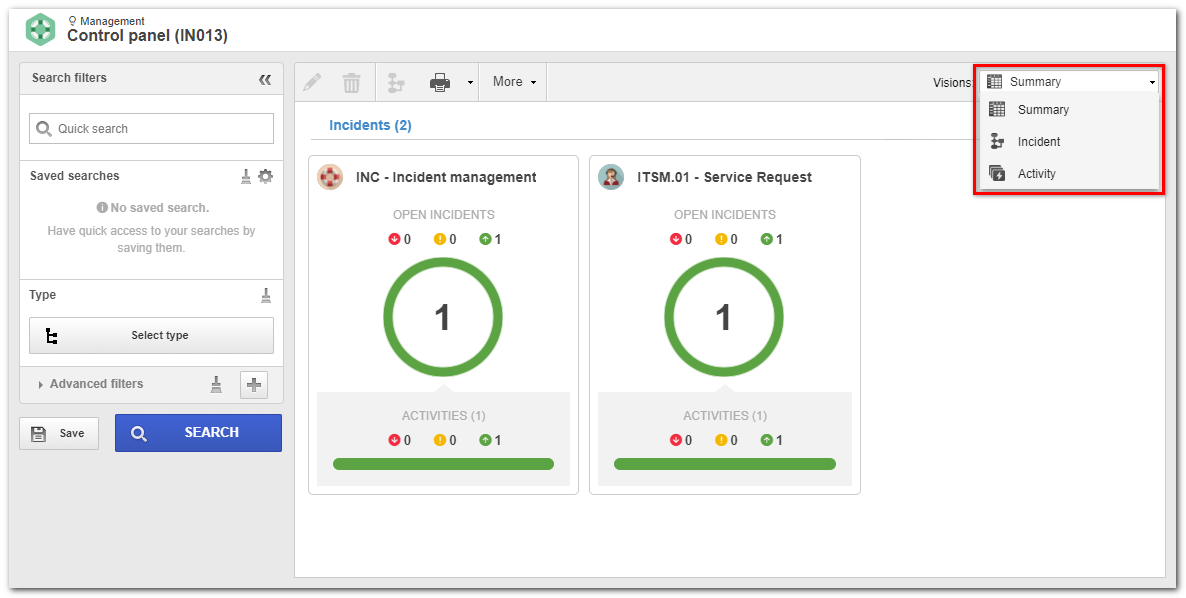
Through this menu, it is possible to obtain an incident management through an integrated vision, which allows for greater control and detail on the incidents that are under your responsibility, besides allowing a monitoring of the activities on time, close to the due date and past due.

Through this vision, it will be possible to perform an incident management through an integrated vision, which presents grouped information. In this vision, the users are presented with a card for each process that is under their responsibility. In this card, the system will display the number of instances that are in progress, also displaying how many of these are past due, on time or close to due date. The following buttons are available within each card:

|
Open activities: By clicking on this button, the card will be updated, displaying the number of instances in each incident activity. The color shown indicates the status of the process execution. When clicking on an activity, the card will be refreshed again (drill-down), presenting those responsible for the execution of the selected activity.
|

|
Responsible: By clicking on this button, the card will be updated, displaying the number of instances of each responsible party. The color shown indicates the status of the process execution.
|
Both in the visualization by open activities as by those in charge, the following actions can be taken for each task or person in charge of the card:
▪Redefine deadline: Clicking on this option will display a screen where you will be informed of the new deadline (Date and Time fields) of the activities. An Explanation will also be required for the change of the deadline. Next, the activities that will receive this new deadline must be selected. ▪Change executor: Clicking on this option will present a screen where the new party responsible for the execution of the activities should be informed. First, select the executor type (Specific user, Functional role, Department or Department/Position), and then select the new responsible user. It will be necessary to complete the Explanation for the change of executor. After defining the new executor, select the activities to be performed by the new responsible user. ▪Execute activity: Clicking on this option will display a screen with the activities that can be performed by the user logged into the system. This screen displays the buttons that allow you to Execute and View data from the activity selected in the listing. To execute an activity, select it from the list and then click on the "Execute" button. At this point, the activity data screen will be displayed in the execution mode.
|
In this vision will be listed all the incidents that are in progress. Note that if any incident process has been selected in the Summary vision, then only instances of the selected process will be presented. Use the following buttons, located on the toolbar, to exercise any action on any incident of this listing:

|
Click on this button to edit the data of the incident selected in the list of records. See further details in the Editing incident data section.
|

|
Click on this button to delete the incident selected from the list of records. It is important to point out that, to perform this operation, it is necessary to have the Delete control enabled in the incident security list. Remember that the incident record will be deleted from SE Incident, however its template will remain in SE Process.
|

|
Click on this button to access the process flowchart that automates the incident selected from the list of records. See more details on this operation in the Operations with incident flowchart section.
|

|
Click on the arrow next to this button to export the list of records displayed on the main screen to an Excel file, configure a new report or associate an existing report, or search for the parameters that can be used in the configuration of new reports.
|

|
Click on this button to edit the status of the incident selected from the list of records.
|
|
This vision will list all activities that are in progress. Note that if any incident process has been selected in the Summary vision, then only activities of the selected process will be presented. Use the following buttons, located on the toolbar, to exercise some action on some activity of this listing:

|
Click on this button to edit the data of the incident selected in the list of records. See further details in the Editing incident data section.
|

|
Click on this button to delete the incident selected from the list of records. It is important to point out that, to perform this operation, it is necessary to have the Delete control enabled in the incident security list. Remember that the incident record will be deleted from SE Incident, however its template will remain in SE Process.
|

|
Click on this button to access the process flowchart that automates the incident selected from the list of records. See more details on this operation in the Operations with incident flowchart section.
|

|
Click on the arrow next to this button to export the list of records displayed on the main screen to an Excel file, configure a new report or associate an existing report, or search for the parameters that can be used in the configuration of new reports.
|

|
Click on this button to edit the status of the incident selected from the list of records.
|
|
Use the "Search filters" to easily retrieve the desired records based on specific information. Refer to the "View  Incident" menu for a detailed description of the filters. Incident" menu for a detailed description of the filters.
|
|


