Checking an asset out for calibration |
|
|
See how to check an asset out for calibration:
1.In the list of records of the second quadrant, locate and select the desired asset. Use the CTRL or SHIFT key on the keyboard or the checkbox next to each record to select more than one asset at a time.
2.After that, click on the
3.Fill in the following fields on the data screen that will be displayed:
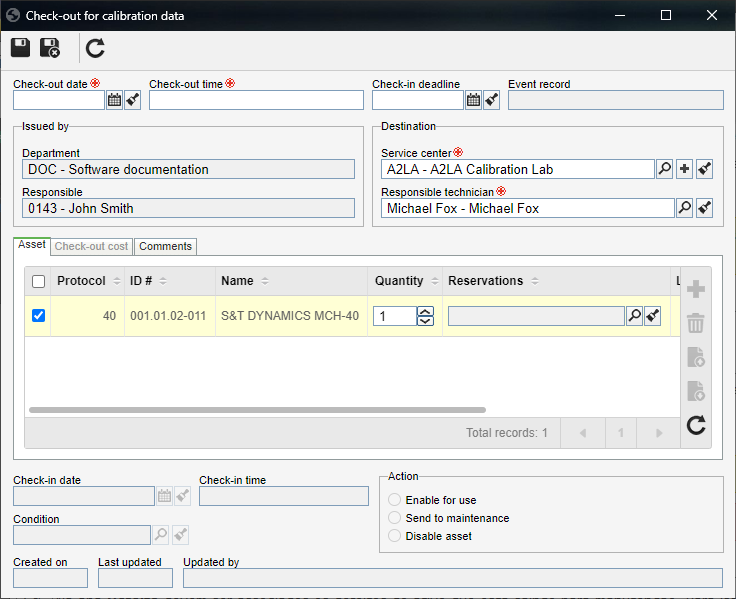
Check-out date: Enter the check-out date of the asset for calibration. The system automatically fills in the current date, but it is possible to edit it. Check-out time: Enter the check-out time of the asset for calibration. The system automatically fills in the current time, but it is possible to edit it. Check-in deadline: Enter the limit date for the asset check-in from calibration. Event record: This field is automatically filled in by the system with the record date of the event protocol. Issued by: The following fields are automatically filled in by the system with the department and the user responsible for issuing the calibration event. Addressee: Select the destination (department and responsible) data that will use the asset: ▪Service center: Select the service center that will perform the calibration of the asset. ▪Responsible: Select the name of the party responsible for the calibration of the asset.
4.The Asset tab displays general information about the asset. Enter them as follows: Quantity: Enter the number of assets that will be involved in the event. Reservations: If the asset to be checked-out is reserved, select the reservation number in this field. Location - Check-out: This field will only be available when the protocol data is saved for the first time. Then, select the changes that were made to the asset location.
5.Save the record after filling in the fields above; however, do not close the data screen. At this point, the other tab screens will be enabled to be filled out.
6.In the Check-out cost tab, all the costs that were associated with the check-out for the calibration of the asset are displayed. Then, for each displayed cost, it is necessary to enter a value in the list of records itself.
7. Search: Enter the name of the desired defect and, then perform the search. If needed, select more than one defect at a time from the list of records on the screen. Apply to all assets: Select this option for the defect to be applied to all assets in question. Remember that this field is valid when more than one asset is selected from the main screen. Asset: Select this option for the defect to be applied to a particular asset. In this case, select the desired record. Remember that this field is valid when more than one asset is selected from the main screen.
8. Asset: Select the asset. The system will only display the assets selected for this event. Defect: Select the defect among those selected on the previous tab, i.e., the system will only display the defects associated in this event. Cause: Select the cause of the defect. The causes must be previously created through the SE Asset component, in the "File
9.The Attribute tab displays all the attributes that have been associated with the asset event. Thus, required attributes must, necessarily, have their values filled in. For that, enter them in the list of attributes itself.
10.Use the Problem tab to enter, descriptively, the problems detected in the asset, which made it necessary to move them to calibration.
11.Use the Comments tab to enter general comments about the asset calibration event.
12.Save the record.
|