Editing form data |
|
|
In this section you will be presented how to edit the data of an already recorded form. See how to perform this operation:
1.Select the form to be edited, click on the arrow next to the button
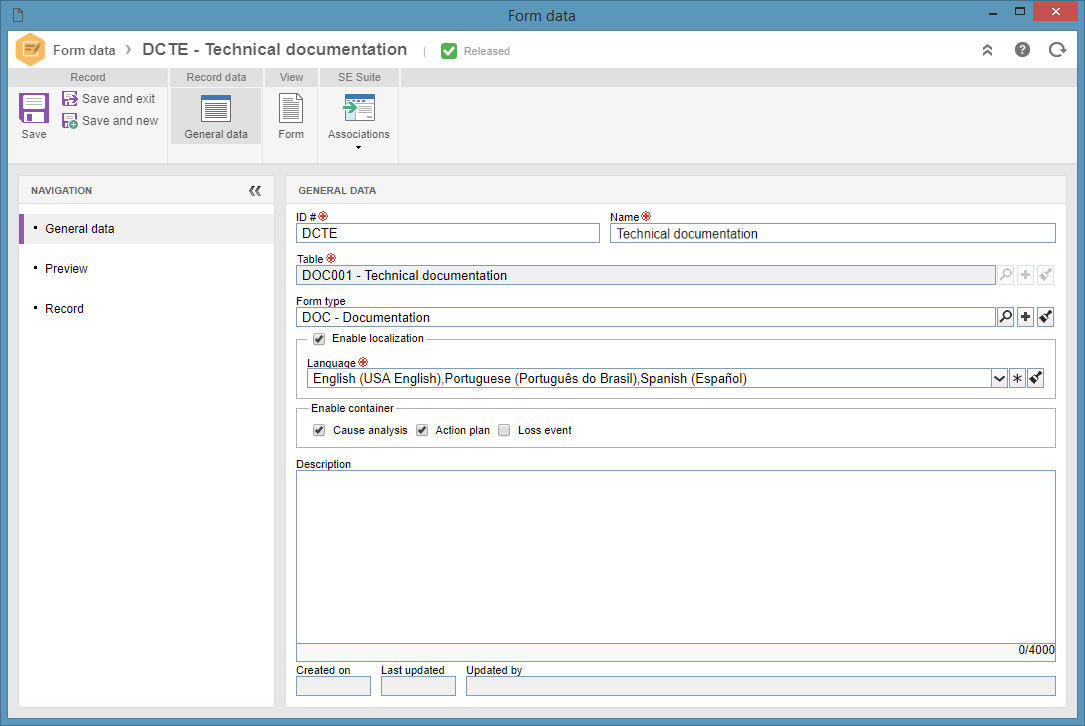
2.At this point, the following screen will be displayed:
3.In the General data ID #: Enter a number or code to identify the form. Name: Enter a name for the form in question. Table: This field will display the table that will be used by the form. Form type: Select the type that classifies the form being created. Enable localization: Check this option so that it is possible to configure the form in multiple languages, that is, to have the form fields appear in the language of the user who is executing. To do this, select to which languages the form in question can be translated. See the Translating forms section for details on how form translation is performed. Description: Enter a description for the form in question. Enable container: Check in this section, which containers will be enabled in the form. ▪Cause analysis: If this option is checked, the Cause analysis item will be displayed in the form editor. When associating a configured form with the Cause analysis container in a process with automation for SE Problem, the cause analysis step can be performed through the form, as long as this feature is configured in the process. ▪Action plan: If this option is checked, the Action plan item will display in the form editor. When associating a configured form with the Action plan container in a process with automation for SE Problem or for SE Incident, the creation/association/visualization of action plans can be done through the form, as long as the process is configured with the object association feature of SE Action plan. ▪Loss event: If this option is checked, the Loss event item will be displayed in the form editor. When associating a configured form with the Loss event container in a process with automation for SE Problem or for SE Incident, the creation and control of loss event can be done through the form, provided this feature is properly configured in the process.
4.In the General data
5.In the General data
6.In the Associations section, the user can check where the form in question has been associated.
7.Save the record after making the necessary changes. For more details on how to assemble the form, refer to the Form designer section. |