|
To add an object, click on the  button on the toolbar on the second quadrant of the main screen. On the screen that will be displayed, select the type (SE Administration) that will classify the object and save your selection. button on the toolbar on the second quadrant of the main screen. On the screen that will be displayed, select the type (SE Administration) that will classify the object and save your selection.
To edit the data of an object, select it in the list of records and click on the  button. button.
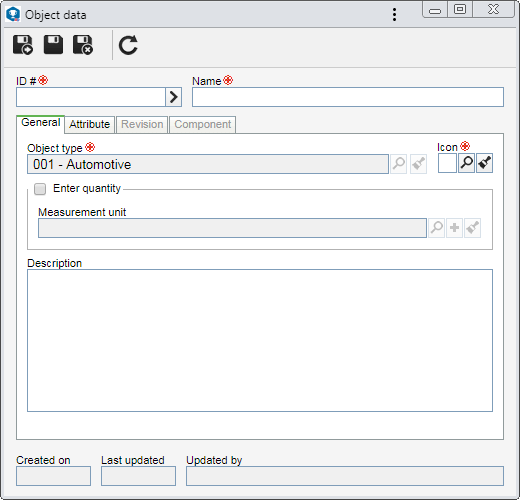
On the screen that will be opened, enter an ID # and a name for the object. To enter an ID # more easily, the button next to the "ID #" field can be used to generate a new sequential number. The following tabs are also available:
Note: To successfully create an object, it is necessary to fill out the required fields in the General and Attributes tab (according to the configurations performed in the object type). After saving the data for the first time, the other tabs will be available to be filled out.
Object type
|
Displays the object type selected during the addition.
|
Icon
|
Select the image that will represent the object.
|
Enter quantity
|
Check this option so that it is possible to enter the quantity of the object. In the respective field, select the measurement unit in which the quantity will be entered. Use the other buttons next to the field to add a measurement unit, associate it with the object and clear the field.
|
Description
|
Fill out this field to record important information about the object.
|
|
|
This tab will only be displayed if at least one attribute has been associated in the Attribute tab of the type that classifies the object. In that case, enter the value of the displayed attributes. Therefore, the required ones must, necessarily, have their values filled in. The way to fill in an attribute varies according to the configurations established when registering it.
|
This tab lists all revisions of this object. Note that the first revision is created with the object. Click on the  button to view the data of the object revision selected in the list of records. See further details about object revision in the Revising an object section. button to view the data of the object revision selected in the list of records. See further details about object revision in the Revising an object section.
|
This tab displays the SE Suite components that use the object. When you wish to use the same object in several components, the association of objects from other components may be done through the association of an existing record, available next to the add button in object creation, or through the SE Administration component.
|
After setting the necessary configurations, save the record.
|