|
See how to add new revenues:
1.On the main screen toolbar, click on the arrow next to the  button and click on the Revenue option. button and click on the Revenue option.
2.On the screen that will be displayed, fill in the following fields:
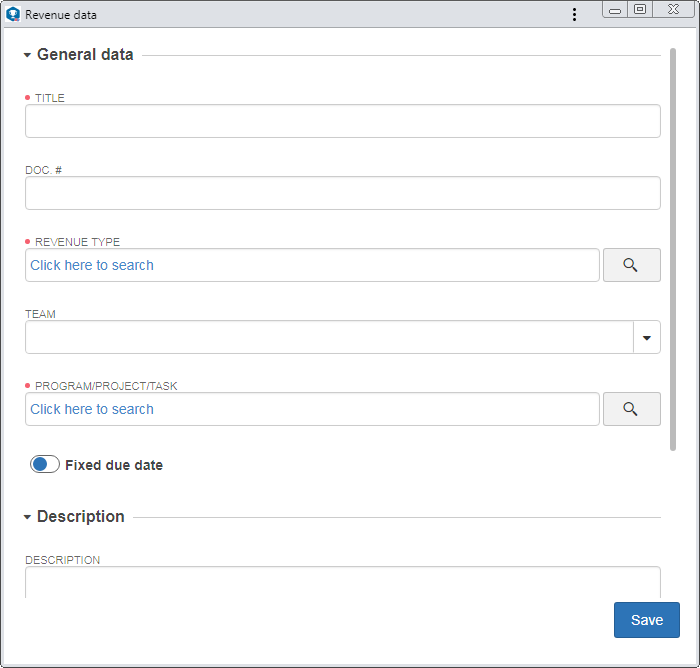
Field
|
Title
|
Enter a name for the revenue.
|
Doc. #
|
Enter the document number which the revenue is related to. For example, the number of an invoice.
|
Revenue type
|
Select the type that will classify the revenue that is being added.
|
Team
|
Select the team that will be responsible for managing the revenue being added.
|
Program/Project/Task
|
Select the program, project or nonproject task to which the revenue being added refers.
|
Fixed due date
|
If this option is not enabled, the revenue will follow the object execution flow, that is, its date may change according to the execution period. Enable this option to indicate that the revenue will happen in a specific day, regardless of whether it is within the execution period or not. Thus, the revenue due date will not be edited.
|
Planned/Rescheduled/Actual
|
According to the status in which the task, the project or the program to which the revenue is being added is found, these sections may be displayed. In it, the following fields will be available:
▪Due date: Select the date in which the revenue must take place. To do that, type the desired date in the "dd/mm/yyyy" format or click on the field and select the date. ▪Quantity: Enter the quantity of the item related to the revenue. ▪Unit value: Enter the unit value of the item related to the revenue. ▪Total value: This field will only be enabled if a quantity and a unit value are not informed previously. In this case, enter the total value of the revenue being added. If the quantity and unit value are entered, this field is filled out by the system with the total cost value (quantity * unit value). |
Attribute
|
This section will only be displayed if in the Attribute tab on the revenue type data screen, an attribute is associated. In that case, enter the values of the attributes that complement the revenue. Those attributes that are required must, necessarily, have their values filled in. The way to enter an attribute varies according to the configurations established when creating it.
|
Description
|
Enter relevant information about the revenue.
|
3.After filling all the required fields, save the record.
4.To add attachments to the revenue, select it in the main screen list of records and click on the  button. On the revenue data screen, access the Attachment section. Refer to the Adding attachments section for further details on how to add attachments. button. On the revenue data screen, access the Attachment section. Refer to the Adding attachments section for further details on how to add attachments.
|