|
To add a new range, click on the  button on the toolbar in the second quadrant of the main screen and fill out the following fields on the screen that will be displayed: button on the toolbar in the second quadrant of the main screen and fill out the following fields on the screen that will be displayed:
Field
|
ID #
|
Enter a number or code to identify the range.
|
Name
|
Enter a name for the range.
|
Configuration
|
Set the configuration that will be applied to the target percentage of the goal of the indicator to which the range will be associated:
▪The higher the better: Select this option when you want the measurement to be higher than the target set for an indicator. For example, in a "Billing" indicator, the higher the measurement obtained, the better for the organization. ▪The lower the better: Select this option when you want the measurement to be less than the target set for an indicator. For example, in a "Complaints" indicator, the smaller the measurement obtained, the better for the organization. ▪Stabilize: Select this option when you want the measurement to be stable relative to the target set for an indicator, that is, it must be a specific range of the target. By selecting this option, the system will set the range classification to be Others, and only sets of 3 or 5 items will be available for selection. |
Classification
|
Define how the measurement result of the indicator in relation to the range item score will be classified:
▪Optimistic: Select this option so that when the item has a score equal to or greater than the gauge measurement, the system considers that the target has been reached. For example, if the range item has a score of 100 and the measurement of the indicator is 110, the target is considered to be reached. ▪Pessimistic: Select this option so that when the item has a score equal to or less than the gauge measurement, the system considers that the target has not been reached. For example, if the range item has a score of 100 and the measurement of the indicator is 90, the target is considered to be unachieved. ▪Others: Select this option so that when the item has a lower and higher interval and the measurement is found between that interval, the target is considered to be reached. The range item intervals are entered through the Item tab. |
Gauge
|
Displays the default gauge of the system, and it is possible to edit it. Select the gauge that will be used to display the range values in relation to the measurement of the indicator.
|
Revision
|
Displays the number of the current revision of the range.
|
Status
|
Displays the current status of the range.
|
Validity start
|
This field will only be available for editing from the second revision of the range being created. In it, it is possible to select a date from which the revision of this range will be applied to the indicators with which it is associated.
For example, if it is defined that the range revision will have its validity start on October 1st, 2024 for a monthly indicator using it, the configurations performed in the revision will only be applied to the targets of the 10/2024 period.
|
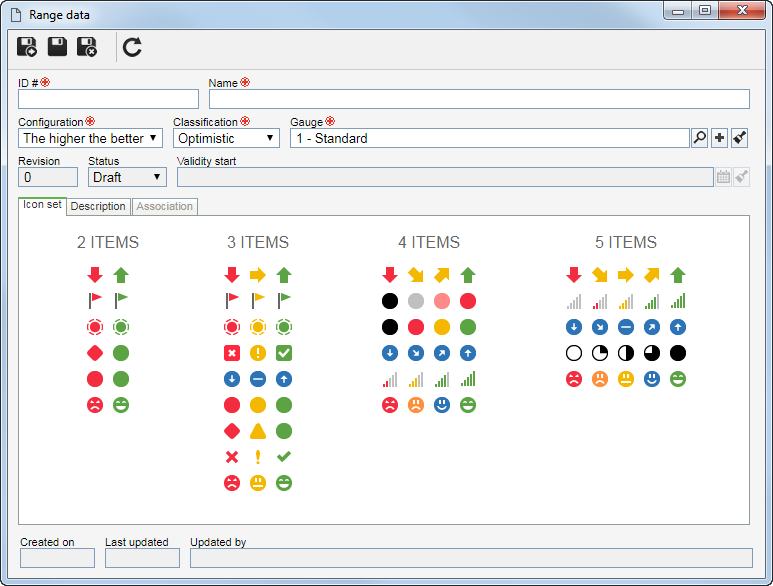
Icon set
|
This tab allows defining the icons that will be used to represent the range items. After saving the record, it will no longer be displayed, but it will be possible to define a set of icons or edit the selected set through the Item tab.
|
After filling out the required fields, save the record. At this point, the other tabs will be enabled for completion and, in the RS column on the main screen, the created range will be presented with the "Draft" status, identified by the  icon. Refer to the Configuring a range section for a detailed description of the other fields on the range data screen. icon. Refer to the Configuring a range section for a detailed description of the other fields on the range data screen.
|