|
See how to create the sending of the transport to its destination:
1.
|
In the list of records on the main screen, locate and select the planned transport that will be sent to its destination.
|
2.
|
After that, click on the  toolbar button. toolbar button.
|
3.
|
At this point, the transport sending data screen will be displayed:
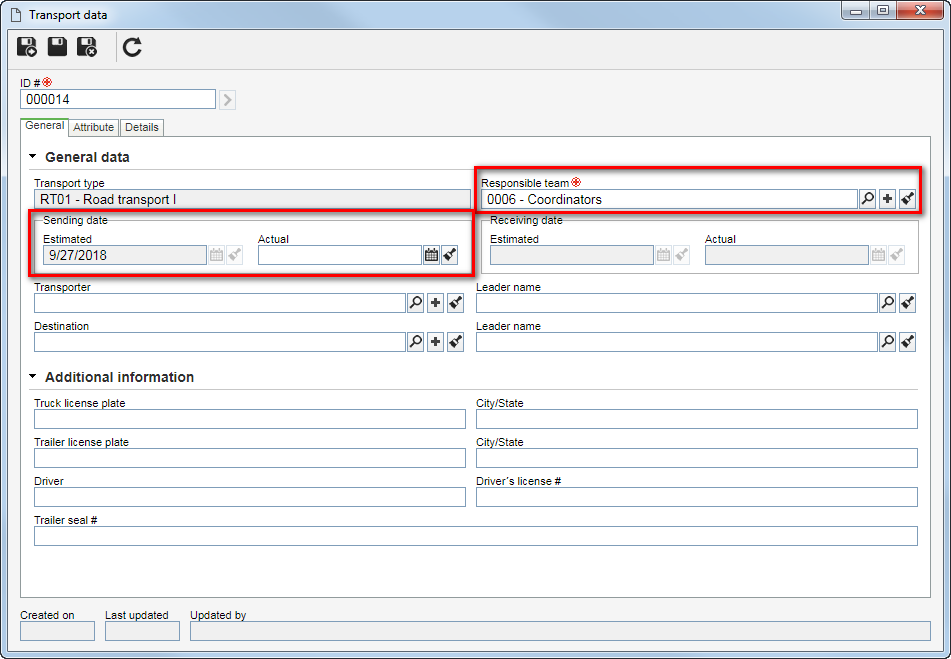
The image refers to the transport sending of an item. As the way to perform a transport sending is similar for all object types (supply, item, or waste), the description will be displayed in this section only.
|
|
4.
|
In the General data section in the General tab, fill in the following field:
Responsible team: Select the team responsible for the transport.
Sending date: In the Actual field, enter the actual date on which the transport in question was sent to its destination. If this field is not filled in, when saving the record, the transport will continue pending in the list of records on the main screen, that is, it will not be sent to receiving.
|
5.
|
If needed, it is possible to edit the other fields in the General tab (except those relating to the sending and receiving planned dates), the values of the attributes (if any) and the fields of the Details tab.
▪Remember that the fields displayed on the transport data screen may vary according to the type of the object being transported. ▪See the Planning a transport section for a detailed description of the tabs displayed on the transport data screen with their respective sections and fields. |
|
6.
|
After filling in all the necessary fields, save the record.
|
7.
|
At this point, the system will ask whether you wish to view the report for printing. Choose the desired option:
▪OK: The system will display the HWM - Hazardous waste manifest report and the transport will be sent to the receiving step. ▪Cancel: The transport will be sent to the receiving step without printing the report. |
|