|
The execution of an action plan action and an isolated action is similar. Thus, the description of how to perform this operation displayed in this section is valid for both action types. See below how to execute actions:
See a quick and easy way of executing an action in the "Executing an action" topic of the SE Action Plan Quick Guide!
|
1.
|
 To start the execution of an action, first locate and select the action you wish from the list of records. The actions with the "To be started" status can be identified with the To start the execution of an action, first locate and select the action you wish from the list of records. The actions with the "To be started" status can be identified with the  icon in the AS column. icon in the AS column.
|
2.
|
 After that, click on the After that, click on the  button on the main screen toolbar. button on the main screen toolbar.
|
3.
|
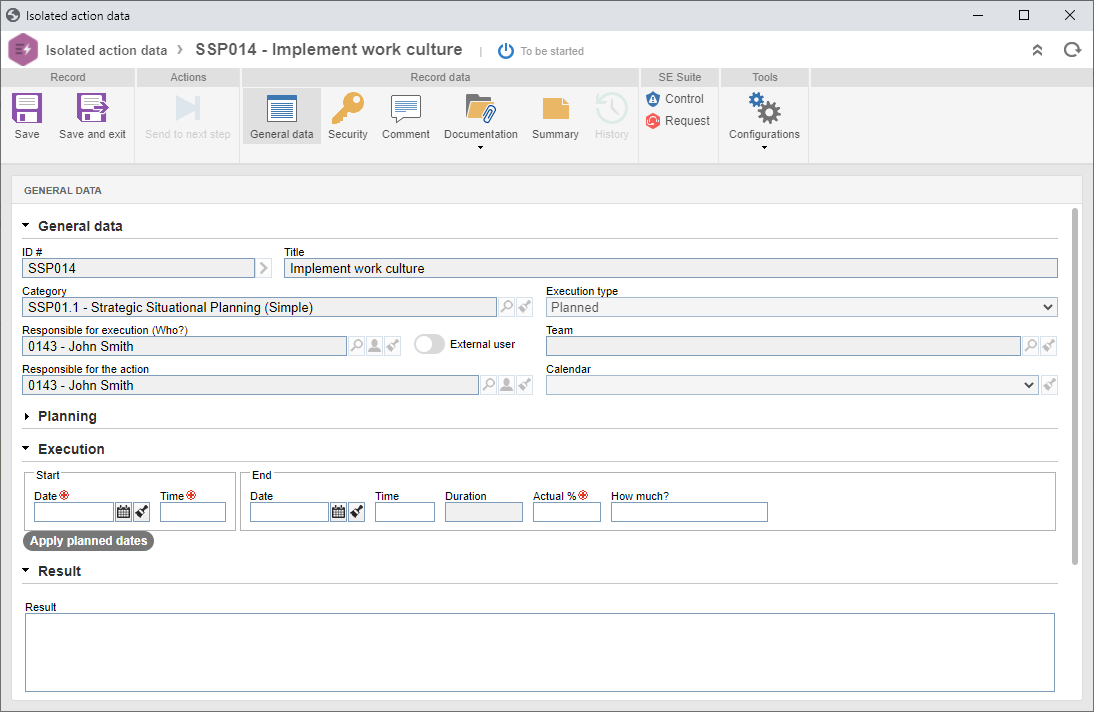
At this point, the action data screen will be displayed. In the General data section, fill out the following fields in the following sections:
 This image refers to an isolated action. The data screen of the action of an action plan is similar.
Execution
|
Start
|
|
Date
|
Enter the date on which the action execution started. It will only be possible to enter a start date that is earlier than the current date if the permission for retroactive dates during execution is configured in the general parameters.
|
Time
|
This field will only be displayed if the "Use hours and minutes in actions and plans" option is enabled in the general parameters. In this case, enter the time at which the action started.
|
End
|
|
Actual %
|
Enter the percentage of the action performed so far. The system only considers the action to be initiated when a percentage of the execution is reported between 1% and 99%. When 100% is entered, the remaining fields in the "End" section will be filled out, considering the action as finished.
|
How much?
|
Enter the cost generated with the action execution.
|
|
Result
|
Fill out the Result field with the consequence of the action execution.
|
If the action whose execution is being started, is sorted by a category:
▪The filling of the "How much?" and "Result" fields may be required, according to the settings made on Rule tab. ▪In which an execution checklist has been configured, it will be required to answer the checklist questions to successfully start the execution of the action. ▪In which execution attributes have been associated and configured as required, it will be required to complete the value of the attributes to begin the successful execution of the action. |
|
4.
|
Once done, save the record. At this point, the action status will change to "Execution". Refer to the Editing an action under execution section for a detailed description of the fields and sections that may be available to be filled in during the execution of the action.
|
1.
|
 To end the execution of an action, first locate and select it in the list of records. The actions with the "Execution" status can be identified with the To end the execution of an action, first locate and select it in the list of records. The actions with the "Execution" status can be identified with the  icon in the AS column. icon in the AS column.
|
2.
|
 After that, click on the After that, click on the  button on the main screen toolbar. button on the main screen toolbar.
It is important to note that to perform the action successfully, it is necessary to dully complete all the required fields of the action (execution checklist, attachments, etc.). When a required field is not filled in, the system will issue an alert informing the error. Refer to the Editing an action under execution section for a detailed description of the fields and sections that may be available for completion.
|
|
3.
|
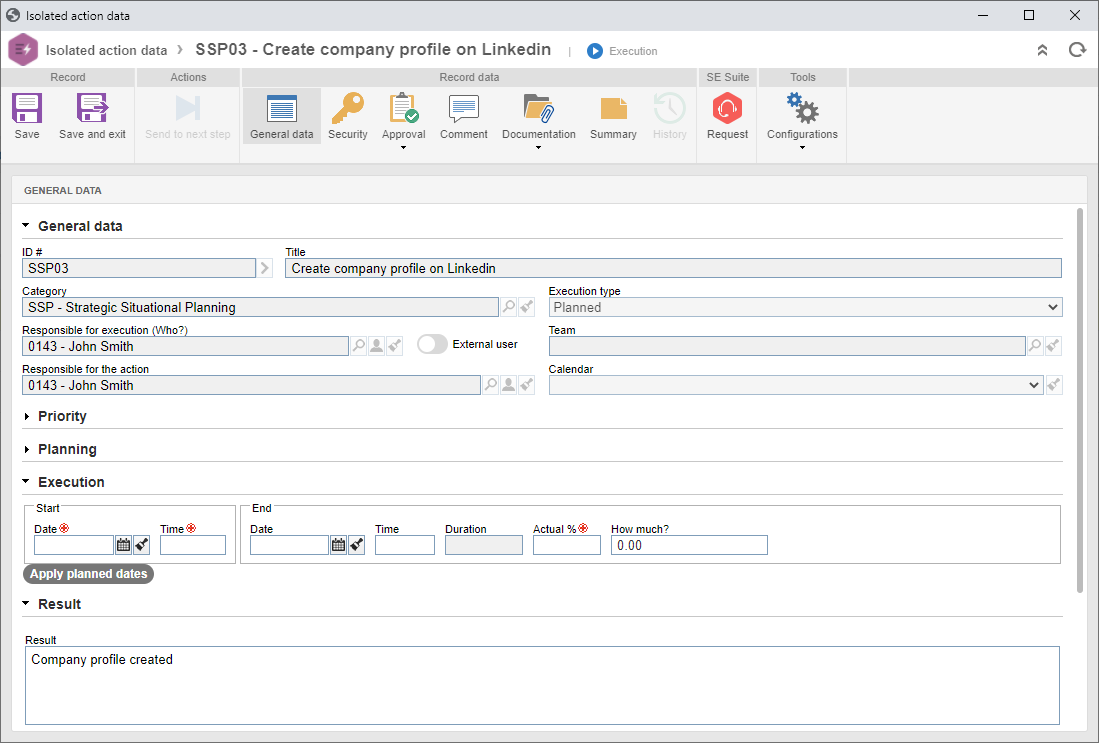
At this point, the action data screen will be displayed. In the General data section, fill out the following fields in the Execution  End section: End section:
 This image refers to the action of an action plan. The data screen of an isolated action is similar.
End
|
|
Date
|
Enter the actual end date of the action execution. It is only possible to enter an end date that is earlier than the current date if the permission for retroactive dates during execution is configured in the general parameters. When filling out this field, the Actual % field will be completed by the system with the value 100%.
|
Time
|
This field will only be displayed if the "Use hours and minutes in actions and plans" option is enabled in the general parameters. It will be filled out with the date on which the action execution is being finished; however, it is possible to edit it. In this case, enter the time at which the action was completed.
|
Actual %
|
Fill out this field in with 100% to indicate that the action was finished. When filling out this field in with 100%, the Date field will be filled out by the system with the current date.
|
Use scheduled dates
|
Click on this option to use the planned dates as the execution (performed) dates of the action. In this case, the Start and End fields will be filled with the start and end dates defined in the planning of the action. Note that the Actual % field will be filled out with the value 100%.
|
|
4.
|
Once done, use the Save and exit or the Send to next step option. Choose the desired option:
OK: The action will continue to one of the following steps:
▪Action verification: If the action whose execution was closed is a plan action and, in its category, the Verification option is checked, the system will generate the Action verification task for the due responsible parties. ▪Effectiveness verification: If the action whose execution was finished is an isolated action and, in its category, the Verification option is checked, the system will generate the Effectiveness verification task for the due responsible parties. ▪Closure: If the action does not have an associated category, or the category does not have effectiveness verification configured, the action is finished. It will be possible to view it through the View  Actions and plans menu. Actions and plans menu. Cancel: The action will remain pending with the Execution status. In that case, it will be possible to send it to the next step using the  toolbar button on the main screen, or through the Action execution task. toolbar button on the main screen, or through the Action execution task.
|
These operations can also be performed through the Action execution task and through the Action execution widget, as long as it is made available through a portal.
|
|


