Creating a storage place |
|
|
To add a new storage place, click on the
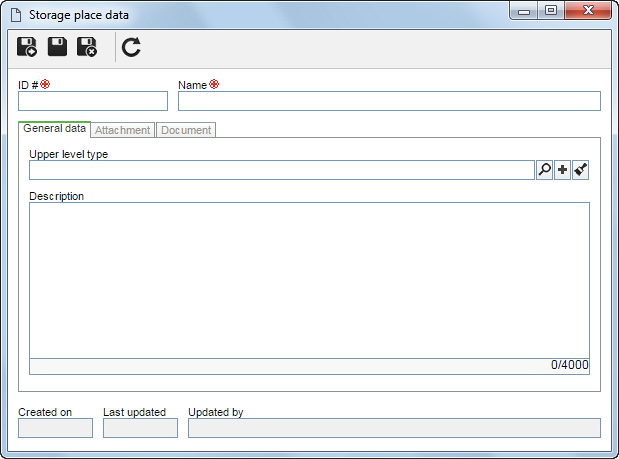
On the screen that will be opened, enter an ID # and a name for the storage place. Fill out the desired fields in the following tabs:
Note: To successfully add a storage place, it is necessary to fill out the desired fields in the General tab. After saving the data for the first time, the other tabs will be available to be filled out.
General dataUpper level type: Fill out this field for the storage place to be hierarchically added below another location. In that case, select the desired storage place. If a storage place is selected in the main screen hierarchy, this field will be filled out by the system, but it will be possible to edit it. Description: Use this field to record important comments on the storage place.
AttachmentIn this tab, it will be possible to add, delete, download and view the attachments related to the storage place. For further details on how to add attachments to the record, see the Adding attachments section.
DocumentThis tab is only available if the SE Document component is part of the solutions acquired by your organization. Through it, it is possible to add, delete, download and view the electronic file and the data of the documents related to the storage place. Refer to the Adding documents section for further details on how to add and/or associate documents from SE Document.
When all desired fields are filled out, save the record. |