Checking the asset in from maintenance |
|
|
In the list of records on the main screen, locate and select the desired asset. Use the CTRL or SHIFT key on the keyboard or the checkbox next to each record to select more than one asset at a time.
After that, click on the
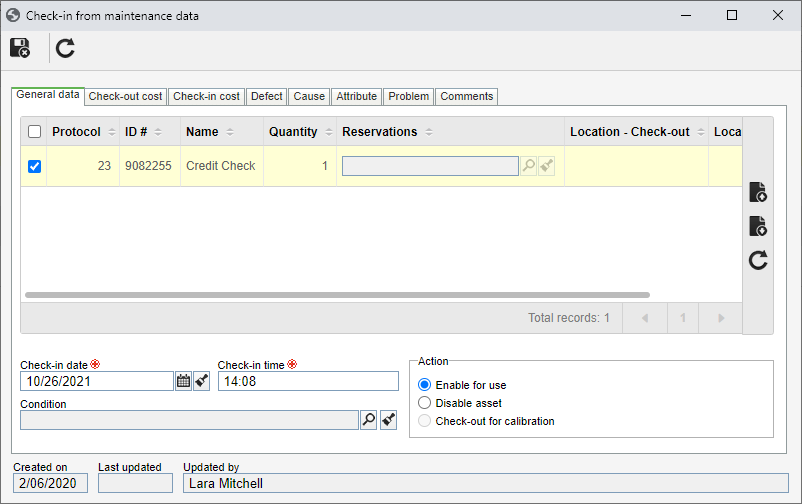
Fill in the following fields on the data screen that will open up:
Check-in date: Enter the actual date of the asset return. The system automatically fills in the current date, but it is possible to edit it. Check-in time: Enter the time of the asset return. The system automatically fills in the current time, but it is possible to edit it. Condition: Click on the Action: Select the action that will be taken on the check-in of the asset: ▪Enable for use: Select this option so that, once the record is saved, the asset is again available for use. Remember that this option will be enabled only if the "Enable for use when checked-in from maintenance" option is selected in the general parameters of the system. ▪Disable asset: Select this option so that, once the record is saved, the asset is deactivated from the system, that is, it can no longer be used. ▪Check-out for calibration: Select this option so that, once the record is saved, the asset is sent for calibration. Remember that this option is enabled only if the "Calibration event" is selected in the asset record in question and with the appropriate configurations set. Calibrations are performed by SE Calibration and, for this, it is necessary that the component is integrated with SE Asset.
General dataOn the Asset tab, select the changes that occurred in the storage place of the asset. The asset location data screen has already been described in detail in the Management
Check-out costThis tab will only be enabled after completing the Check-in date field on the General data tab. It displays all the costs that were associated with the asset check-out event (File
Check-in costThis tab will only be enabled after completing the Check-in date field on the General data tab. It displays all the costs that were associated with the asset check-out event (File
DefectAllows associating the defects found in the asset. To do so, click on the Search: Enter the name of the desired defect and, then, perform the search. If needed, select more than one defect at a time from the list of records on the screen. Apply to all assets: Select this option for the defect to be applied to all assets in question. Remember that this field is valid when more than one asset is selected from the main screen. Asset: Select this option for the defect to be applied to a particular asset. In this case, select the desired record. Remember that this field is valid when more than one asset is selected from the main screen.
CauseOn this tab, associate the causes of each defect detected in the maintenance of the asset. To do so, click on the Asset: Select the asset. The system will only display the assets selected for this event. Defect: Select the defect among those selected on the previous tab, i.e., the system will display only the defects associated in this event. Cause: Select the cause of the defect. Causes must be previously created through the File
AttributeThis tab displays all the attributes that were associated with the asset event (File
ProblemEnter the problems detected in the asset maintenance.
CommentsEnter general comments about the check-in of the asset from maintenance.
Save the record. |