Navigation:  Execution > Inbox >

Confirming protocol receiving

Previous  Top  Next

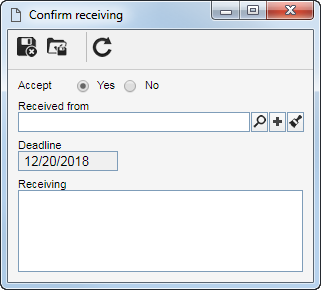
To confirm the receiving of a protocol, first locate and select it in the list of records. The status of the selected protocol in the RS column must be "Not confirmed".


After that, click on the button on the toolbar. At this point, the following data screen will be opened:


Fields


Accepted

Yes: Confirms the receiving of the protocol.

No: Rejects the protocol.

Received from

This field will only be displayed if the support configured in the type of the protocol is physical. In this case, select the user who delivered the protocol. Use the other buttons next to the field to enter a new user and set them as the issuer of the protocol and clear the field.

Deadline

Displays the date of the deadline set when dispatching the protocol.

Receiving

Record important information regarding the protocol receiving.


After filling in the necessary fields, save the record. If the protocol is:

Accepted: The status displayed in the RS column will be changed to "Accepted". From this moment on, it will be possible to end its processing. If you wish to save it and dispatch it again, use the button on the data screen toolbar. If the protocol is sent to the same addressees, confirm the system question to end the protocol dispatch.

Rejected: The status displayed in the RS column will be changed to "Rejected". In this case, it will be sent to the inbox of the user who issued it, so that the necessary adjustments are performed. In doing so, it will be necessary to dispatch the protocol again.