Configuring a security rules set |
|
|
The security rule lets you set permissions on documents, eliminating the need to replicate multiple similar category structures or setting permissions manually on each document. SE Document allows configuring sets of security rules that can be applied to document categories.
To configure a security rule set, perform the following steps:
1.Access the Configuration
2.Select the
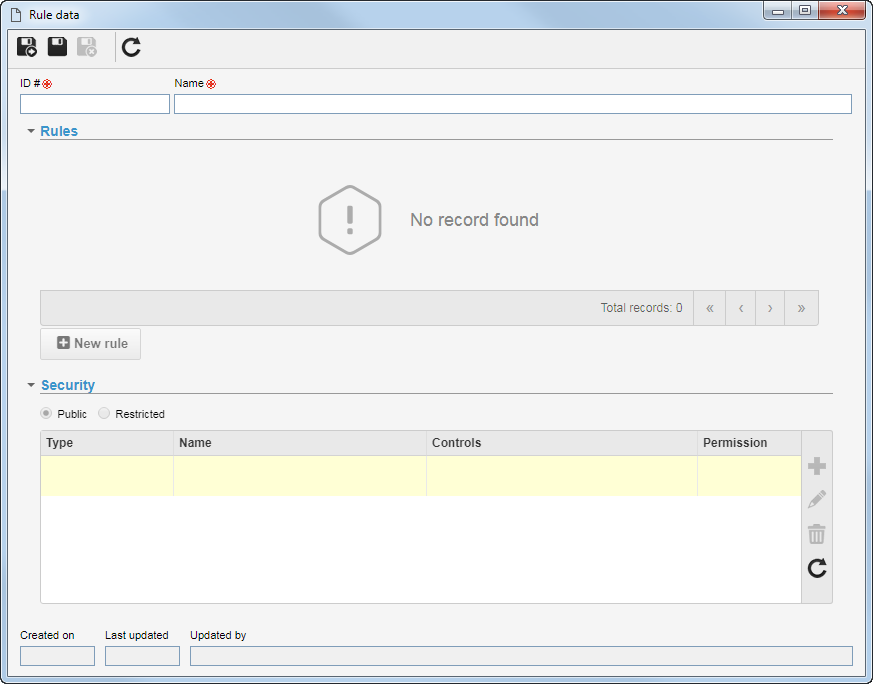
3.On the screen that the system will open, enter an ID # and a name for the security rules set.
4.Save the record to enable the following sections: RulesThe rules that compose the set will be displayed. The rules displayed in this section complement each other, but they are not necessarily dependent on each other. To add a new security rule to the set, click on the New rule button on the lower part of this section. See more details in the Configuring a security rule section.
When hovering the mouse over a rule displayed in the listing of this section, the following buttons will be available:
Type securityIn this section, the configuration of the rule security list is performed. To do that, first, select one of the following options: Public: Any user of SE Document is allowed to access the security rule. Restricted: Only certain users of SE Document are allowed to access the security rule. By selecting this option, the system already adds the logged user with all permissions to the security list. In addition, the buttons on the side toolbar will be enabled. To perform new access to the security list, click on the
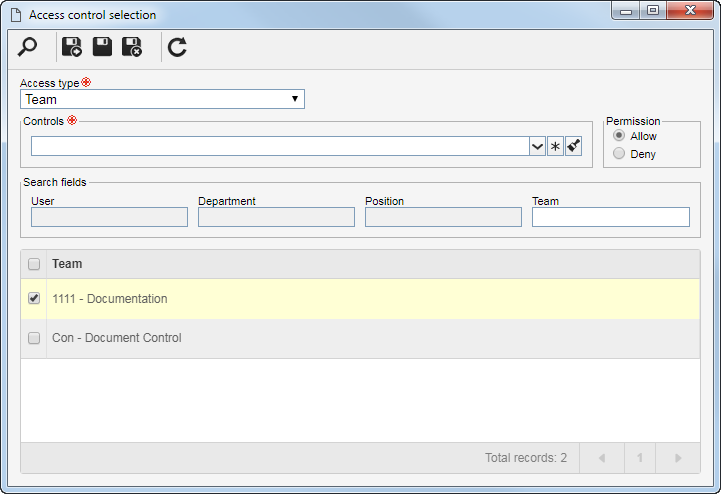
a.Select one of the following options to set the access type that will make up the security list: Team: It will be composed of the members of a team already registered in SE Document. Organizational unit: It will consist of users of a particular organizational business unit/department of the organization. Department/Position: It will be composed of users from a specific department of the company, who hold a specific position. Position: It will be composed of users who hold a specific position in the company. User: It will be composed of a specific user. All: It will be composed of all users who have access to SE Document. b.According to the selected access type, the Search filters will be enabled to be filled out. Use them to make it easier to search for desired records. c.If the selected access type is Organizational unit, the hierarchy of business units and the departments belonging to them (if any) will be displayed. Check the business units and/or desired departments. By checking the "Consider sublevels" option at the bottom of the screen, the system will also consider the organizational units that are down in the hierarchy of the selected organizational unit. Note that by checking this option, if new organizational subunits (whether they are business units or departments) are subsequently added, they will be automatically added to the security list. Next to the hierarchy, the system also makes available buttons that allow you to check all the sub-levels of a particular organizational unit or uncheck all sub-levels. Note that by using the "Check all sub-levels" button if new organizational sub-levels are subsequently added, they will not be included in the security list. d.Then, click on the e.In the Controls field, expand the list and check the desired actions. Then, define if they will be allowed or denied for the access type:
f.Once done, save your selection. Use the other side toolbar buttons to edit and delete the record selected in the security list.
5.After performing the necessary configurations, save the record. |