Configuring a security rule |
|
|
To add a new security rule, perform the following steps:
1.Access the Configuration
2.Select the desired rule set in the list of records and click on the
3.On the screen that will be opened, click on the New rule button on the lower part of the "Rule" section listing. To edit a rule, hover the mouse over it and click on the
4.Adding and editing a rule is performed through a wizard. In it, fill out the fields in the following steps:
IdentificationIn the respective field, enter an ID # for the created rule. This ID # will facilitate finding it in the list of rules.
Click on the Finish button to finish the rule configuration. Thus, the wizard screen will close and the rule will be displayed in the "Rule" section of the rules set data screen.
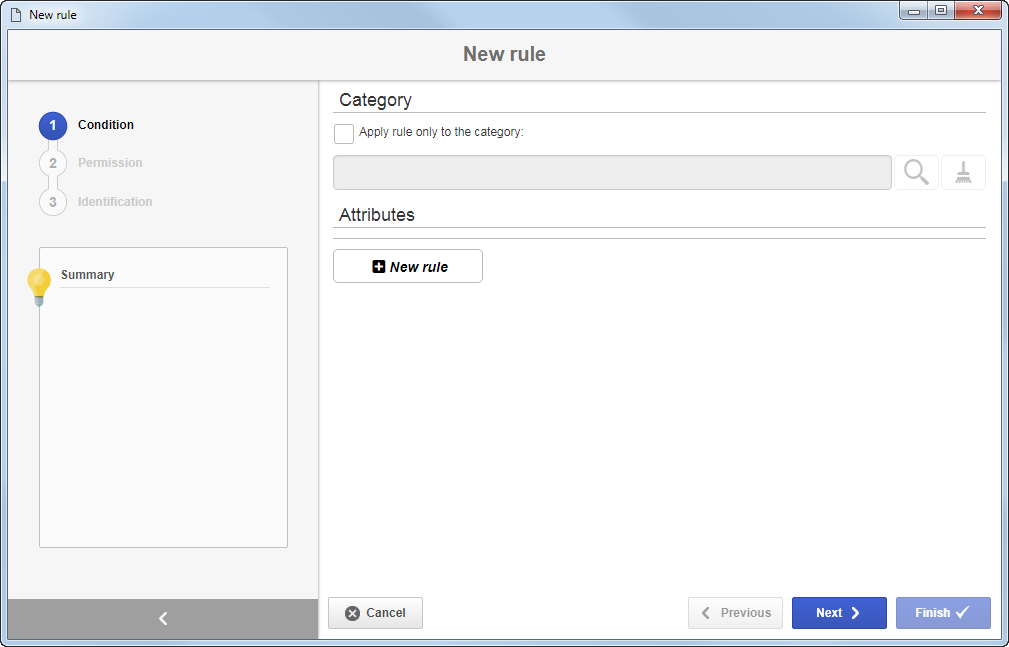
ConditionIn this step, the conditions for the security rule to be applied must be configured. To do that, the following sections are available:
Attributes: Click on the New rule button and, on the fields that will be displayed, select the attribute, an operator and the value that must be filled out in the attribute to condition the application of the security rule. In order for the rule to be correctly applied, it is necessary for the attribute selected in this section to also be associated with the category to which the rule is applied. To use more than one attribute as a rule condition, click on the New rule button once again and repeat the procedure described above. Use the
Use the Next button at the bottom of the wizard to access the next step in which it is located.
PermissionIn this step, it is possible to perform the security configurations for the documents in the category with which the security rule will be associated. To do that, click on the a.Select one of the following options to define the type of access to which the security rule permissions will be assigned: Team: It will be composed of the members of a team already registered in SE Document. Organizational unit: It will consist of users of a particular organizational business unit/department of the organization. Department/Position: It will be composed of users from a specific department of the company, who hold a specific position. Position: It will be composed of users who hold a specific position in the company. User: It will be composed of a specific user. All: It will be composed of all users who have access to SE Document.
b.According to the selected access type, the Search filters will be enabled to be filled out. Use them to make it easier to search for desired records.
c.If the selected access type is Organizational unit, the hierarchy of business units and the departments belonging to them (if any) will be displayed. Check the business units and/or desired departments. By checking the "Consider sublevels" option at the bottom of the screen, the system will also consider the organizational units that are down in the hierarchy of the selected organizational unit. Note that by checking this option, if new organizational subunits (whether they are business units or departments) are subsequently added, they will be automatically added to the security list. Next to the hierarchy, the system also makes available buttons that allow you to check all the sub-levels of a particular organizational unit or uncheck all sub-levels. Note that by using the "Check all sub-levels" button if new organizational sub-levels are subsequently added, they will not be included in the security list.
d.
e.In the Controls field, expand the list and check those that will be enabled for the access types: Edit: The user will be able to edit the document data. Delete: The user will be able to delete the document. Revise: The user will be able to create revisions for the document through the Management Acknowledgment: The user will receive the document publication acknowledgment. For the acknowledgment task to be generated for the user, it is also required for the Electronic copy control to be checked. Notice when this control is checked, the "Notification" control will be disabled for selection. Distribute copy: The user will be able to distribute document copies. In order to successfully perform this operation, it is also required for the Printed copy control to be checked. View: The user may view the document data screen and electronic files. Cancel: The user may edit the document status (cancel/reactivate). Archive: The user may perform the archiving of the document in the SE Archive component. In order to successfully perform this operation, it is also required for the Physical file control to be checked. Print: The user may print the electronic files of the document. Training: The user will be able to participate in document trainings recorded through the SE Training component. For the user to be able to participate in document trainings, it is also necessary for the Training control to be checked. Create training: The user will not receive the "Training record" task (SE Training) related to the document. In order for the task to be generated for the user, it is also required for the Training control to be checked. Save locally: The user may save the electronic files of the document to their machine. Sign: The user may digitally sign the electronic files of the document. Notification: The user will receive e-mail notifications when the document is created or when its revision is released. For the notification to be sent to the user, it is also necessary for the Electronic copy control to be checked. Notice when this control is checked, the "Acknowledgment" control will be disabled for selection. Add comments: The user may add text and graphical comments to the electronic files of the document. Evaluate applicability: The user will receive the Applicability evaluation task related to the document. f.Once done, save your selection. Use the other side toolbar buttons to edit and delete the record selected in the security list.
5.Use the Next button at the bottom of the wizard to access the next step in which it is located.
6.Click on the Finish button to finish the rule configuration. Thus, the wizard screen will close and the rule will be displayed in the "Rule" section of the rules set data screen.
|