Complete the following fields on the data screen that opens:
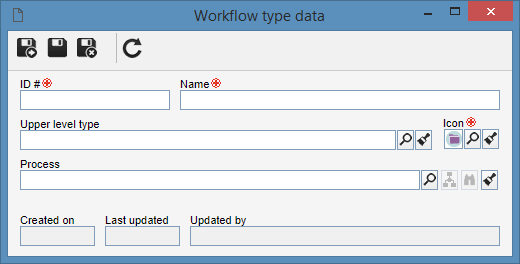
ID #: Enter a number or code for the workflow type.
Name: Enter a name for the workflow type.
Upper level type: Select the workflow type that, on the main screen hierarchy, is one level above the type. This field will be filled automatically by the system if a workflow type has been selected in the main screen hierarchy, but it can be changed by another type.
Icon: Select the image that will identify the workflow type.
Process: If the type in question will be used to record new workflows, select the process (SE Process) that will automate the workflow execution in the type. Otherwise, the workflow type will be just a record in the type hierarchy. It is important to note that the process automation with SE Workflow is performed through the SE Process component. See how to perform this operation in the Configuring process automation with SE Workflow section.
|