|
To add a new access group, click on the  button on the main toolbar. To edit an access group, select it in the list of records and click on the button on the main toolbar. To edit an access group, select it in the list of records and click on the  button. button.
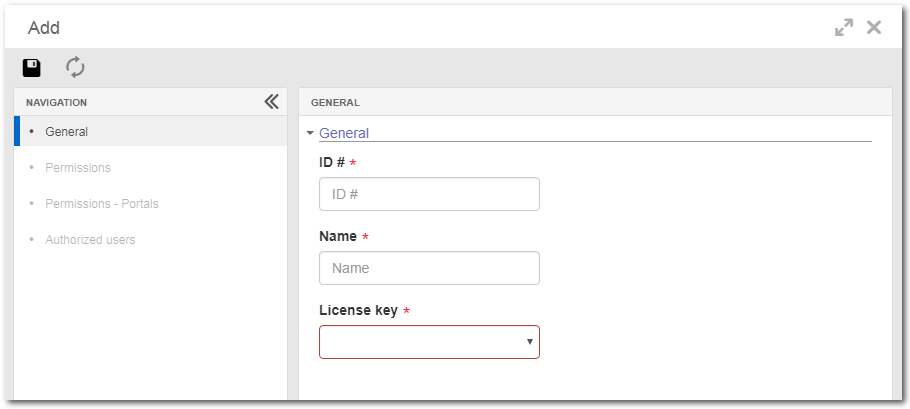
At this point, the access group data screen will be opened. It is divided into the following sections:

Note: To successfully add an access group, it is necessary to fill out the required fields on the General section. After saving the data, the other sections will be enabled to be configured.
Field
|
|
ID #
|
Enter an ID # for the access group.
|
Name
|
Enter a name for the access group.
|
License key
|
Select the license key that will be used by the users of the access group.
|
|
This section will display all menus from all components acquired in the license key. The menus that will be available for access configuration will vary according to the profile of the license associated with the access group: Manager, Staff, Basic or View.
Only users with "Manager" licenses can assign access permissions. In this case:
▪Check the options that correspond to the components and menus that the users in the access group may access. ▪Keep the components and menus that the users in the access group may not access unchecked. ▪Use the search filter to find the menus of a component or a specific menu in an easier way. ▪Click on the Check all button to select all menus displayed in this section and use the Expand all button to expand all menus and submenus displayed in this section.
|
The menus that will be available for access configuration will vary according to the profile of the license associated with the access group:
By default, this license type has permission to:
▪Set portal as Home ▪Edit default home ▪Create a portal ▪Edit a portal* ▪Copy a portal* ▪Follow a portal ▪Delete a portal* ▪Share a poral, including publicly* ▪Access the audit trail* *only portals created by the user themselves or if the editing mode is set in the sharing of the accessed portal.
|
By default, this license type has permission to:
▪Follow a portal ▪Edit a portal* ▪Delete a portal* *only if the user sets the editing mode in the sharing of the accessed portal.
|
Only users with the "Manager" license can edit the permissions to perform operations in the portals. In this case:
▪Check the options that correspond to the operations that the users in the access group may perform. ▪Keep the operations that the access group users will not be able to perform unchecked. ▪Use the search filters to locate a specific option more easily. ▪Click on the Check all button to select all options displayed in this section and use the Expand all button to expand all options and sub-options displayed in this section.
|
In this section, it is possible to manage the users that belong to the access group, that is, which components and menus they may access and which permissions they will have in the portals.
▪To add a user to the access group, click on the Add button. On the screen that will open, select the desired users and click on the Add to group option. ▪The users added to the access group will be displayed in the list of records. In the "Status" column it is possible to view the status of the user's record in the system (active/inactive). Hover the mouse pointer over the  icon to view the user data. icon to view the user data. ▪To remove a user from the access group, select them on the list and then click on the  button. button. ▪Use the search filter to find the desired user more easily. |
After performing all desired configurations, save them.
|


