Confirming the calibration result |
|
|
After entering all the calibration data and performing all the asset measurements, it is necessary to confirm the obtained result. When the calibration record is saved, then the system will display the result confirmation screen differently for the following situations:
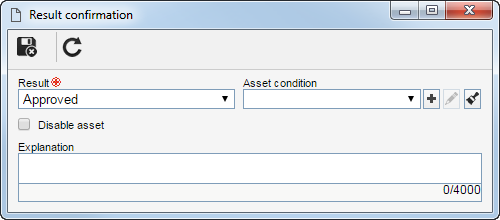
When the calibration is finished1.For this case, the following screen will be displayed:
2.Fill in the following fields: Result: Confirm or edit the result obtained in the asset calibration (Approved, Conditionally approved, or Rejected). The system allows creating an action plan for the rejected calibrations if the respective configuration is set through the general parameters screen. Asset condition: Select the condition of the asset after the calibration. Disable asset: By selecting this option, after confirming the result, the asset in question will be unavailable for use. Explanation: Enter the explanation for the calibration result.
3.
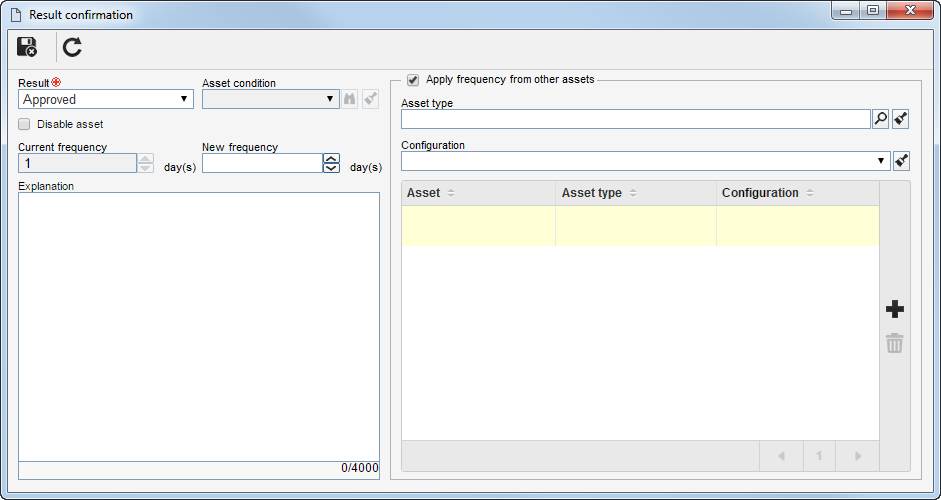
When the calibration is finished, contains Schumacher frequency, and it is the 3rd or later performed calibration1.For this case, the following screen will be displayed:
2.Fill in the following fields: Result: Confirm or edit the result obtained in the asset calibration (Approved, Conditionally approved, or Rejected). The system allows creating an action plan for the rejected calibrations if the respective configuration is set through the general parameters screen. Current frequency: The system enters the frequency in question automatically, as defined through the Configuration New frequency: Enter, if needed, a new frequency for the record in question. Apply frequency from other assets: Select this option to apply the frequency configured for other assets to the record in question. In that case, fill in the following fields: ▪Asset type: Select the type that classifies the asset. ▪Configuration: Select the asset configuration. ▪Asset: If it is necessary to apply the same frequency to other assets, click on the
3. |