Customizing toolbar |
|
|
SE Suite allows the toolbar to be customized, that is, allows the user to define the buttons that will be displayed in the toolbar, besides configuring the order to display those buttons. See next how to customize the buttons:
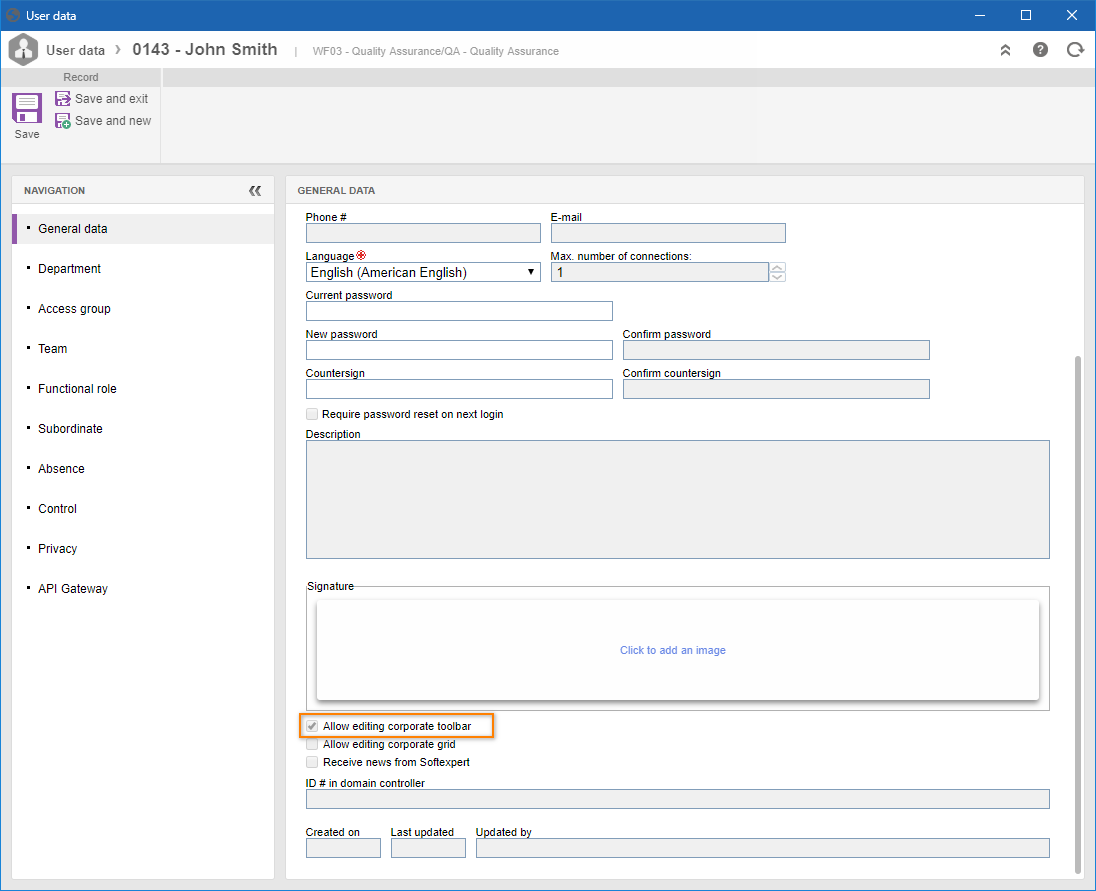
1.Verify if the "Allow editing corporate toolbar" option is selected in the Optional tab of the user data screen:
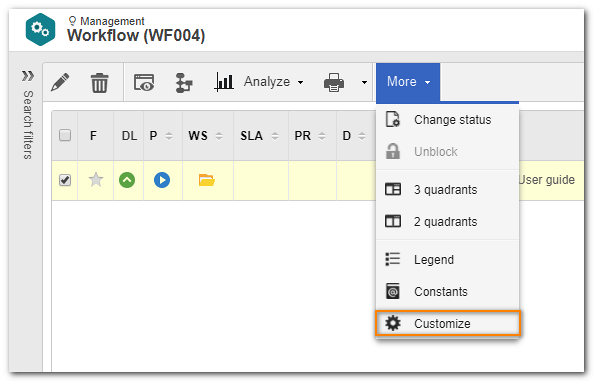
2.Access the menu that has the toolbar you wish to customize. Then, click on More button and select Customize option:
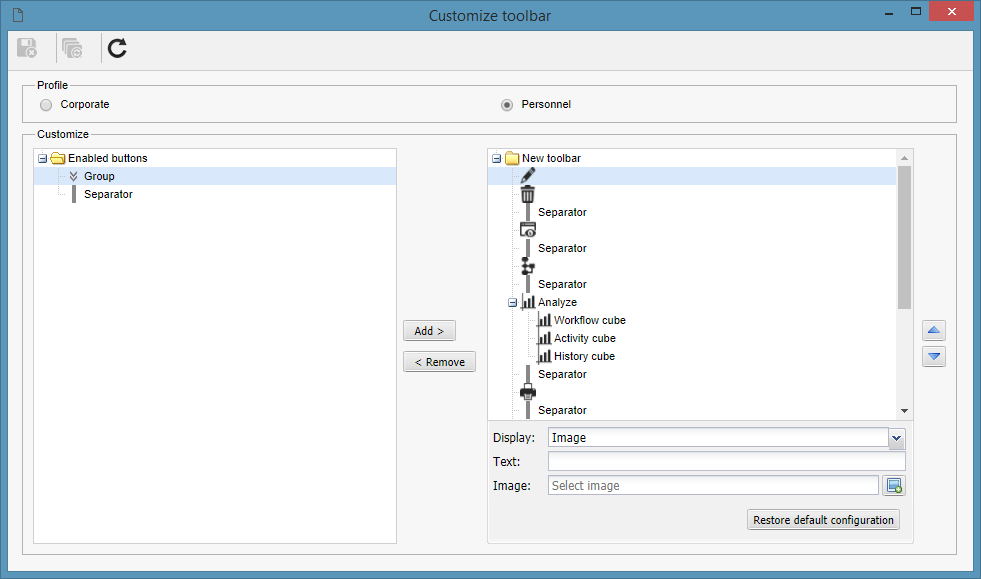
3.At this point, the system will display the toolbar configuration screen. On the right panel of Customize section, the user can find all buttons, groups and separators displayed. On the left panel, find all the items that can be added to the toolbar:
4.To delete a button from the toolbar, select the button on the right panel and click on the Delete button, placed between the two panels. To rearrange the display order of the buttons, select the desired button item and click on the
5.Find in the lower right corner, some fields that allow to change the buttons text and image. In case, you wish to restore the appearance of some button that has been modified, you just need to select it and click on the Restore default configuration button.
6.Save the changes made by clicking on the |