Creating an asset downtime record |
|
|
See below how to interrupt the use of an asset:
In the list of records of the second quadrant, locate and select the desired asset. Use the CTRL or SHIFT key on the keyboard or the checkbox next to each record to select more than one asset at a time.
After that, click on the
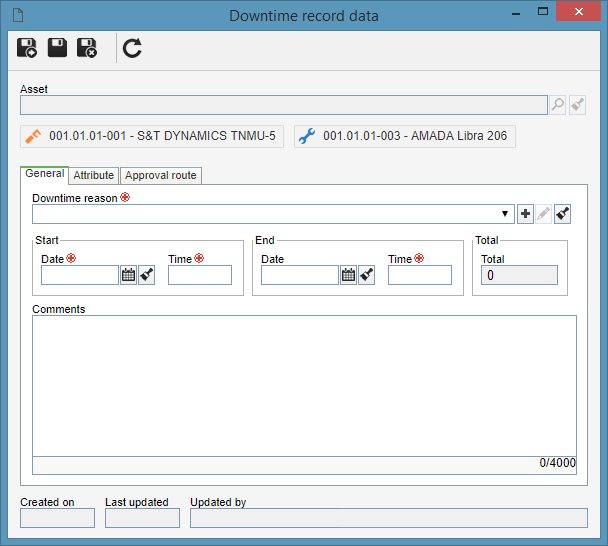
At this point, the following screen will be displayed. Below the Asset field, the system will display the assets that will be stopped:
GeneralOn this tab, enter general information about the downtime record:Downtime reason: Select a downtime reason for the asset. Only the reasons that were created by the users of the system will be displayed, that is, the default system reasons will not be displayed for filling. Remember that if the "Create corrective maintenance when generating a downtime record" option is checked in the data of the selected reason, when saving the downtime record, the corrective maintenance activity will be automatically created by the system. Start: Enter the start date and time of the asset downtime. End: Enter the end date and time of the asset downtime. If this field is not filled in, when saving the record, the system will generate the Issue downtime record task. The end date can be filled later, either on the task screen or by this menu (Execution Total: Depending on the start and end data of the downtime above, the system will automatically calculate the number of total hours that the asset will remain stopped. Comments: Use this text field type to provide the necessary comments of the asset downtime.
Save the record after filling in the fields above; however, do not close the data screen. At this point, the remaining tabs on the screen will be available for completion.
AttributeThe Attribute tab will only be displayed if the selected downtime reason has associated attributes. Therefore, the required attributes must have their values filled out. Enter the value of each attribute in the attributes list itself. Remember that the way to associate the value varies according to the configurations established when creating the attribute.
Approval routeThis tab will only be displayed if the Downtime reason selected in the General tab is configured with the approval step. On this tab, then, the system will display the information about the approval step of the asset. Remember that filling out some fields of this tab depends on the configuration of the approval step in the downtime reason in question. Responsibility route: Responsibility route that will approve the asset downtime. Filling in this field depends on the route type associated with the downtime reason: ▪Variable: For this type, it will be allowed to select any other responsibility route in the respective field, change its members, or even associate new responsible parties. ▪Fixed: For this type, it will be allowed to select any other responsibility route in the respective field; however, its members MAY NOT BE CHANGED. ▪Fixed & unique: For this type, it will not be allowed to change the route and, even less, its members. In that case, the information about the responsibility route will be available FOR VIEW ONLY. Approval type: This field indicates whether the approval is circular or incremental. Cycle: This field indicates the approval cycle. Wait for all members approval: If this field is checked, it indicates that the record will only continue to the next step when all route members release their tasks.
Save the record. |