Revalidation management |
|
|
To revalidate a document, perform the following steps:
1.Access the Management
2.Locate and select the document in the list of records of the second quadrant of the main screen.
3.After that, click on the
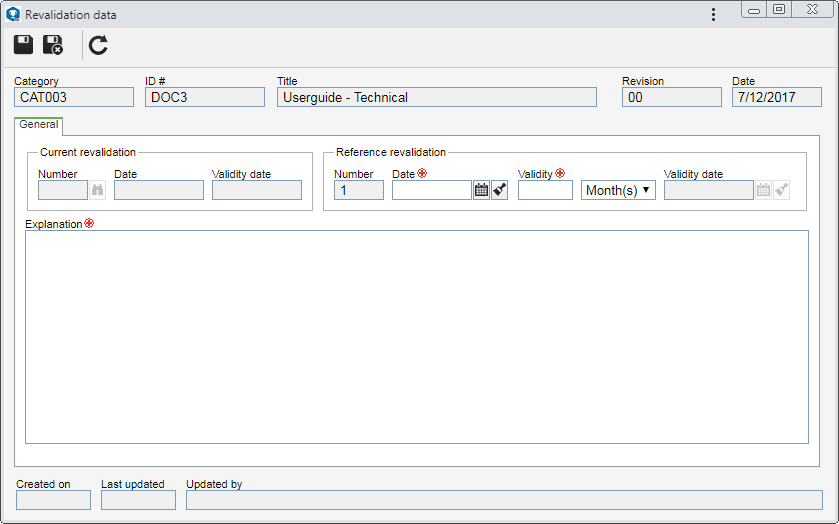
4.On the screen that will be opened, the Category, ID #, Name, Revision and Date fields will be filled with the respective information of the document:
5.In the General tab, the following fields may be filled out: Number: Displays the number of the current revalidation of the document. Click on the button next to this field to view the data screen of the current revalidation. Date: Displays the date when the current revalidation of the document was performed. Validity date: Date until which the current revalidation will be effective. Reference revalidation Number: Displays a number to identify the revalidation. Date: Displays the date in which the document is being revalidated. If the "Allow changing revalidation date" option is not checked in the validity associated with the document category, it will not be possible to edit it. Otherwise, it will be possible to edit the date, thus allowing a retroactive revalidation. Validity: Displays the "default time" defined in the validity associated with the category of the document being revalidated. If it is defined that the default time is: ▪Fixed: This field may not be edited. ▪Variable: It is possible to define the desired validity time. Validity date: Displays the date until which the document being revalidated will be considered valid, according to the validity previously reported. If in the validity associated to the category it is defined that the default time is: ▪Fixed: This field may not be edited. ▪Variable: It is possible to define the desired validity date. Note that when reporting a validity date in this field, the period of the "Validity" field, will be adjusted by the system. Explanation: Use the available field to enter an explanation for the document revalidation.
6.Once done, save the record. At this point, the Approval tab will be enabled.
7.In the Approval tab, it is possible to view or define the responsible for the approval, according with the configurations performed in the validity. The completion of the information will depend on the route type selected in the validity. If it is a "Fixed & unique" route, this section may not be edited. Fill out the fields according to your needs. Responsibility route: Select the route that is responsible for approving the document revalidation. Only approval responsibility routes will be available for selection. If the route defined is "Fixed", it will only be possible to define another route through this field; however, it will not be possible to edit its members. Approval type: Displays the approval type (Incremental or Circular) defined at the time of the responsibility route creation selected previously; however, it is possible to edit it. Cycle: Displays a number indicating the approval cycle that the revalidation is going through. Every time that the revalidation is rejected and goes through approval again, the system increases a number. Select the previous cycles to view the members of the responsibility route that performed the approval.
*It will be displayed checked or unchecked by the system according to the configurations performed when creating the route
If the route type defined in the category is "Variable", on the side toolbar of the list of records, the following buttons are available:
8.After that, save the record: ▪If the validity does not have the approval step configured, the system will ask if you wish to confirm the revalidation. By clicking on OK, the revalidation will be finished. If clicked on Cancel, the revalidation will remain with the "Issue" status. ▪If the validity has the approval step configured, the system will ask if you wish to send the revalidation to approval. Choose the desired option: oOK: The revalidation will be sent to approval and the Revalidation approval task will be generated for the members of the responsibility route. oCancel: The screen will be refreshed by the system, displaying the Approval tab and allowing it to be edited. After performing the necessary changes and saving the record again, it will be possible to send the revalidation for approval. |