|
On main the screen toolbar, click on the  button. In the window that will be displayed, select the type that will classify the requirement being created and save your selection. button. In the window that will be displayed, select the type that will classify the requirement being created and save your selection.
It is important to point out that to perform this operation, the logged user must have the "Add" control enabled in the requirement type.
|
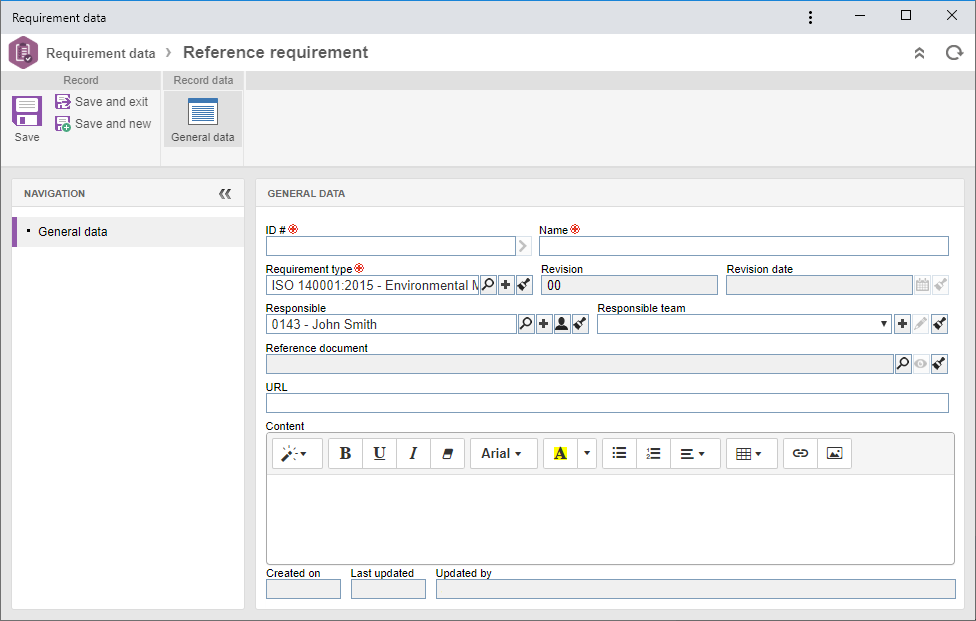
On the screen that will be opened, fill in the following fields in the General data section:
Field
|
ID #
|
Enter a number or code to identify the requirement. If you prefer, use the arrow next to this field to generate an automatic identifier. Don't forget that, if the use of the identification mask was configured in the requirement type, the mask will be displayed when the automatic ID # is generated. Remember that the ID # generated through the mask can only be edited if the "Allow changing ID #" option is checked on the requirement type data screen. Otherwise, it will not be possible to edit the generated ID #.
|
Name
|
Enter a name for the requirement.
|
Requirement type
|
This field is filled in by the system with the type that classifies the requirement; however, it is possible to edit it. In this case, select the type that should classify the requirement in question.
|
Revision
|
This field will be filled in by the system with the ID # corresponding to the current revision of the requirement.
|
Revision date
|
This field will be filled in by the system with the date on which the requirement revision was closed.
|
Responsible
|
This field will be filled in by the system with the user data that is creating the requirement; however, it is possible to edit it. In this case, select the responsible user for the requirement. Use the other buttons next to the field to add a new user and make them responsible for the requirement, fill out the field with the logged user data and clear it.
|
Responsible team
|
Select the team that will be responsible for the requirement that is being created. Use the other buttons next to the field to create a new team and make it responsible for the requirement, edit the selected team data and clear the field.
|
URL
|
Enter the URL where you can find the documentation to which the requirement refers. For example, a labor law article etc.
|
Reference document
|
Click on the  button, next to the field and on the screen that will open, locate and select the document (SE Document) to which the requirement refers. button, next to the field and on the screen that will open, locate and select the document (SE Document) to which the requirement refers.
|
Content
|
Describe the requirement that is being created. Use the options in the upper part of the field to format the content text of the requirement.
|
Revalidation
|
This section will only be available if the "Revalidation" option has been configured in the type of the requirement. In that case, the system makes available the following fields regarding the revalidation:
▪Validity: This field is filled out by the system with the number of days/months/years entered in the validity associated with the requirement type. This section will only be available for editing if the "Variable" option is selected in the validity configuration. ▪Revalidation: This field is completed by the system with the information of the last revalidation of the requirement in question. ▪Expiration date: This field is filled out with the requirement revalidation expiration date. |
Once done, click on the  button to record the requirement. At this point, the other sections will be enabled to be configured. Refer to the Editing a requirement section for further information on how to configure these fields. button to record the requirement. At this point, the other sections will be enabled to be configured. Refer to the Editing a requirement section for further information on how to configure these fields.
|