Creating tasks in the sprint |
|
|
See below the necessary steps to create a task within a sprint:
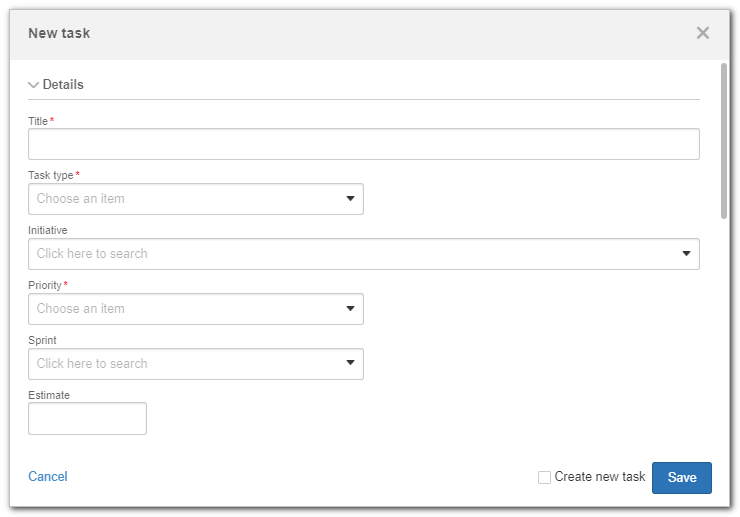
1.To create the task, click on the Create 2.On the screen that will be opened, fill out the following fields:
Title: Define the title of the task. Task type: Define the task type. Note: If the flowchart of the selected type has attributes, they will be displayed as fields of the task after the description field. Initiative: Allows selecting an initiative of which the task is part. Priority: Define the priority of the task. Sprint: Determine the sprint of which the task will be a part. If no sprints are selected, the task will remain in backlog after being saved. Estimate: Enter the effort estimate (in hours) for the execution of this task. Start date: Choose a start date for the task. Deadline: Define the deadline of the task. Description: Enter a description for the task. This field features the Rich Text resource, which allows adding links, images and tables, as well as formatting the text. Attributes: There may be additional fields to be filled out when creating the task if the selected task type is associated with a flowchart in which there are attributes configured. Thus, the additional fields (or attributes) depend on the selected task type. People: use this section to define the reporter and the assignee for the task. By default, the Reporter field will be filled out with the user who is creating the task, but it can be edited. ▪Reporter: Person who requested the creation of the task (or reported the problem), but not necessarily the creator of the task. ▪Responsible: Person in charge of executing the task (or solving the problem). 3.After filling out the fields, click on the "Save" button. If desired, check the "Create new task" option for another task creation screen to be opened when finishing the operation.
After finishing the operation, the task is displayed in the lane that corresponds to the initial step. |